OLAP Select
The OLAP Select transform is created when a cube from an OLAP database (e.g., Microsoft SQL Server Analysis Services) is dragged onto the canvas from its data connector.
This transform was formerly called the MDX Select transform. If you want to write your own MDX query instead of choosing data interactively as shown below, you can use a Manual Select.
1. Input
You configure an OLAP Select transform to select specific measures and dimensions to return a table of data. This tabular result becomes an input to your data cube.
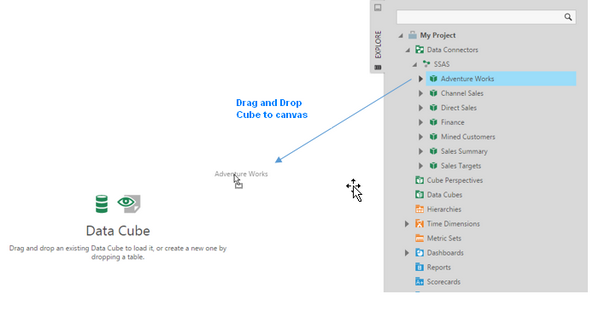
2. Add the transform
Expand the data connector in the Data Connectors folder in the Explore window, then drag one of its cubes to the canvas.
Configure the transform by selecting the transform and clicking Configure in the toolbar.

3. Configure
To configure the OLAP Select transform, drag and drop the measures and dimensions to the right pane.
For a dimension hierarchy, only one hierarchy level can be selected. Use the Hierarchy Level Display Property drop-down to indicate whether you want the captions (display values) or the unique names (keys) of the hierarchy's members.
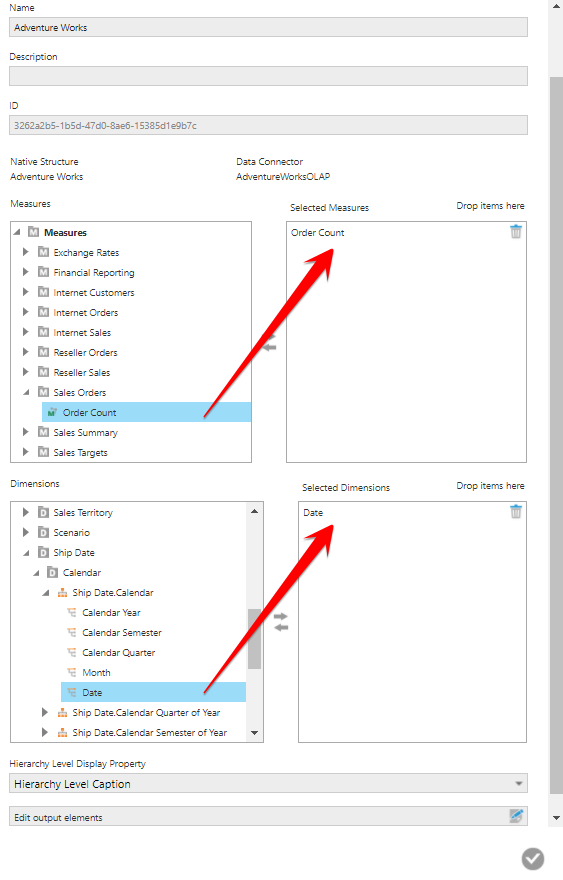
Click the submit button at the bottom of the dialog when finished.
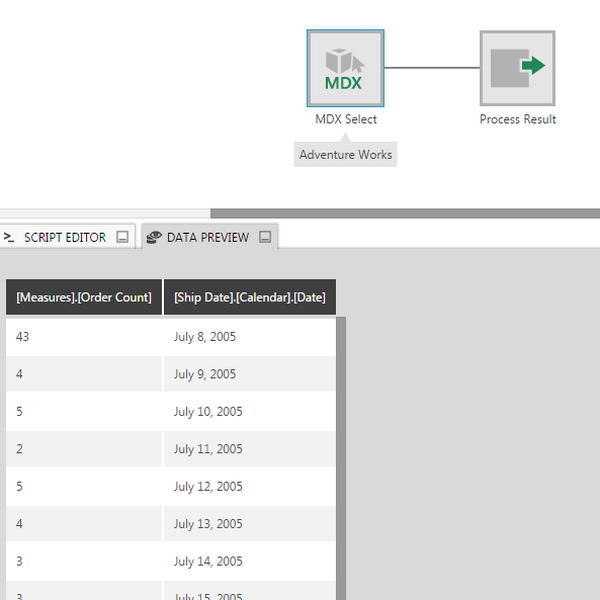
4. Output
Open the Data Preview window to view the output.