
1. Overview
This article shows you how to connect to flat files such as CSV and other text files where columns of data are separated by delimiter characters.
2. Drag and drop a flat file
Just like with Excel files, you can drag a CSV or other text file from Windows Explorer or Finder and drop it onto the Explore window or the dashboard canvas.
This will automatically import the flat file data and create a corresponding data connector.

3. Connect to a CSV file
As an alternative to dragging and dropping as shown above, the following walkthrough shows you how to manually create a data connector for a text file which contains comma-delimited stock price data.
Date,Close,Volume,Open,Low,High
2006-01-03,82.06,11715200,82.45,80.81,82.55
2006-01-04,81.95,9837800,82.2,81.33,82.5
2006-01-05,82.5,7213500,81.4,80.999,82.9
2006-01-06,84.95,8197300,83.95,83.41,85.03
2006-01-09,83.73,6857800,83.9,83.38,84.25
2006-01-10,84.07,5701000,83.15,83.12,84.12
2006-01-11,84.17,5776400,84.37,83.4,84.81
2006-01-12,83.57,4924100,83.82,83.4,83.96
2006-01-13,83.17,6921700,83,82.5,83.45
...
Create a new data connector to begin.
In the New Data Connector dialog, click inside the Name box, and enter a name for your data connector.
Click the Data Provider dropdown and choose Flat Files.
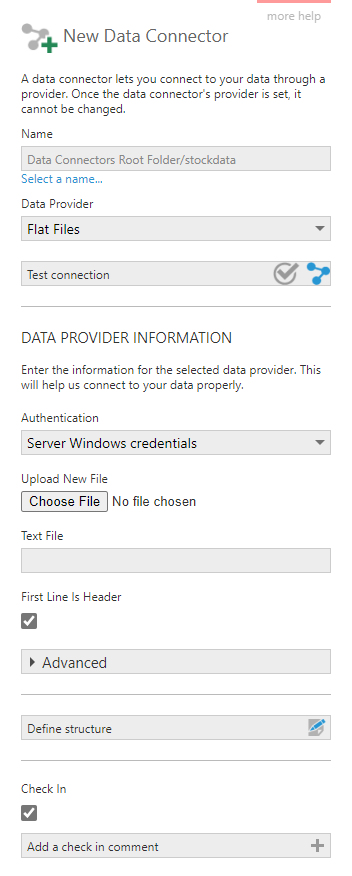
Next, specify the CSV file using one of two options:
- Click Choose File and use the file selector to select the CSV file to be imported. Note that changes to the original file will no longer affect the generated data connector.
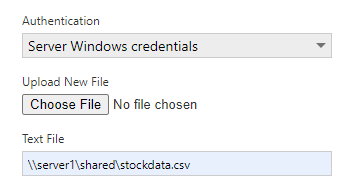
- Or, use the Text File field to specify the full network path or web address to the file (e.g., \\server1\shared\stockdata.csv). Note that changes to the original file will affect the data once the data connector gets refreshed. Use the Authentication setting above to change how to access the file if access is restricted.
For CSV files, the first line of data often contains the header text values. In this case, make sure the First Line Is Header option is checked.
If your data values are not surrounded by quotation marks, click to expand the Advanced section and uncheck the Fields Are Enclosed In Quotes option.
The Define Structure option lets you define the table and column names and data types, but it is recommended to just click the Submit button at the bottom of the dialog and let the auto-discovery run first. You can then go back and edit the discovered columns if needed.
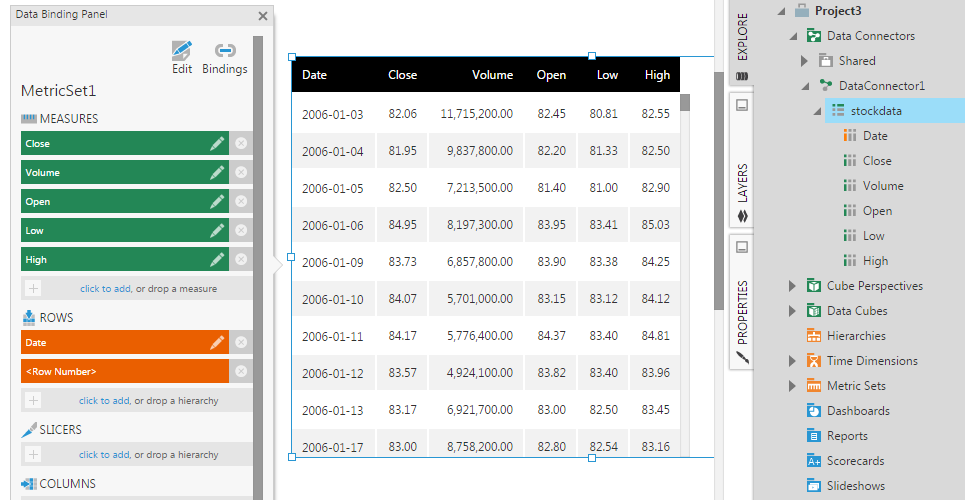
Go to Explore and locate the newly added data connector. Expand it to see the CSV file and its discovered columns. Drag the file to the dashboard canvas to see its values displayed in a table visualization (in Raw Data format).
4. Define columns
The structure of the file is discovered automatically when the data connector is first created, along with other details such as the delimiter character and culture code page. Afterwards, you can redefine these settings as needed.
First, locate the flat file data connector from the main menu or from the Explore window. Right-click (or long tap) on the data connector and click Edit from the context menu.
The Character Used As Delimiter is auto-detected by default, but you can change it if necessary. If your text file is delimited by Tab characters, just click inside the box, delete any existing character, and then type the Tab key, or right-click and choose the tab option.
In the Edit Data Connector dialog, scroll down and click Define structure.
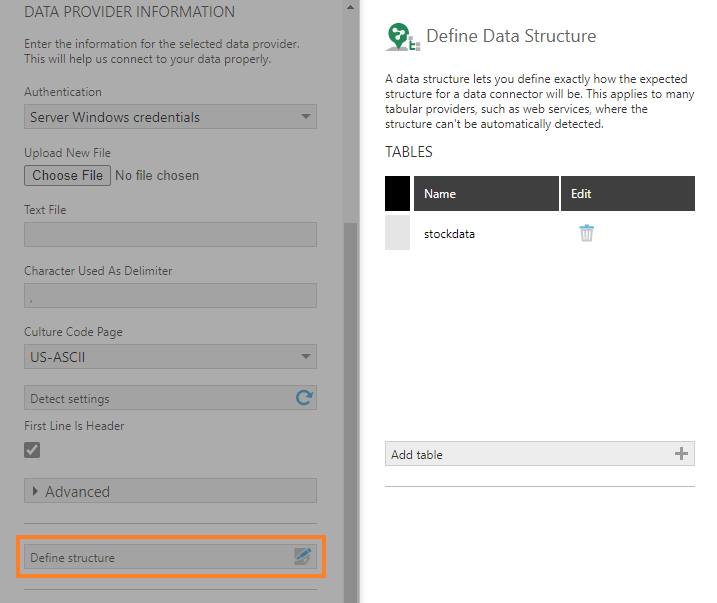
In the Define Data Structure dialog, select the table and then scroll down to see the discovered columns. The columns are discovered on-demand so if you don't see any listed, click Re-discover table.
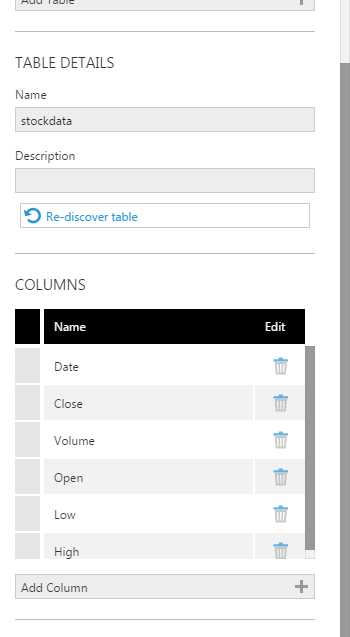
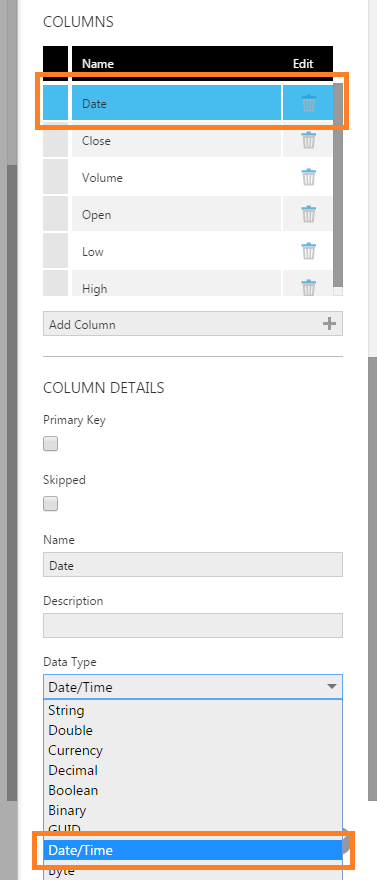
Select a column and then set the details for the column as needed. For example, date/time columns are discovered as string columns so you'll want to change the data type to Date/Time.
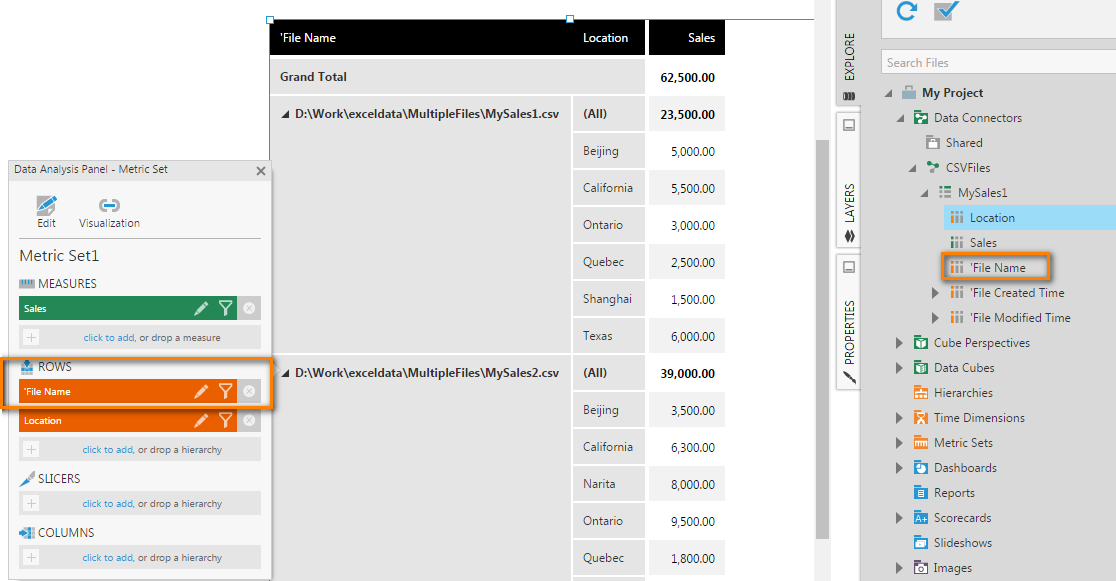
5. Reading multiple files
You can read data from multiple files located in the same folder using a single data connector. To do this, specify the path using the asterisk wildcard character (*) as a filename. Files with the same structure will be loaded simultaneously.
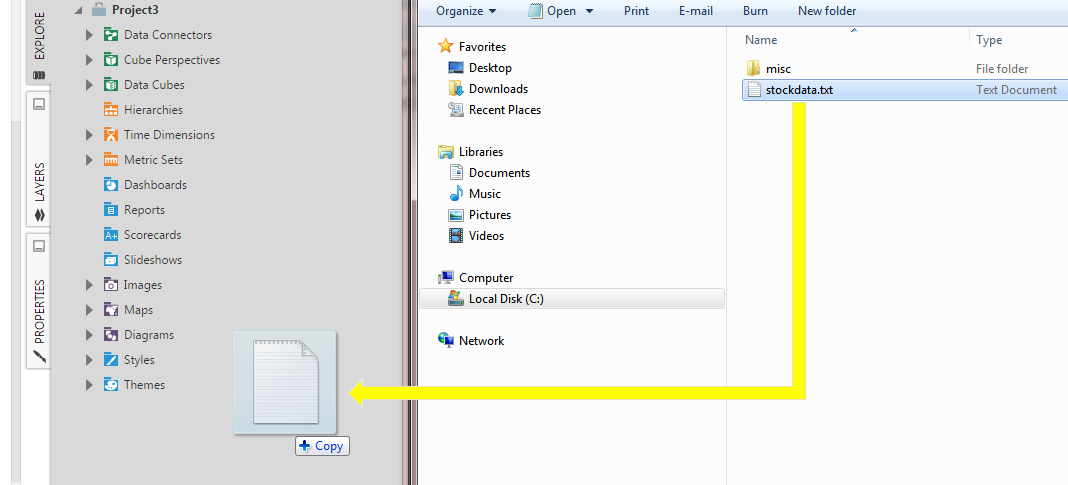
For example, the folder below contains 2 CSV files with the same structure:
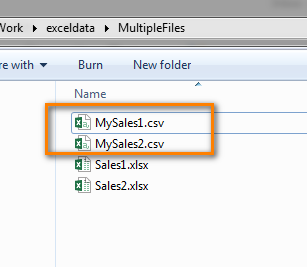
In the Text File field, specify the path using a wildcard character to represent the part of the filename that changes. For example, \\server1\shared\*.csv.
The data from all files will be included together, and 'File Name is one of the columns you can access:
6. See also
- Drag and drop an Excel file
- Connecting to Excel
- Connect to data and view it on a dashboard
- Flat file connection issues