
1. Overview
This article provides the steps to deploy Dundas BI version 9 or earlier on Amazon Web Services (AWS) Elastic Beanstalk. The process includes generating a Dundas BI instance source bundle and creating an AWS Elastic Beanstalk application from the source bundle.
2. Prerequisites
To deploy Dundas BI on AWS Elastic Beanstalk, you will need:
- An AWS account
- Access to the Dundas BI deployment application
- Dundas BI installed with a working instance
- Database accessible to AWS Elastic Beanstalk. For example, Amazon RDS
3. Create a Dundas BI instance source bundle
You must use the Dundas BI deployment application to create a source bundle of the instance that you want to deploy on AWS Elastic Beanstalk.
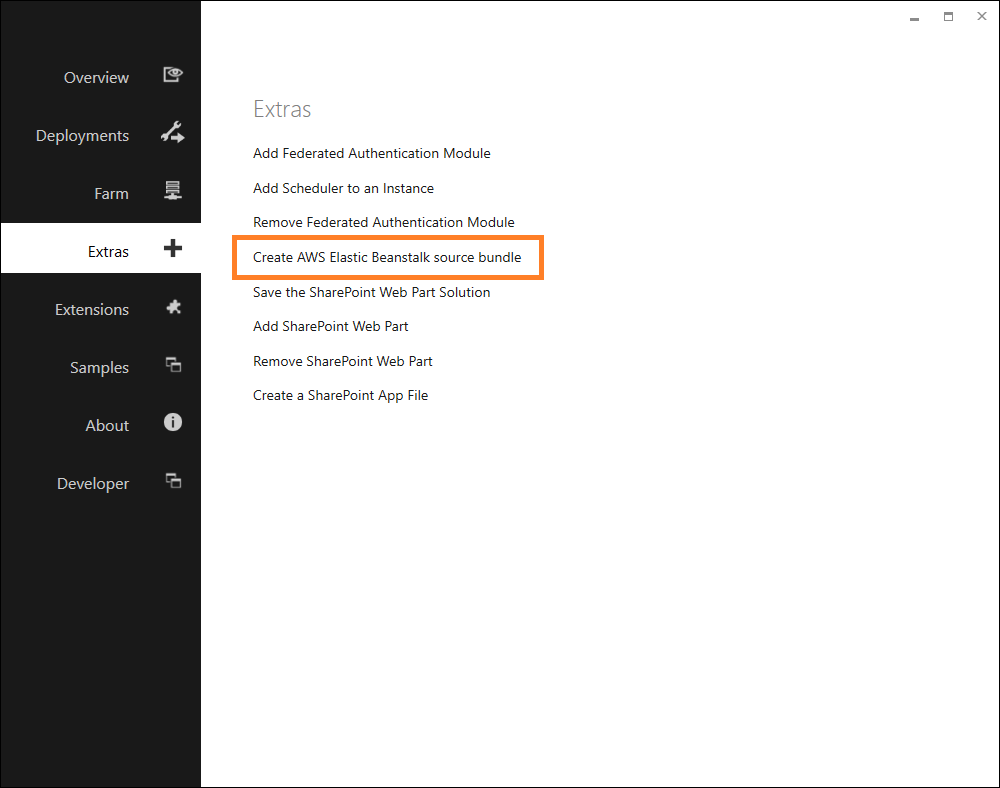
Open the Dundas BI deployment application and go to the Extras tab.
Select Create AWS Elastic Beanstalk source bundle.
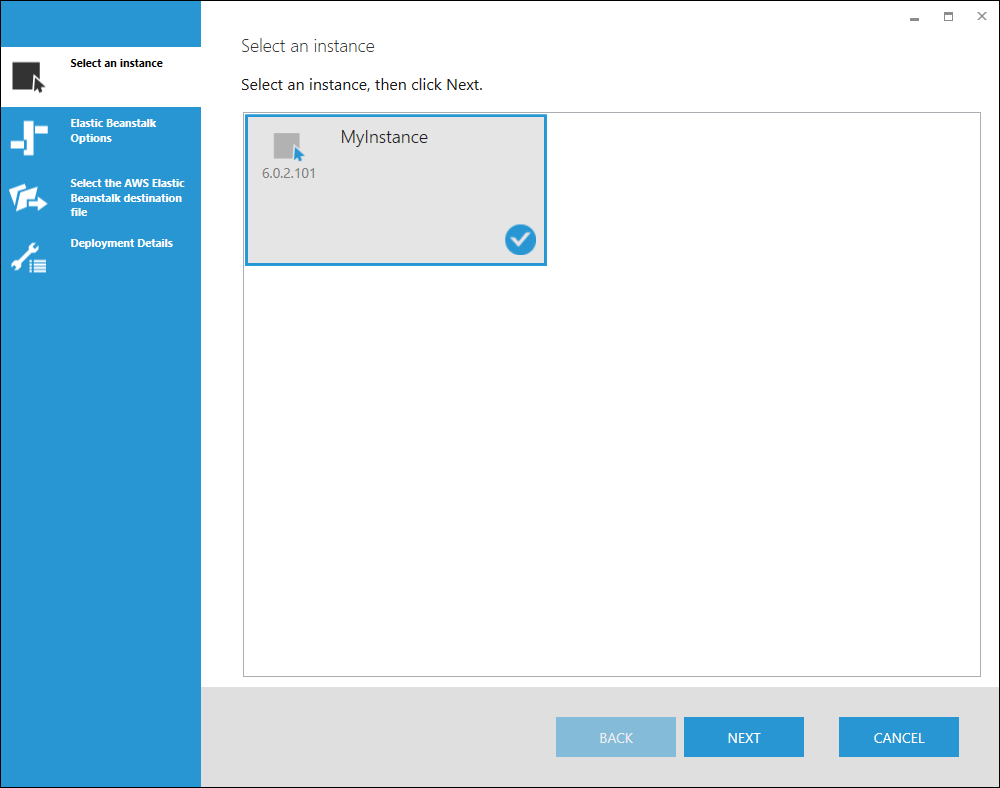
Select the instance that you want to deploy on AWS Elastic Beanstalk.
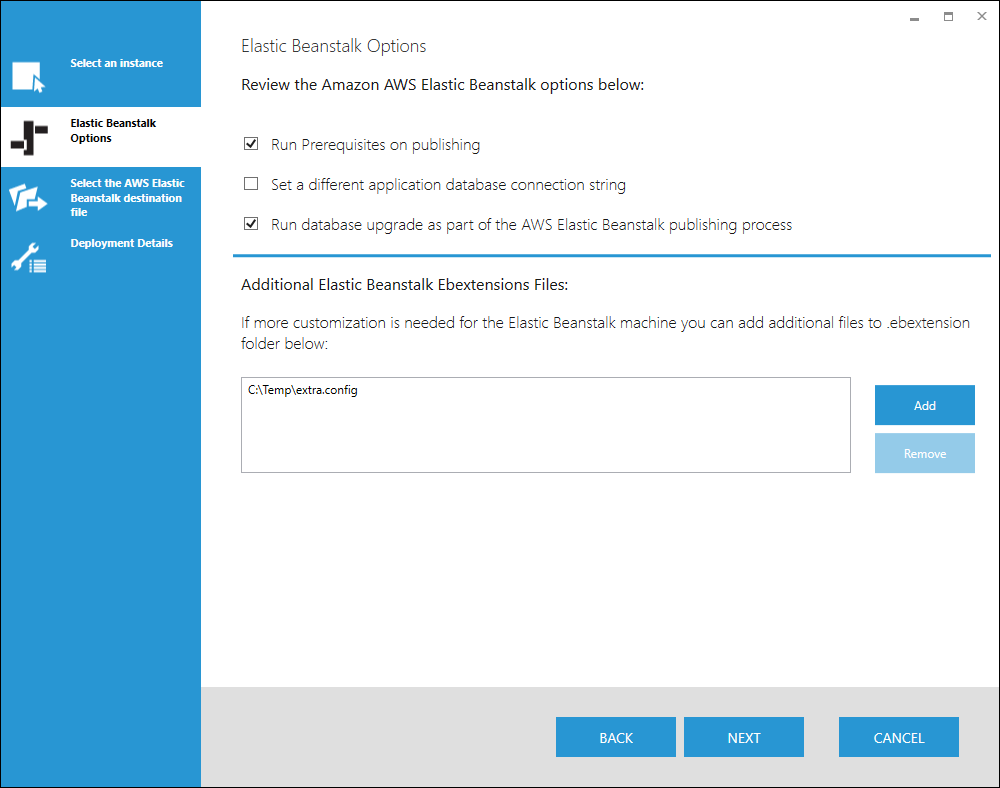
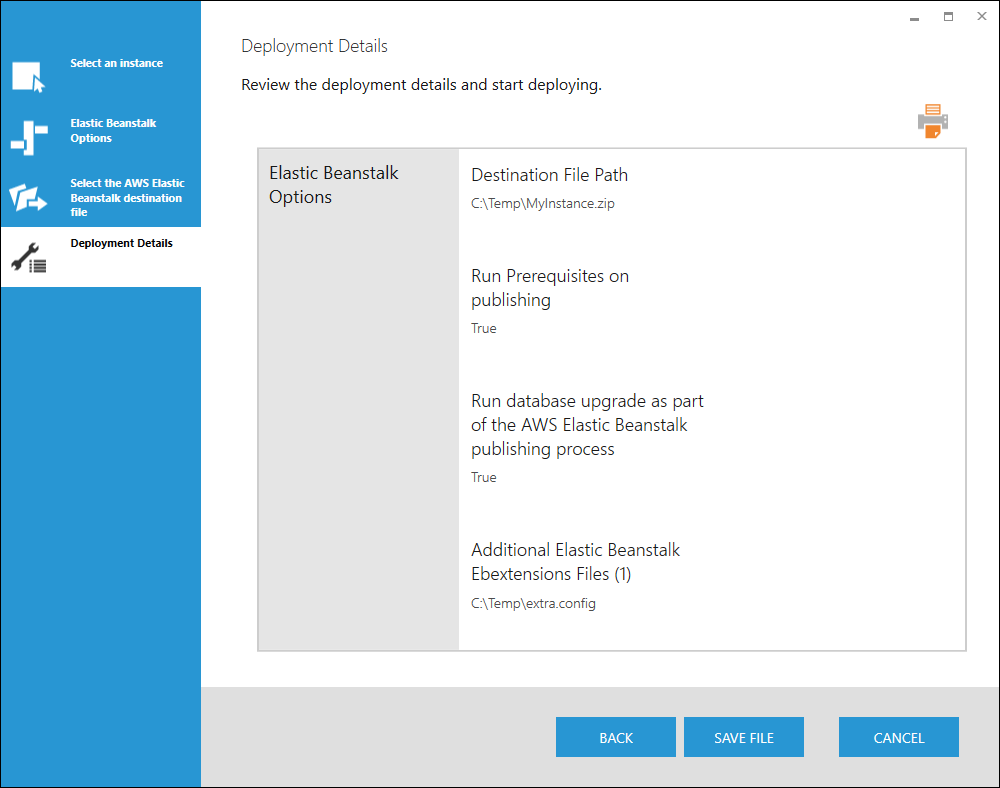
Select any of the following AWS Elastic Beanstalk options:
- Run prerequisites on publishing - Force the prerequisites to be installed when deploying to AWS Elastic Beanstalk. Ideally, this option is not used and a custom AMI with the prerequisites already installed is used instead. For more information about using a custom AMI, click here.
- Set a different application database connection string - Set up a new connection during deployment. This option is typically used to create a separate staging and production environment.
- Run database upgrade as part of the AWS Elastic Beanstalk publishing process - Force the schema to be updated during deployment.
If more customization is needed for the AWS Elastic Beanstalk environment, additional .ebextension files can be added by clicking Add under Additional Elastic Beanstalk Ebextension Files.
Click Next.
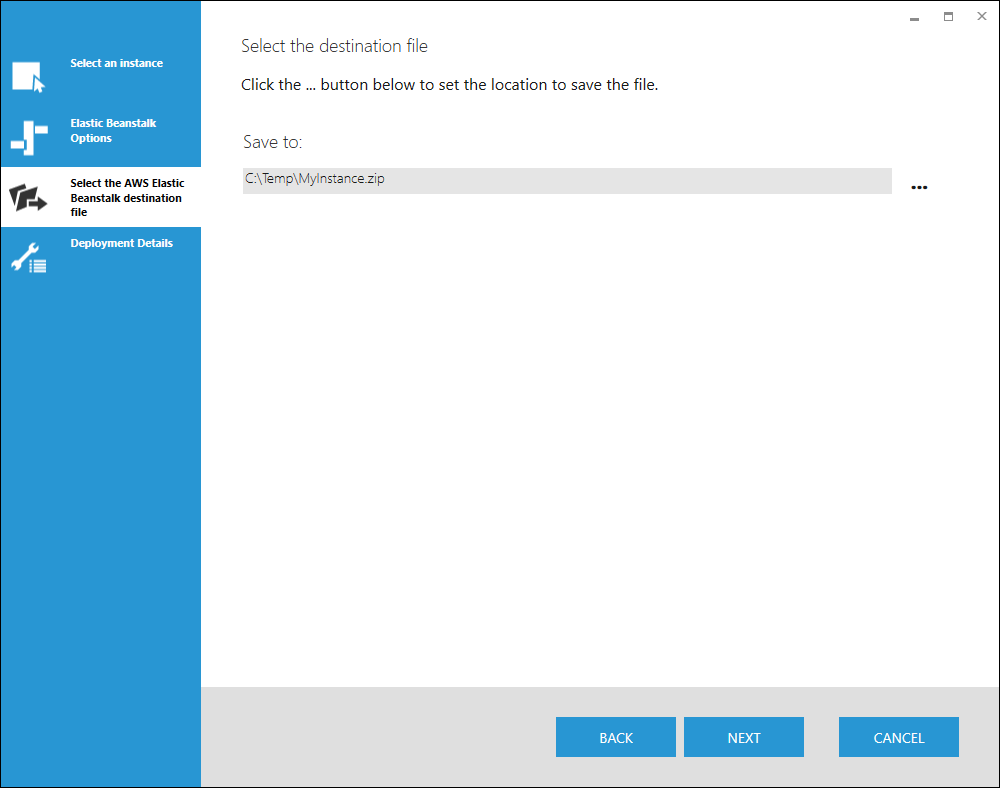
Select a location and provide a file name for the AWS Elastic Beanstalk source bundle. Click Next.
Review the deployment details and click Save File to begin creating the AWS Elastic Beanstalk source bundle .zip file in the specified location.
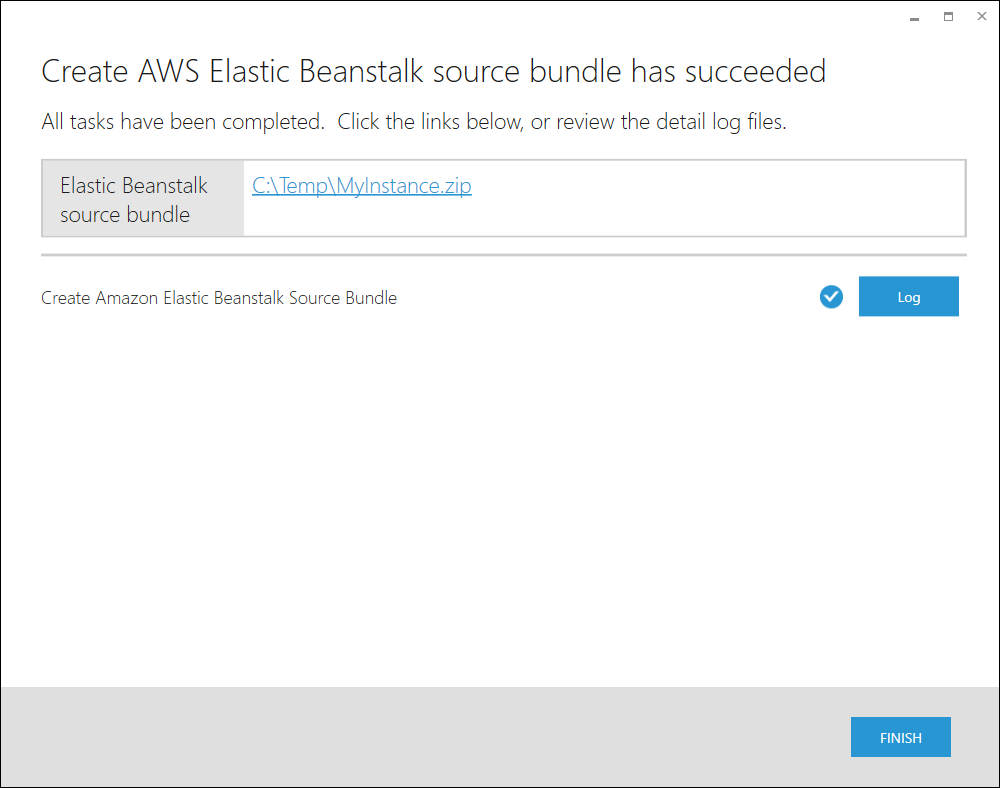
The AWS Elastic Beanstalk source bundle is created and the file location is displayed. This file is used to create the AWS Elastic Beanstalk environment. Click Finish.
4. Create an AWS Elastic Beanstalk application
Sign in to AWS and navigate to AWS Elastic Beanstalk. Click Create New Application.
Enter an Application Name and a brief Description for the Dundas BI instance. Click Create.
For more information about creating an AWS Elastic beanstalk application, click here.
5. Create the Dundas BI AWS Elastic Beanstalk environment
After creating the AWS Elastic Beanstalk application, you must set up the environment.
Click Create one now. On the Select environment tier page, ensure that Web server environment is selected. Click Select.
On the Create a web server environment page, for Platform choose .NET (Windows/IIS).
For Application code, click Upload your code.
Click Upload to select the Dundas BI instance source bundle that was created earlier and then click Upload.
After the upload is complete, click Create environment. This process may take a few minutes to complete.
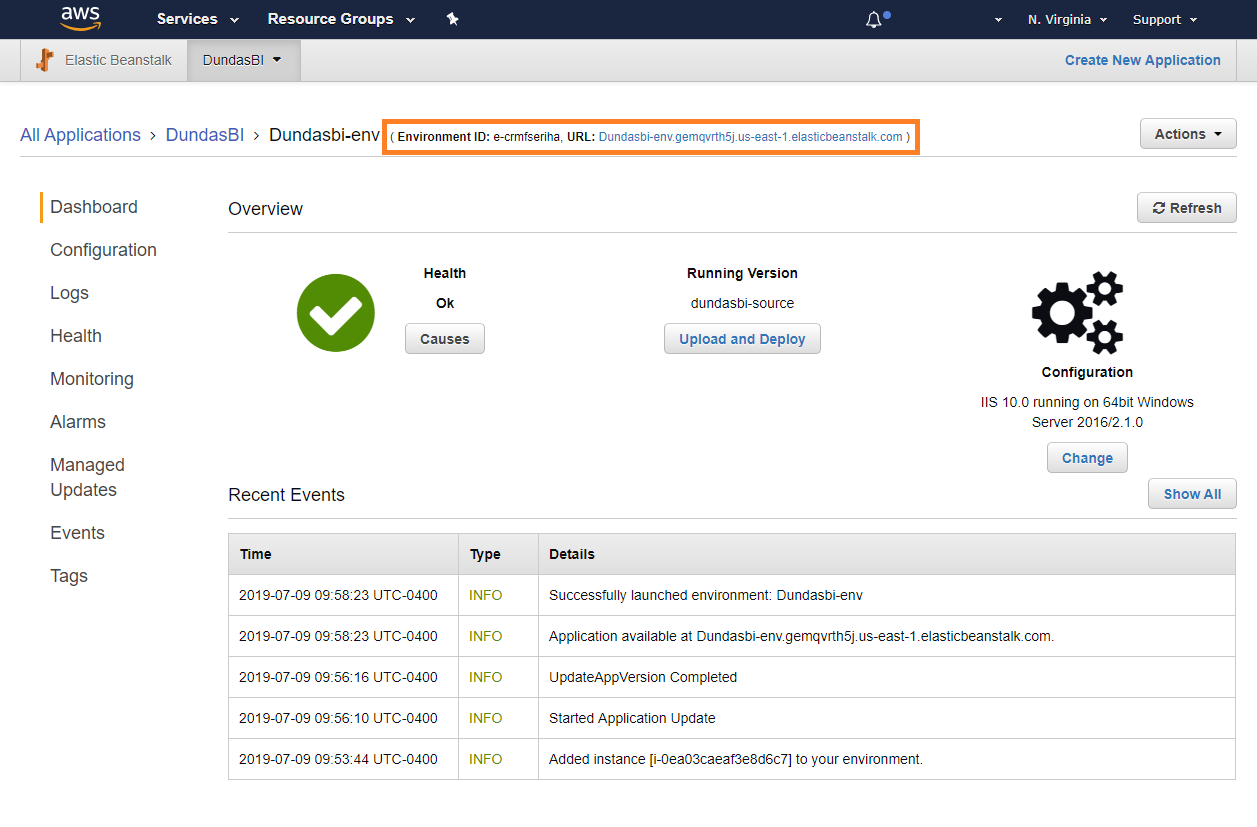
While AWS Elastic Beanstalk creates the environment, the environment management console is displayed. When the environment health turns green, click the URL next to the environment name to view the Dundas BI instance.
For more information about creating an AWS Elastic Beanstalk environment, click here.