Connecting to Pardot
1. Overview
This article shows you how to access Pardot data with a data connector.
Important
To ensure you can access Pardot, upgrade to version 9.0.0.1004 or higher if you are using an older version as the Pardot user authentication system used by earlier versions has been retired.
Main article: Connect to data and view it on a dashboard
2. Set up Pardot
You may need to first set up a connected app and enable access to Pardot services in order to obtain details such as the Consumer Key and Consumer Secret that you will need when creating a data connector.
For details, see Setting Up Salesforce OAuth for Pardot API Authentication.
3. Create the data connector
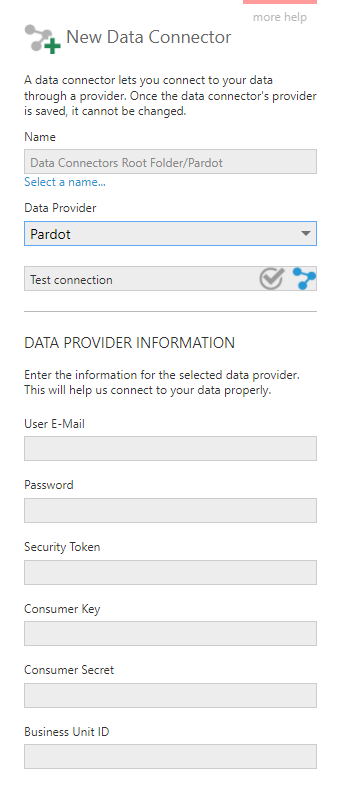
When creating a new data connector, set the Data Provider dropdown to Pardot.

- Enter the User E-mail, Password, and Security Token for your Salesforce account with Pardot login rights. If you do not already have a security token to provide, you can reset your security token in order to obtain it by email or use your authenticator app.
- Enter other details such as the Consumer Key and Consumer Secret from your connected app and Pardot account, detailed in the link provided in the section above.
- You can choose between the Pardot v3 and v4 APIs by expanding the Advanced section and setting the API Version.
