Data cube storage types
1. Overview
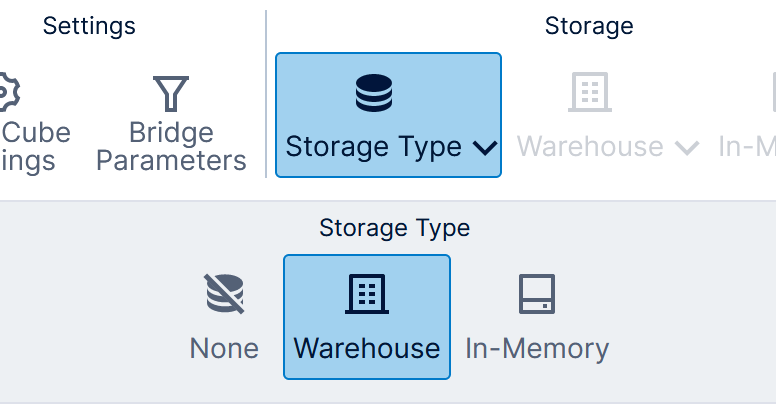
After you have designed your data cube, you can optionally choose a Storage Type and potentially improve data retrieval performance or reduce the load on your database servers or other data sources. There are three storage options available from the toolbar when editing a data cube:
- None – (Default) Connects live to the data sources directly when the data cube is used in a visualization, with the choice of short term caching or real-time updates.
- Warehouse – Stores or caches the transformed data in the Warehouse database when the cube is built.
- In-Memory – Stores data in server memory for even greater performance potential for data analysis queries.
When using warehouse or in-memory storage, you can choose to build the storage either on-demand or schedule it to run periodically, for example overnight if you have a line of business database that is not permitted to be queried during the day. You can also choose incremental updates, which retrieves only data that was added to the database since the last build, and can potentially build large data cubes faster.
2. Data cube preparation
The in-memory storage option in particular can require a lot of server memory, so if you choose this type, we strongly recommend that you remove or hide elements (columns, hierarchies, or measures) that you do not need from your data cube's Process Result transform. This can also benefit the warehouse storage type by leaving out unnecessary data.
To completely remove columns from the data cube output:
- Click the Process Result transform or another transform as far left as possible, choose Configure in the toolbar or context menu, and then uncheck any columns that you don't need in the output.
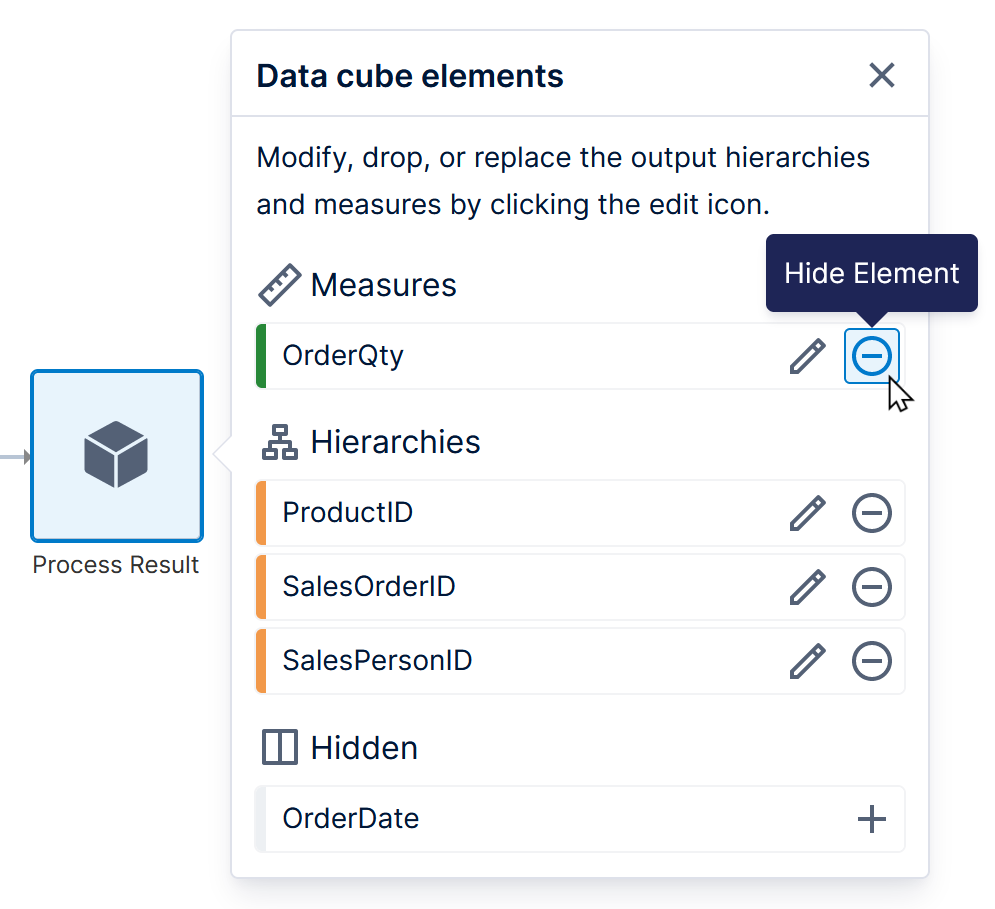
- Alternatively, click the Process Result to open the Data Cube Elements popup where you can click the grey minus icon on the right to hide elements. Those elements will be moved and listed below under Hidden, where you can unhide it by clicking its plus icon. A hidden column will be excluded from storage but still available for linking in hierarchy keys (for example, if you need to use the data cube later to define a hierarchy by using the column as part of a composite key).
In-memory storage is also affected by the number of aggregators enabled on each measure. For example, edit a measure from your data cube and check the list of Supported Aggregators: by default, only Sum, Count, and Average are selected in order to conserve memory usage, but you can adjust this setting as needed.

Elements that provide details about or describe items identified by another hierarchy can be selected as Attribute Hierarchies for that hierarchy. This conserves the amount of in-memory storage required, while providing benefits when selecting data such as disabling unwanted totals and expand/collapse functionality by default.
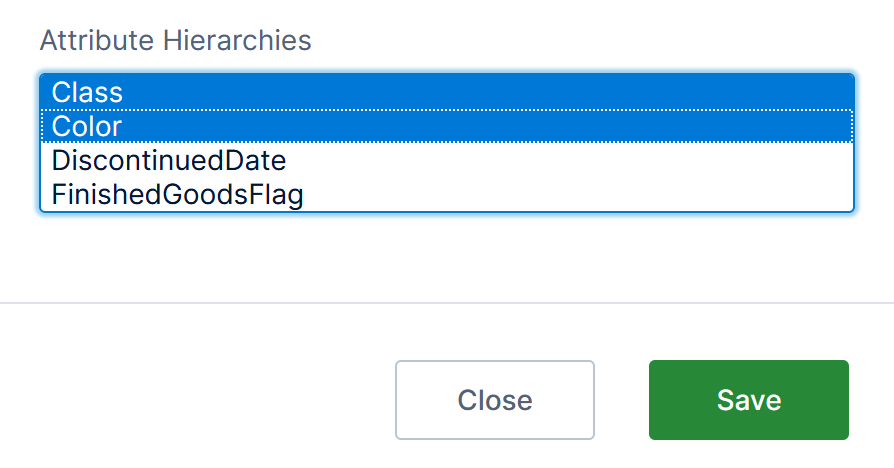
For example, with a ProductID that uniquely identifies each product, you could select various elements such as Color, Class, and Size as attribute hierarchies for ProductID that describe each product.
Attributes can also be set up when creating a predefined hierarchy as shown in Automatic joins and hierarchies.
More details and tips for improving performance for in-memory cube storage are provided in the notes section below.
3. Using data cube storage
When editing a data cube that is checked out to you, click Storage Type in the toolbar and select the type you want.
The Warehouse storage type lets you store or cache data in the Warehouse database. The In-Memory storage type stores data in server memory for even greater performance gain potential for data analysis queries, and also stores its data in the Warehouse database so that it can be reloaded back into memory in the event of a server restart.
The following sections describe how to set up warehouse and in-memory storage.
3.1. Check in your data cube
Once you've chosen a storage type, you must Check In your data cube before you can build its storage or set up scheduling.
After checking in, you will be asked if you want to build the data cube. Click Ok to begin building the warehouse or in-memory storage, or click Cancel if you want to build it later as shown in the next section.
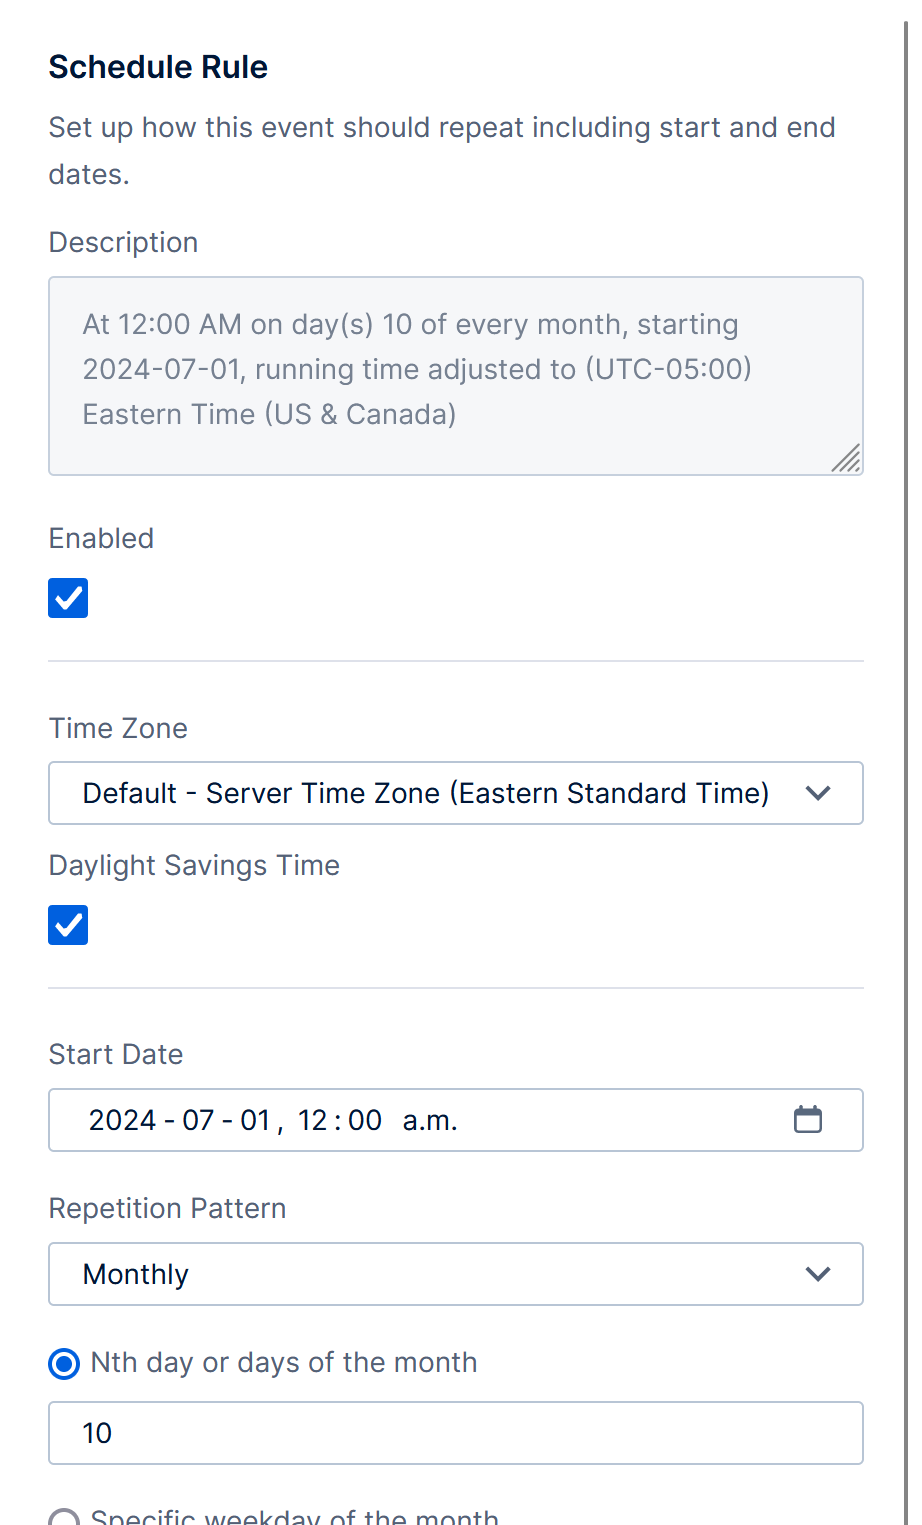
Next, you will be asked if you want to set up a schedule. Click Ok to open the Schedule Rule dialog, otherwise click Cancel and you can still choose to set up a schedule later.
3.2. Build the data cube
After checking in the data cube, you can also build its warehouse or in-memory storage on-demand any of these three ways:
- When the data cube is open for editing but still checked in, click Warehouse in the toolbar and then Build Warehouse, or click In-Memory and then Build In-Memory.
- Locate the data cube within the Data Cubes folder in the main menu or an Explore window, right-click the data cube, and choose Build Warehouse or Build In-Memory.
- If you are an administrator, you can use the Jobs or Data Cubes screens to run the data cube storage job.
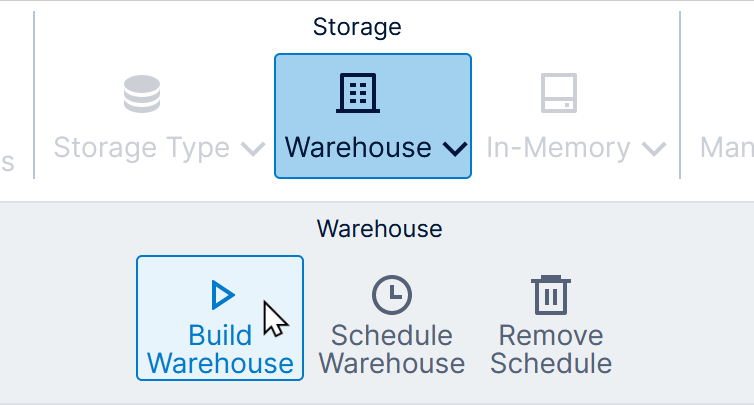
You'll see a message indicating the build has started. The time required to build the cube depends on the amount of data and other factors described elsewhere in this article.
You can check on the status of the build from the Data Cubes dialog, which you can access from your profile.
3.3. Schedule data cube storage
To open the Schedule Rule dialog for scheduling, open the data cube for editing while it is still checked in.
Click Warehouse in the toolbar and then Schedule Warehouse, or click In-Memory and then Schedule In-Memory.
In the dialog, choose from a wide variety of scheduling options to have the data cube periodically re-build its storage automatically, then click to Save at the bottom.
Administrators can also use the Jobs or Data Cubes pages to schedule data cube builds.
3.4. Job failure
You can confirm if the data cube storage processing was successful for data cubes you have access to from your profile.
The Job Failure Email Policy set up by your administrator may be configured so that someone is notified by email if processing the data cube storage fails. In version 23.3 and higher, this can be configured so that you can choose which user to notify for each data cube using storage:
- Click Data Cube Settings in the toolbar when editing a data cube that is checked out to you and is set to use storage.
- If available in the dialog that opens, you can set Notified On Failure to a user that should receive these emails.
There is also a configuration setting that administrators can change to automatically retry failed jobs, including for data cube storage.
3.5. Timeout
By default, warehouse storage jobs do not have a maximum running length. Data retrieval operations for metric sets and visualizations by default may be limited only by timeouts set up in a data connector or data cube transform.
You can stop warehouse storage jobs and/or data retrieval operations after a certain amount of time in version 24.2 and higher:
- Edit a data cube that is checked out to you, click Data Cube Settings in the toolbar, and set or clear the Warehousing Timeout and Data Retrieval Timeout as preferred.
- System administrators can set up a Warehousing Timeout and Data Retrieval Timeout in the configuration settings, found in the Data category. These take effect for all data cubes except those where the corresponding settings above have been set, as those take precedence.
3.6. Disable memory management
When using in-memory storage, after the storage exceeds a certain number of records, it begins compressing the records to maintain a stable use of RAM. When the records are used, they are decompressed and then recompressed again after some time.
You can improve the performance of the in-memory data cube by preventing it from recompressing records.
Click to configure the Data Cube Settings in the toolbar when editing an in-memory data cube that is checked out to you.
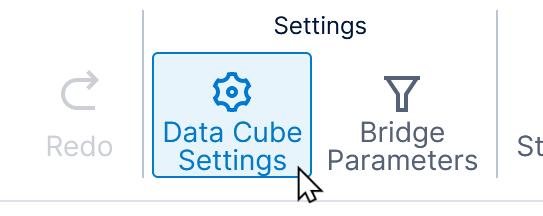
In the Data Cube Settings dialog, select the checkbox under Disable Memory Management and click Save.
The new setting will take effect after the next time the data cube is built.
3.7. Administrator options
If you are an administrator, you can also access additional options that allow you to manage data cube storage for multiple data cubes at once, including running jobs, creating batched sequence jobs, changing storage types, scheduling, and automatically building storage for all referenced data cubes. Under Projects / File System, click Data Cubes to access these options, described in detail in Manage projects and the file system.
You can also manage each data cube's storage job from the Jobs page in Administration as shown in Monitoring system health.
3.8. Limitations
The following limitations exist for in-memory warehouse storage:
- In-memory storage does not support binary data types.
- In-memory storage relies on the double numeric type, which may approximate rather than guarantee accuracy when displaying a large number of significant digits (e.g., many digits to the right of the decimal point).
4. Incremental data update
Incrementally building data cubes will only retrieve data that was added to the database since the last build as kept track of by one or more incremental element fields in your data, such as a date or sequential ID. This has the potential to substantially decrease the time needed to build the data cube, however it will not update or remove existing data.
It is important to avoid or be cautious when using incremental updates on a data cube where changes to existing records or rows in the data are possible. For example, records deleted in the source will remain in the cube, records with the same or a smaller incremental element value will not be updated, and records updated with a larger incremental element value can appear as a new, separate record after the data cube has been re-built.
You can enable incremental data updates when using either the warehouse or in-memory storage type, and then build the data cubes manually or via a schedule, as described above.
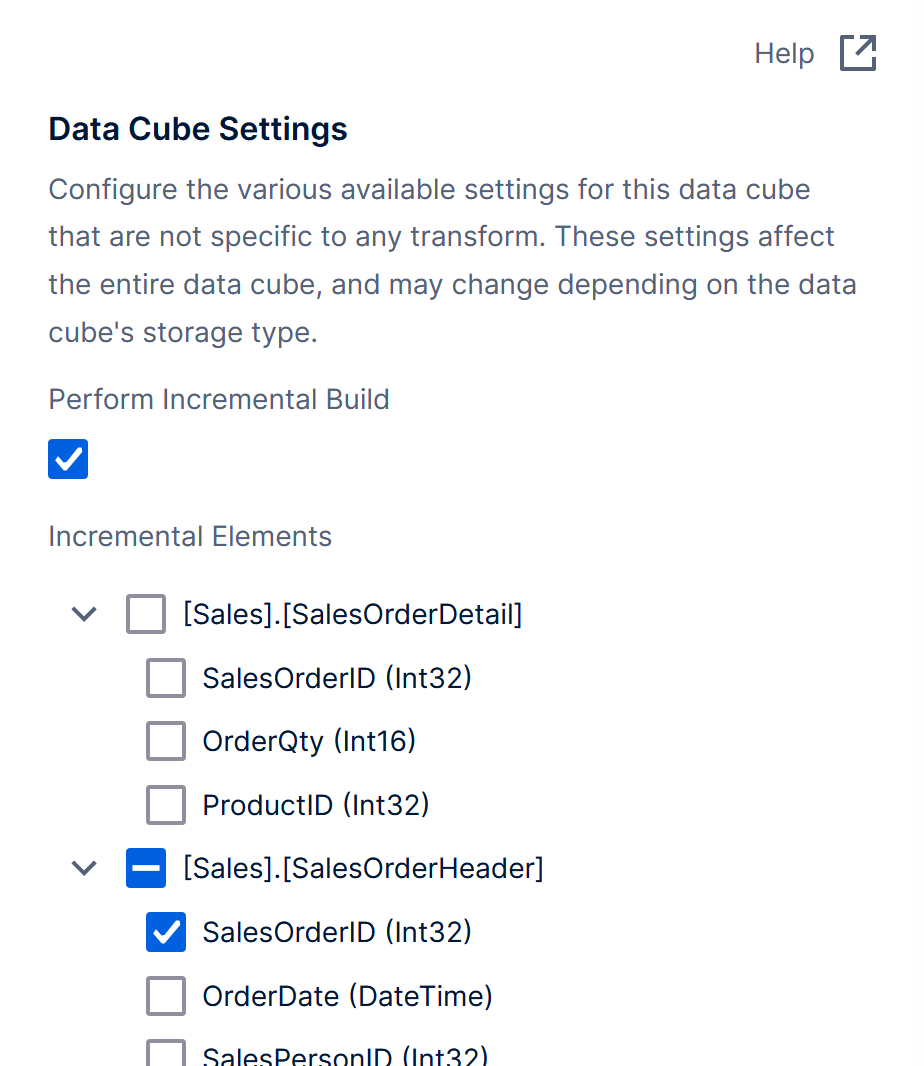
Click to configure the Data Cube Settings in the toolbar when the data cube is checked out to you.

Select Perform Incremental Build, and then select the Incremental Elements to use to identify new records. Each time the data cube builds, it will only load new records where the selected values are greater than those from the previous build.
5. Notes
5.1. Check the storage type and status
If your data cube is checked in, you can identify its storage type from its icon shown when you access it from the main menu, the Explore window, and other file explorers.
The tooltip that appears when hovering over it (or long-tapping) also describes its storage type:
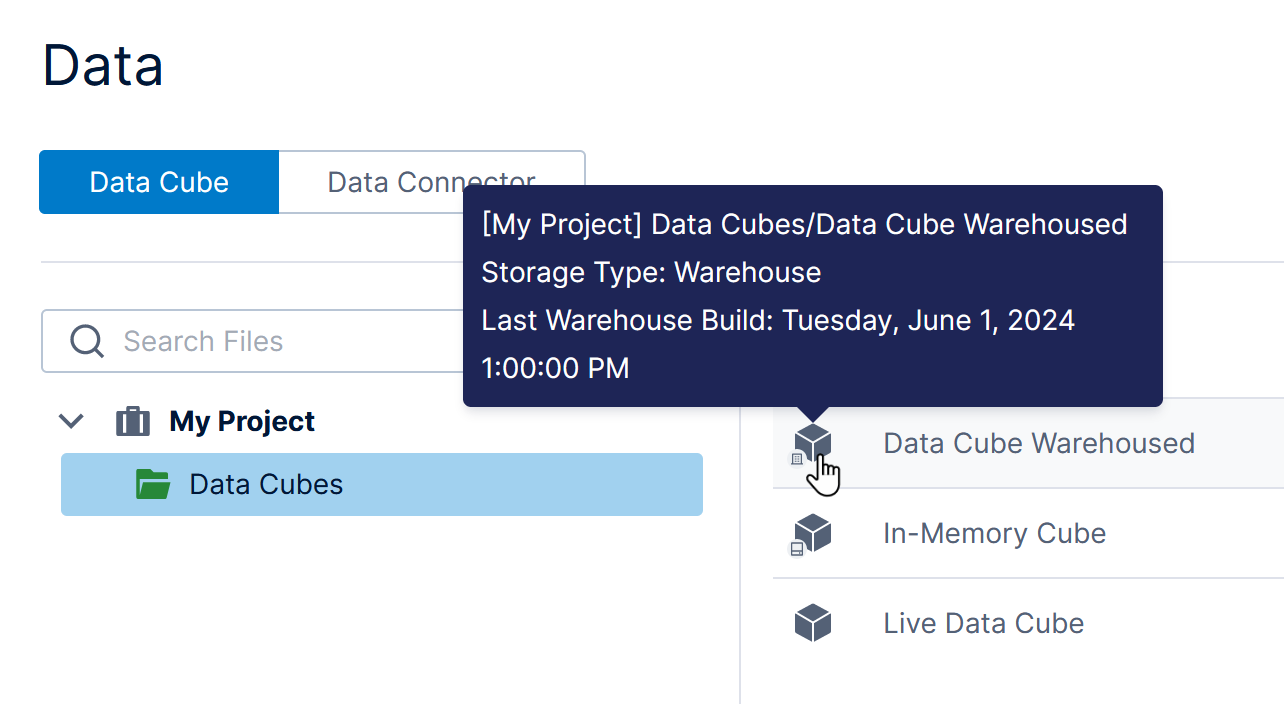
If available, the last build time is also displayed in the tooltip above, and in the status bar when the data cube is open (not available for some data cubes on multi-tenant instances).
You can also view all the data cubes you have access to from the Data Cubes dialog in your profile, along with their storage types, schedules, and build statuses.
5.2. In-memory build performance
The total time required to build in-memory storage for a particular data cube, and the RAM memory required, can vary greatly depending on a range of factors. Estimating build times is therefore not as simple as saying building X records takes Y minutes, etc.
For example, memory consumption generally depends on:
- How memory is allocated by .NET
- The number of hierarchies and measures used in your data cube process (especially with distinct count)
- How sparse your fact table is (end result of your data cube process)
Ideally, if the in-memory storage result fits entirely in RAM, then the total build time will generally be divided as follows on a typical 8 core CPU box:
- 50% of time spent retrieving/loading data from your data sources
- 50% of time spent building the in-memory data structures
With a higher number of processing cores, the time to build the in-memory data structures can be reduced due to parallelization.
Here are some general guidelines for optimizing in-memory builds:
- De-select columns you don't need in your data cube as early in the process as possible.
- Minimize the number of hierarchies, measures, and aggregators in your data cube.
- Include columns as attributes of a hierarchy where appropriate instead of separate hierarchies.
- Minimize the complexity of your data cube process (e.g., type and number of transforms used).
- Use the Filter transform to restrict data to required ranges.
5.3. Raw data
When the Data Retrieval Format on a metric set is set to Raw and <Row Number> is placed on Rows, the raw data may be retrieved directly from the original database, bypassing the data cube's storage.
For more information on raw data mode, see the article Metric set analysis tools.
5.4. Optimizing storage jobs
If you have a very large number of data cubes using warehouse or in-memory storage, you could reach a limit to the number of their storage jobs that can successfully run simultaneously for multiple potential reasons, including the volume of data, database configurations, and your server's hardware. To avoid issues when building data cube storage for many cubes at once, try one or more of the following:
- Avoid scheduling or manually running all of the storage jobs at the same time: stagger each job's run time to allow time for some or all of the previous jobs to complete, and/or use the batching feature to schedule a special sequence job that will automatically build each selected cube in sequence.
- Increase the value of the max_connections setting in PostgreSQL for the warehouse database.
- Change the Data Warehouse Connection String in your configuration settings to specify a higher Maximum Pool Size parameter value.

