How to enable SQL Server authentication
1. Overview
SQL Server authentication is recommended for connecting Dundas BI to its application and warehouse databases for security reasons. This article explains how to enable SQL Server authentication, and how to use it with your Dundas BI instance.
This applies when installing or upgrading Dundas BI when it uses Microsoft SQL Server to store its own data. Within Dundas BI, users can then connect, analyze, and visualize data from a variety of other data sources or use other authentication methods.
2. Enabling SQL Server Authentication through SQL Management Studio
To enable SQL Server Authentication for your instance:
- Open SQL Server Management Studio.
-
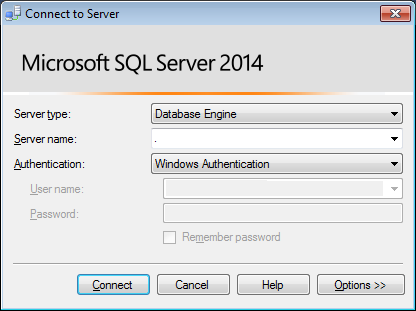
Connect to the SQL Server instance you would like to use for Dundas BI.
-
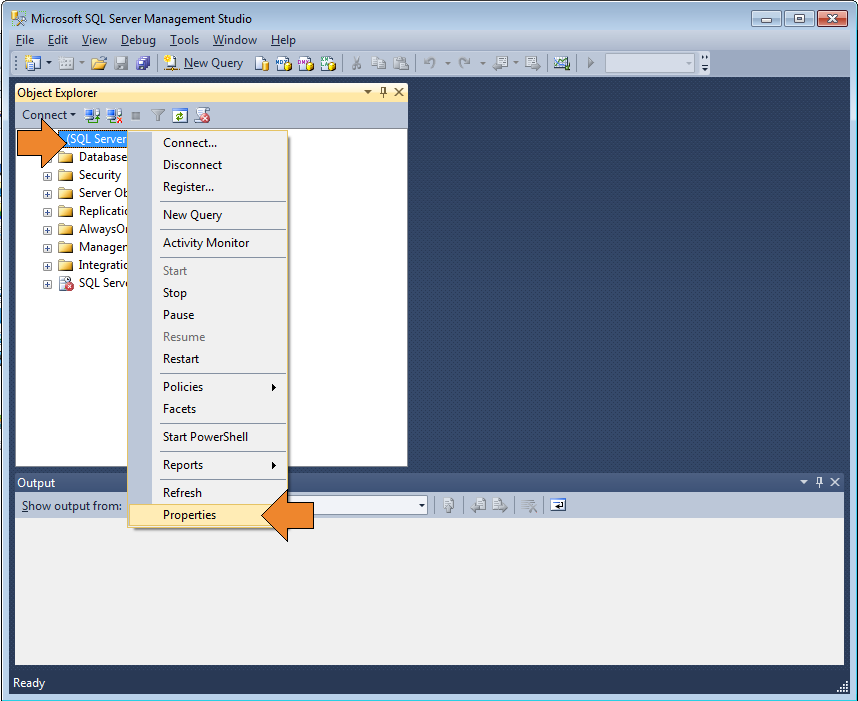
In the Object Explorer, right-click the server and click Properties.
-
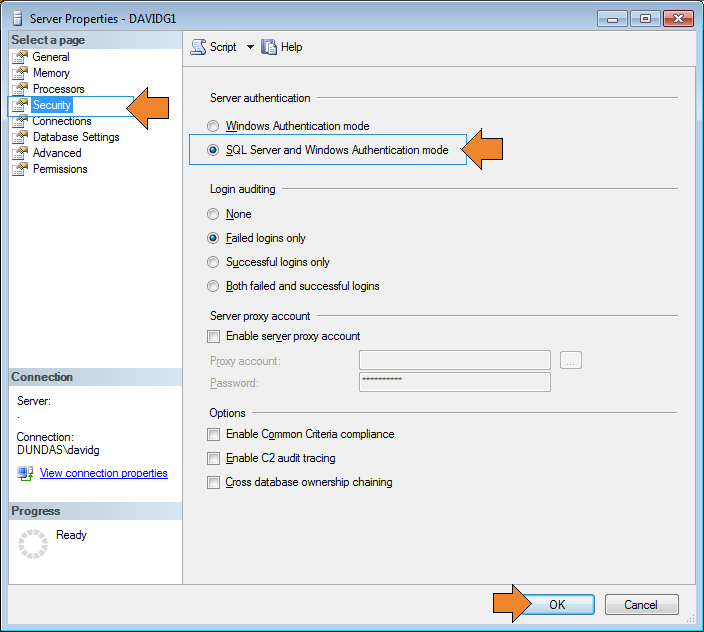
On the Security page under Server authentication, select SQL Server and Windows Authentication mode and then click OK.
-
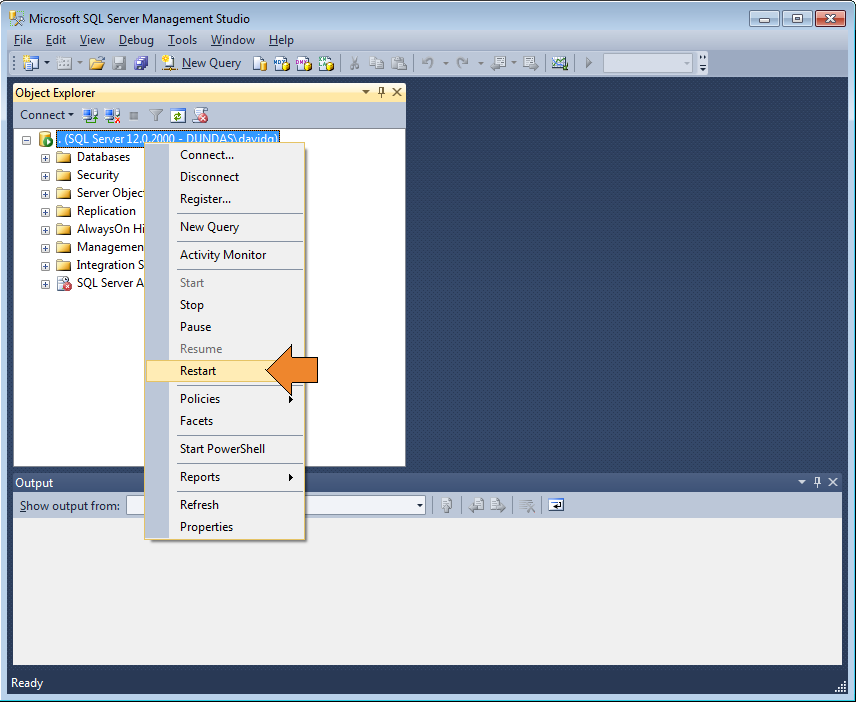
In the Object Explorer, right-click your server and click Restart. If the SQL Server Agent is running, it must also be restarted.
3. Using SQL Server Authentication in Dundas BI
Certain database permissions are needed for the user Dundas BI connects as while deploying a Dundas BI instance, which can be reduced when deploying is finished.
3.1. Before deploying an instance
3.1.1. Creating a SQL Server authentication user
During the deployment of an instance with new databases, the user must have the SysAdmin role, or else all of the following: DbCreator, DiskAdmin, ProcessAdmin, and SecurityAdmin.
Create a user like this in SQL Management Studio:
- Open SQL Server Management Studio.
- Connect to the SQL Server instance you would like to use for Dundas BI.
-
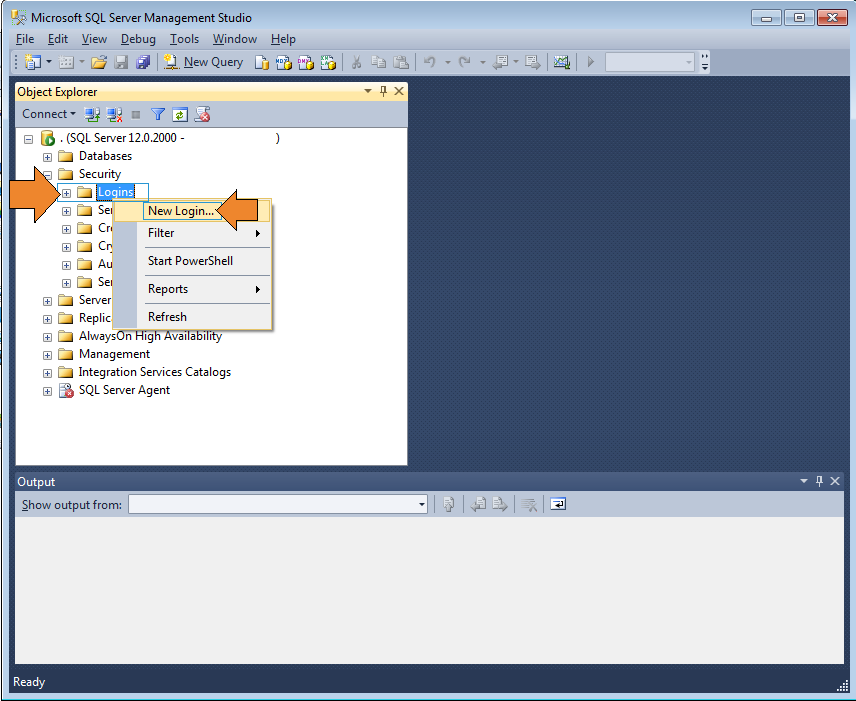
Expand the Security folder, right-click on the Logins folder and choose New Login....
-
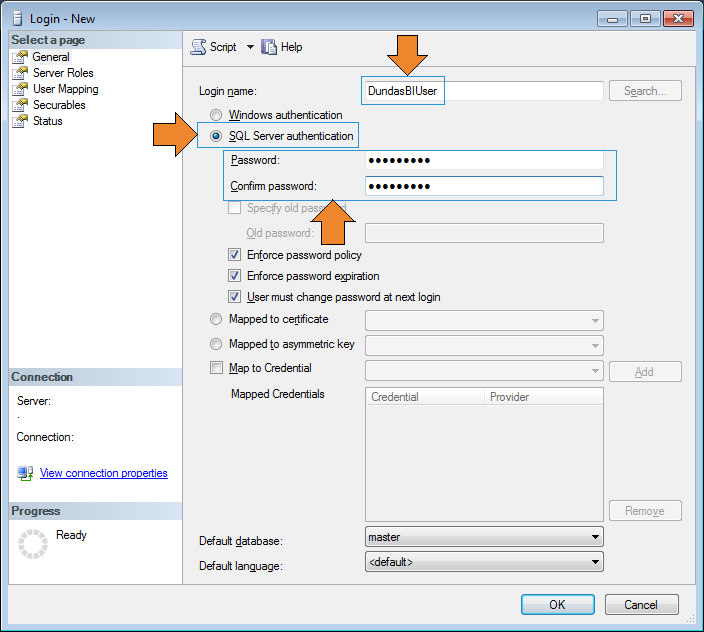
Enter the login name as DundasBIUser, select SQL Server authentication, and enter the Password.
-
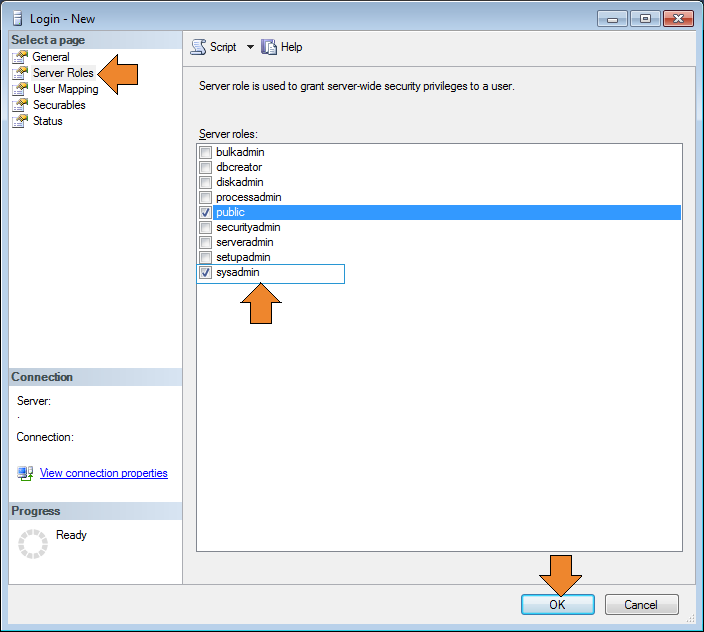
Click the Server Roles page and enable the SysAdmin role, or a combination of DbCreator, DiskAdmin, ProcessAdmin, and SecurityAdmin roles.
3.1.2. Specifying the SQL Server authentication user
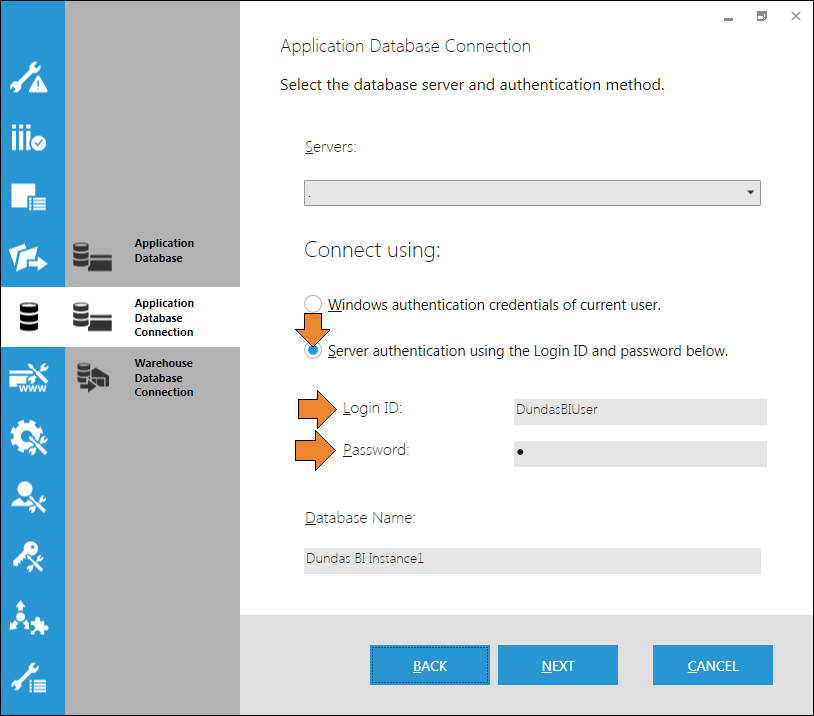
Now that the SQL Server authentication user has been created, use these credentials when you deploy Dundas BI and set up the application database connection.
3.2. After deploying an instance
After deploying, it is possible to remove the SysAdmin role from this user. For regular operation, the user will only require the dbo default schema and the db_owner role membership.
The SysAdmin role will be required again when attempting to upgrade an instance.
4. Changing an existing instance to use SQL Server authentication
Follow the steps below to change an existing instance to use SQL Server authentication for its application and warehouse databases.
4.1. Application database
Open a text editor such as Notepad as an administrator, by right-clicking its shortcut and choosing Run as administrator.
Open the Dundas BI configuration file, located at [InstanceRoot]\www\BIWebsite\App_Data\dbi.config.
Edit the connection string to use SQL Server authentication by specifying the User ID and Password. After saving, recycle the application pool in IIS or restart the Linux service for Dundas BI's website.

4.2. Warehouse database
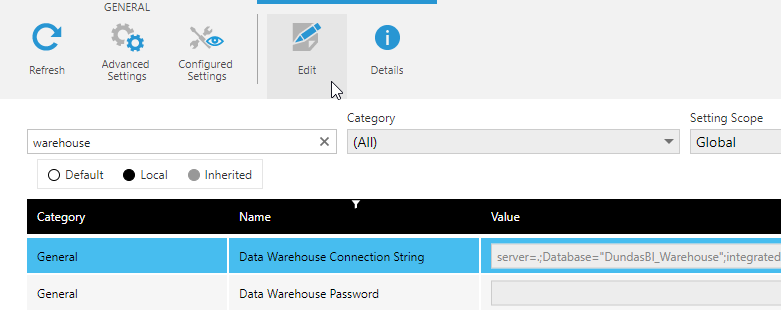
The warehouse database connection is defined in Dundas BI's configuration settings:
Log into Dundas BI as an administrator, and access Administration from the main menu.
Click to expand Setup and then click Config.
Find or search for the Data Warehouse Connection String setting, located in the General category, and edit it to also use SQL Server authentication.
