
1. Overview
By connecting to SSAS (SQL Server Analysis Services) using roles impersonation, you can automatically filter data according to the user who is logged on, providing row-level security. However, this approach can become difficult to manage when there are a lot of roles.
Another option is to use the Custom Data setting of SSAS data connectors in conjunction with custom attributes to secure access to the data. This method requires only one role on the SSAS side.
This is an advanced topic for administrators.
2. Walkthrough
The following walkthrough uses the Adventure Works DW sample database for illustration.
2.1. Set up a role in SSAS
Launch SQL Server Management Studio and connect to Analysis Services.
Create a new role (Role A) exactly as described in Using SSAS roles impersonation but with the following differences:
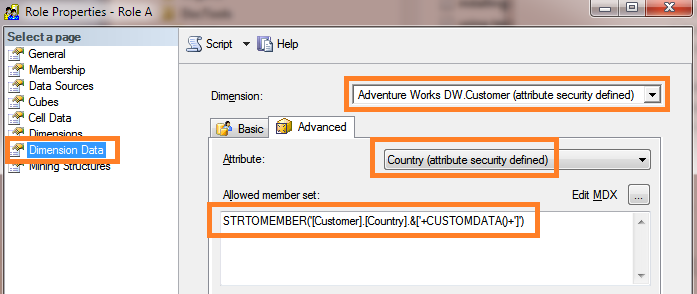
- In the Role Properties dialog, click Dimension Data on the left.
- Set the Dimension dropdown to the Customer dimension.
- Set the Attribute Hierarchy dropdown to Country.
- Click the Advanced tab and enter the following MDX in the Allowed member set box.
STRTOMEMBER('[Customer].[Country].&['+CUSTOMDATA()+']')
This MDX is variable because of the CUSTOMDATA() function which will return a custom attribute value that has been assigned to a user. This is the key to how the data will be filtered.
2.2. Create a custom attribute
In Administration, click Account Service to expand its items and choose Custom Attributes, then click to add a new custom attribute.
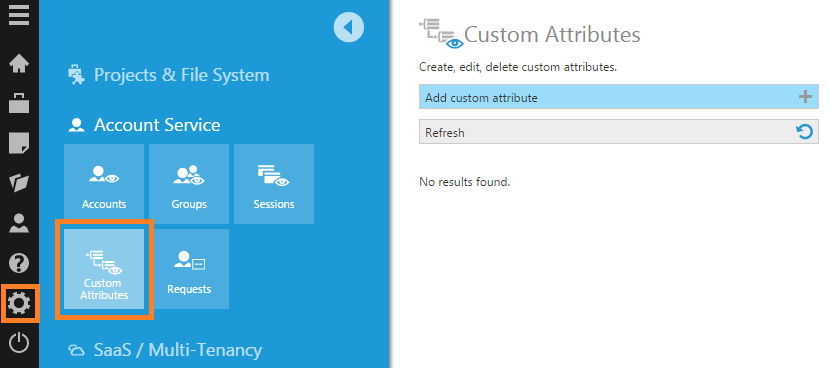
In the Add Custom Attribute dialog, set the Name of the custom attribute to Geography, and check that the Currently Selected Data Type is String.

Click to Save. You'll see a message indicating the custom attribute has been saved, and it will be listed in the Custom Attributes dialog.
2.3. Set up a user group and account
In the Administration sidebar, click to expand Account Service and choose Groups.
Create a new user group with the name Role A. This name must match that of the SSAS role exactly.
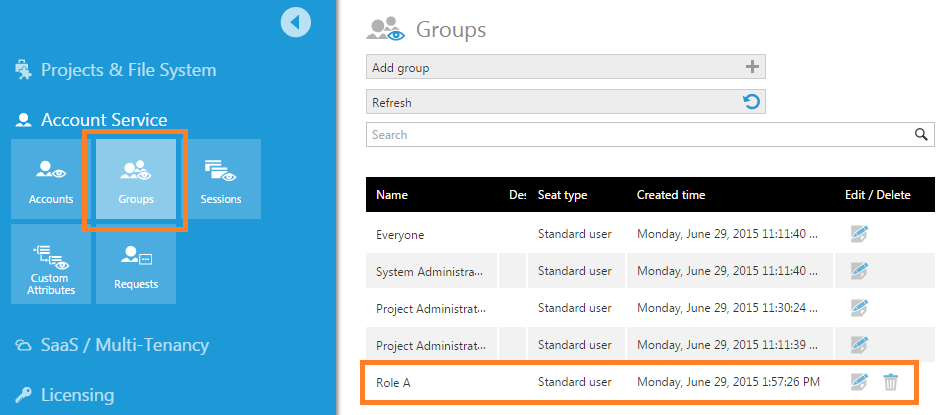
Next, create a new user account named User A and add this as a member of the group Role A.
2.4. Assign custom attribute to user
Under Account Service, click Accounts to see the list of users in the system.
Click the Edit button for User A. In the Account Details dialog, scroll to the bottom. Click the Custom attributes button.
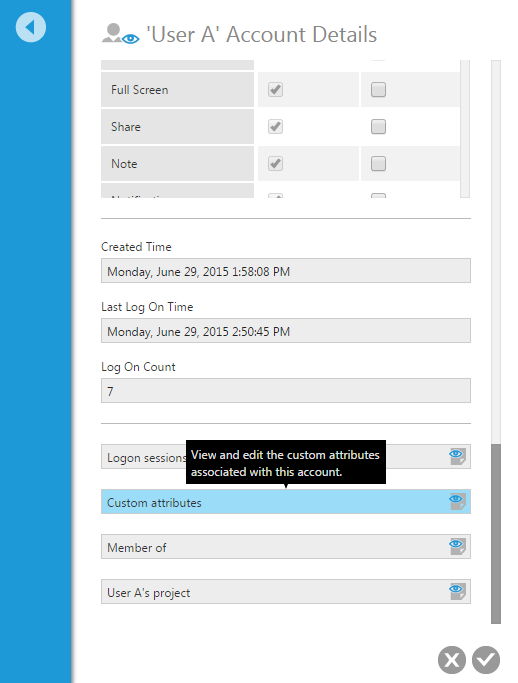
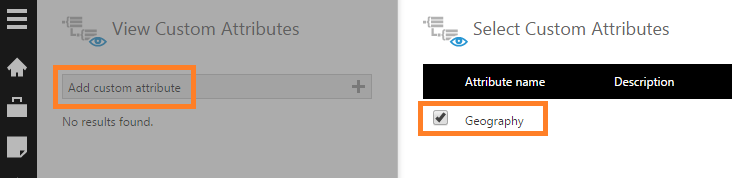
In the View Custom Attributes dialog, click Add custom attribute. In the Select Custom Attributes dialog, you'll see a list of available custom attributes that can be assigned to this user. Select the checkbox for the Geography custom attribute.
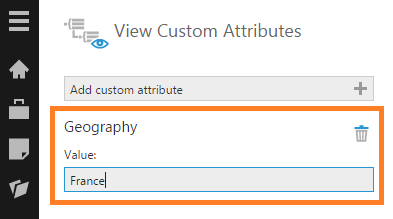
Returning to the View Custom Attributes dialog, enter a value for the Geography custom attribute (e.g., France) and then click to Save.
2.5. Create a new data connector
From the main menu, create a new data connector using the SSAS provider:
- Set Windows Impersonation to Specified and enter the domain credentials that were added to the SSAS Membership pages when setting up Role A.
- Set the Database Name to the name of the SSAS database.
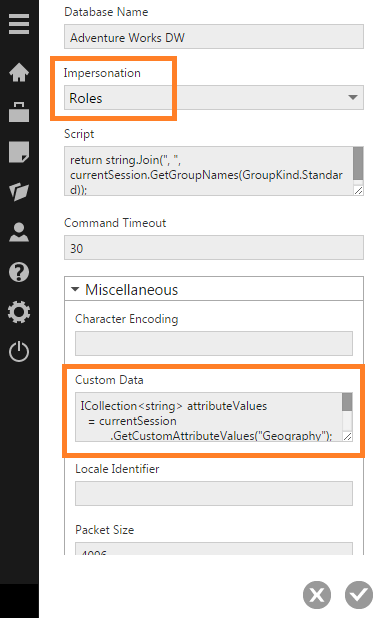
- Set the Impersonation dropdown to Roles.
- Expand the Miscellaneous section and enter the following script in the Custom Data box. This script retrieves the user's Geography custom attribute value and returns it to the CUSTOMDATA() function on the SSAS (MDX) side.
ICollection<string> attributeValues
  = currentSession
         .GetCustomAttributeValues("Geography");
if (attributeValues != null) { return String.Join(", ", attributeValues); }
else { return String.Empty; }
2.6. Create a new dashboard
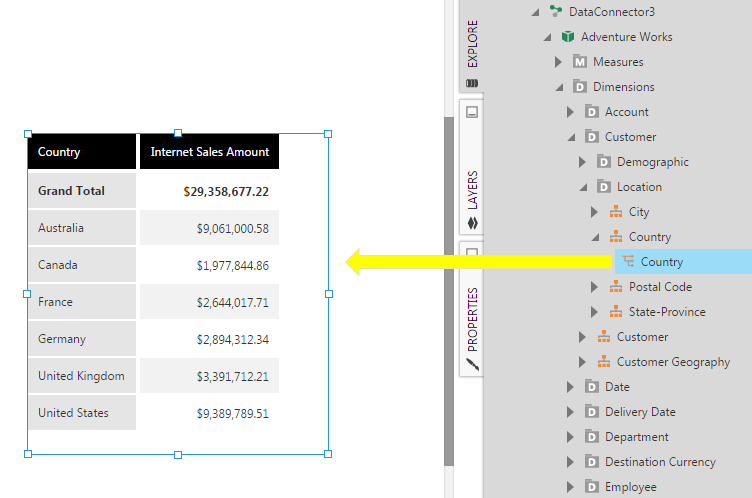
Create a new dashboard by dragging the Internet Sales Amount measure and the Country level from the newly created data connector to the dashboard canvas.
Check In your dashboard so other users can view it.
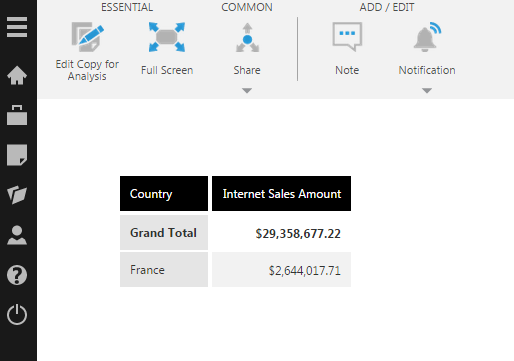
2.7. View the dashboard
Log out and then log on as the restricted User A.
Open the dashboard for viewing and observe that the chart shows data for France only.
3. Notes
You can apply a similar process to make use of the Cell Security functionality in SSAS; however, you will have to disable certain MDX optimizations. To do so, locate the relevant measure from your cube in the Explore panel, right-click on it, select Slicer As Subquery, and select Disable.