
1. Overview
This article shows you how to add a new user account or an existing group account, and how to manage these accounts. Only administrators have permission to add and manage accounts.
2. Account types
- Local user - A local user's credentials are stored and managed within the application.
- Windows user - A Windows domain user can log on via Windows Authentication.
- Windows group - A Windows group account lets any member of the Windows group log on.
- External user - An external user can log on via federated authentication.
- External group - An external group account lets any member of the external group log on via federated authentication.
3. Add a new account
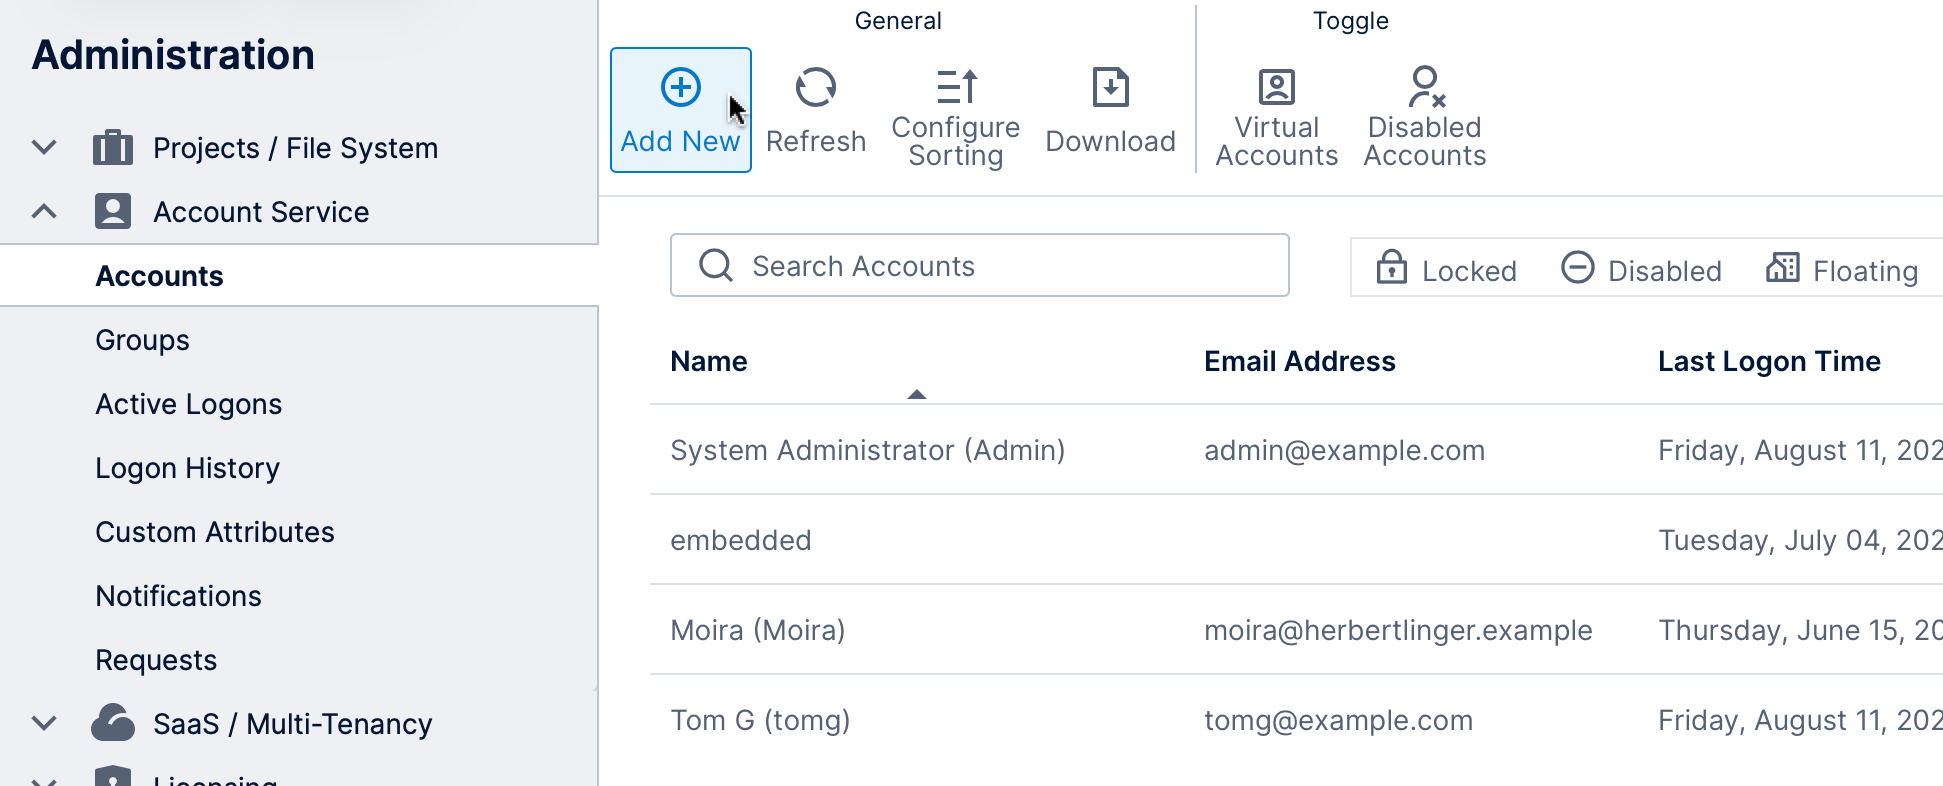
To add a new user account, first access the administration area from the main menu.
Expand the Account Service category along the left and click Accounts. On the Accounts screen, click Add New.
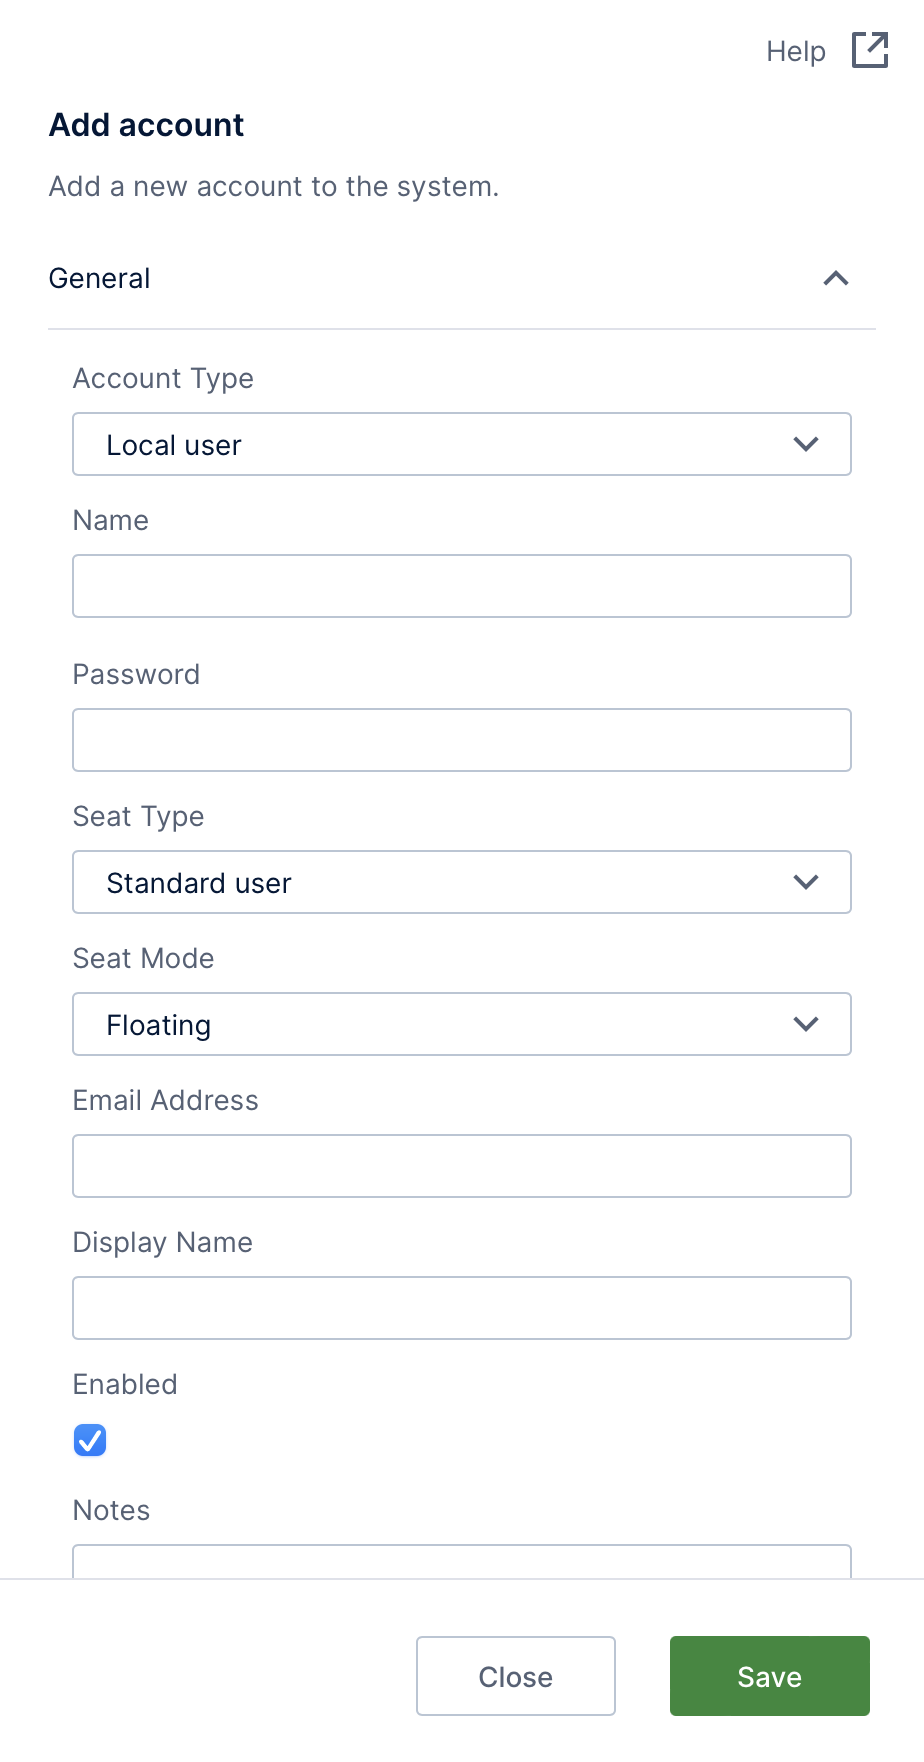
Fill in the general details for the account, such as:
- Account Type - Choose between a Local user, Windows user, or Windows group account. If federated authentication is enabled, you can also choose External user or External group.
- Name - The name of the account (case insensitive).
- Seat Type - Choose between the following license seat types:
- Standard user - Can create views such as dashboards, reports, scorecards, and slideshows.
- Power user - Can create data connectors, hierarchies, time dimensions, metric sets, and views.
- Developer - Can do everything a power user can do, plus create data cubes and cube perspectives.
- Seat Mode - Indicate whether this account has a reserved license seat or floating seat. This option is available only for user accounts. Windows and external group accounts assign a floating seat to any virtual user they create.
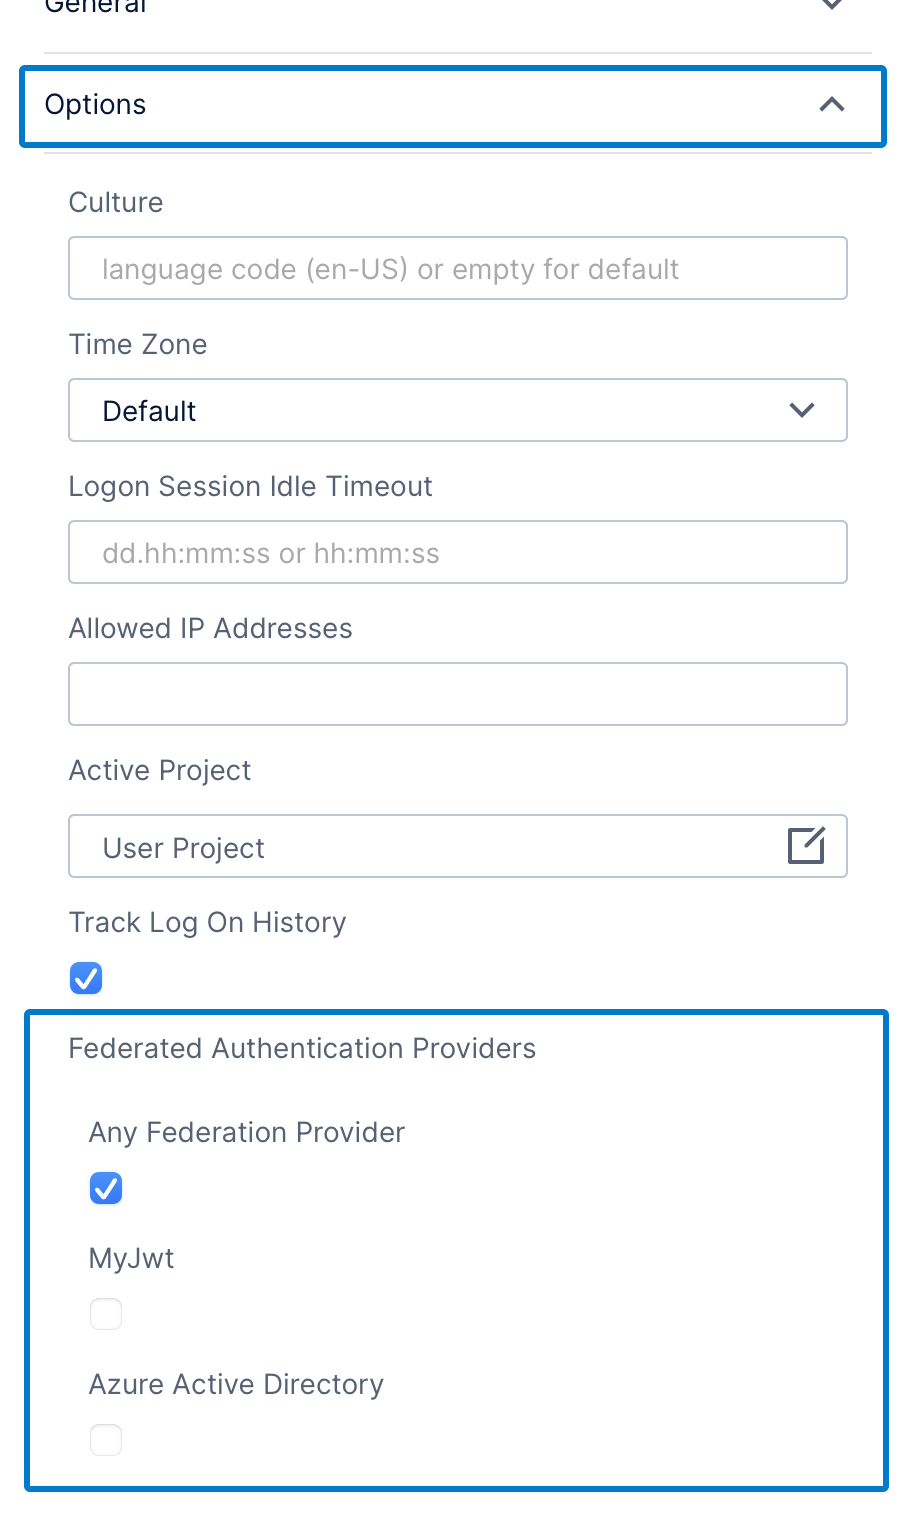
Expand the Options section for additional details for the account.
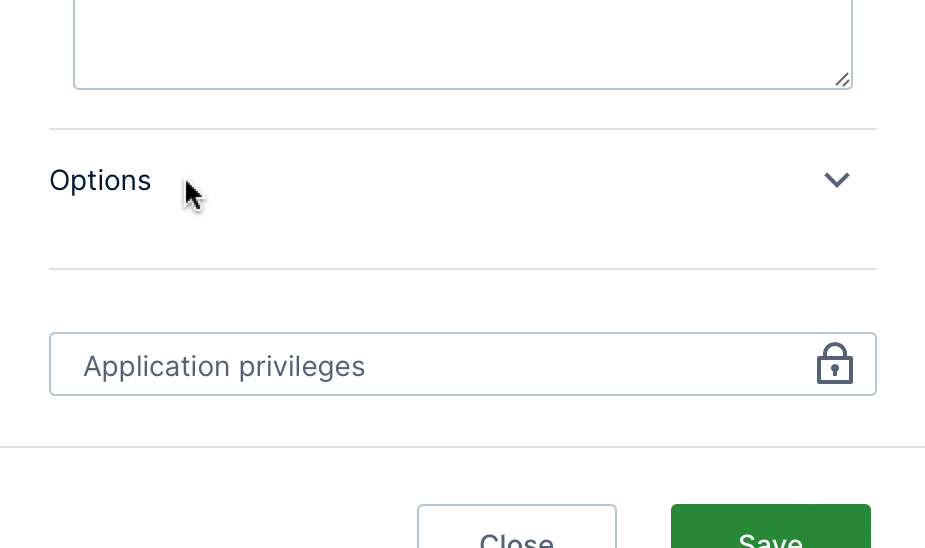
These include:
- Culture - The default culture for this account. Must be a valid IETF language tag, such as en or en-US. This information is included in the configuration of Windows and external accounts, and can only be modified here for local accounts.
- Time Zone - The time zone for the account. This setting generally does not cause any changes on its own, but it can be referred to as an attribute token or in script via the current session.
- Explicit Password Expiry Date - If set, takes effect instead of the Days Before Passwords Expire configuration setting. (The Password Never Expires option below takes precedence over the others.)
- Allowed IP Addresses - An IP address or range that the user must log on from unless they log onto the server locally.
- Active Project - The active project for the user account.
- API Account - Indicates this account is used only for API calls and consumes no seats, with no access to the UI or data retrieval calls.
Click Application privileges to allow or deny access to specific functionality or UI elements.
Click the Save button at the bottom of the dialog to create the account and update the accounts list. Once the account is created, you can edit it to perform additional actions like assigning the account to groups.
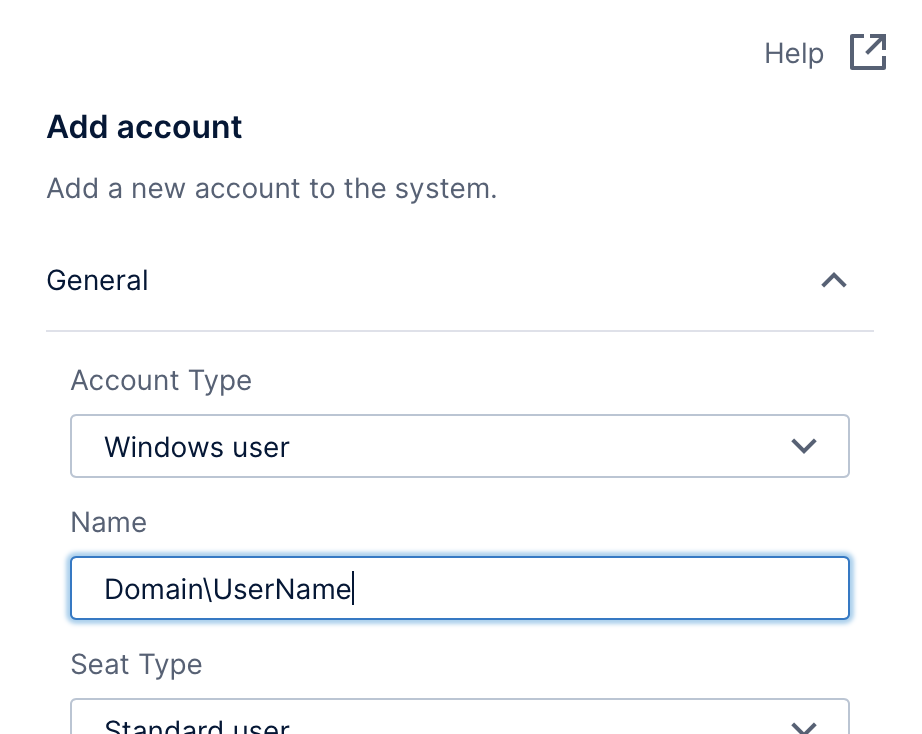
3.1. Windows user and group accounts
When Account Type is set to Windows user or Windows group, you need to specify the Windows domain in the Name field, in the format <domain>\<username>.
The advantage of using Windows groups is that you don't have to create a separate user account manually for each and every user. When a user belonging to the Windows group logs on (via Windows authentication) for the first time, a virtual user account is created automatically.
3.2. External user and group accounts
Account Type can be set to External user or External group when federated authentication is enabled. These accounts represent users that use an external application to authenticate to log on.
When creating an external account, the Federated Authentication Providers setting is available after expanding the Options section. If you have multiple authentication providers and the account should only work with certain ones, uncheck Any Federation Provider and select the applicable providers in the list.
Like for Windows groups, you don't have to create a separate user account manually if you add an external group account. When a user belonging to the external group logs on (via federated authentication), a virtual user account is created automatically.
4. View the list of accounts
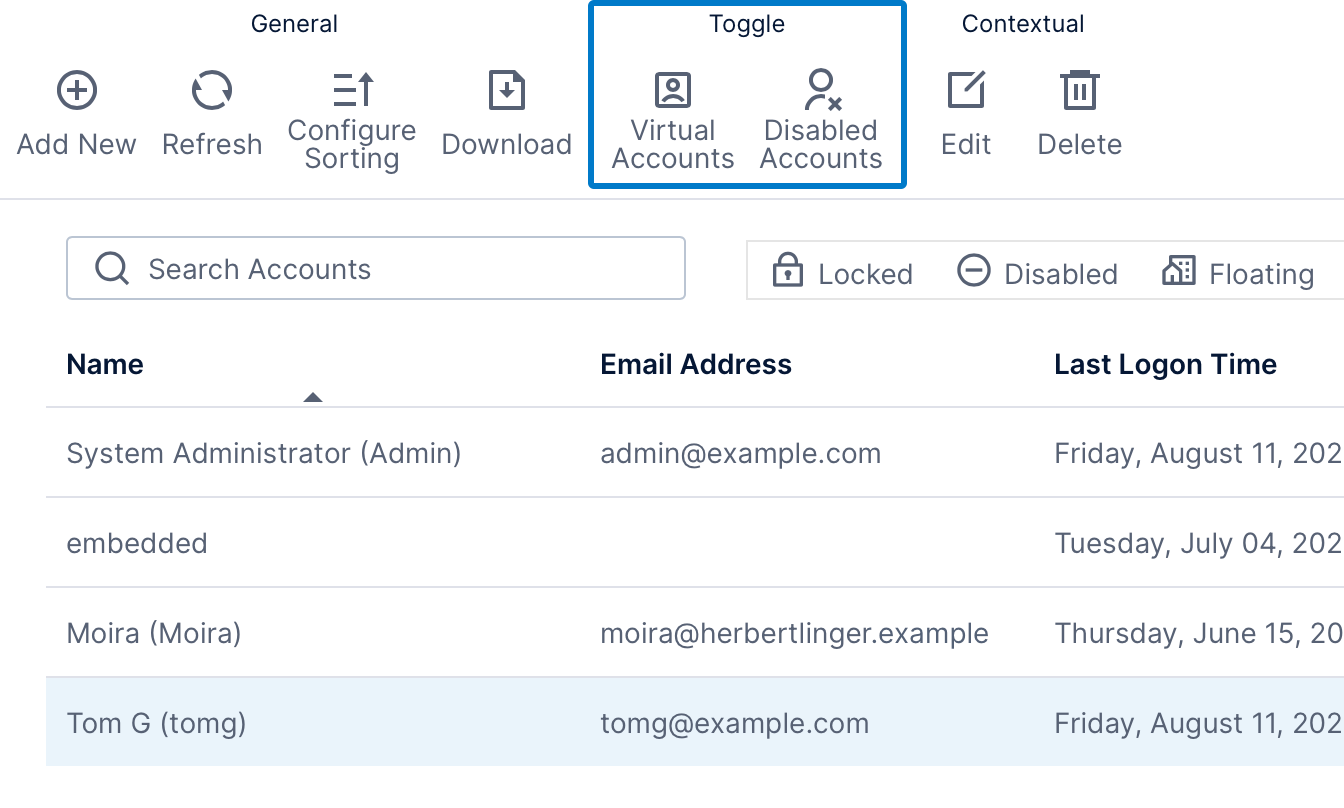
Expand the Account Service category in the Administration area and click Accounts to see a list of the accounts in the system.
By default, disabled accounts and virtual user accounts are not listed - virtual user accounts are those associated with an external group or Windows group account. If you want to see disabled or virtual accounts, click to toggle that option in the toolbar.
4.1. Edit an account
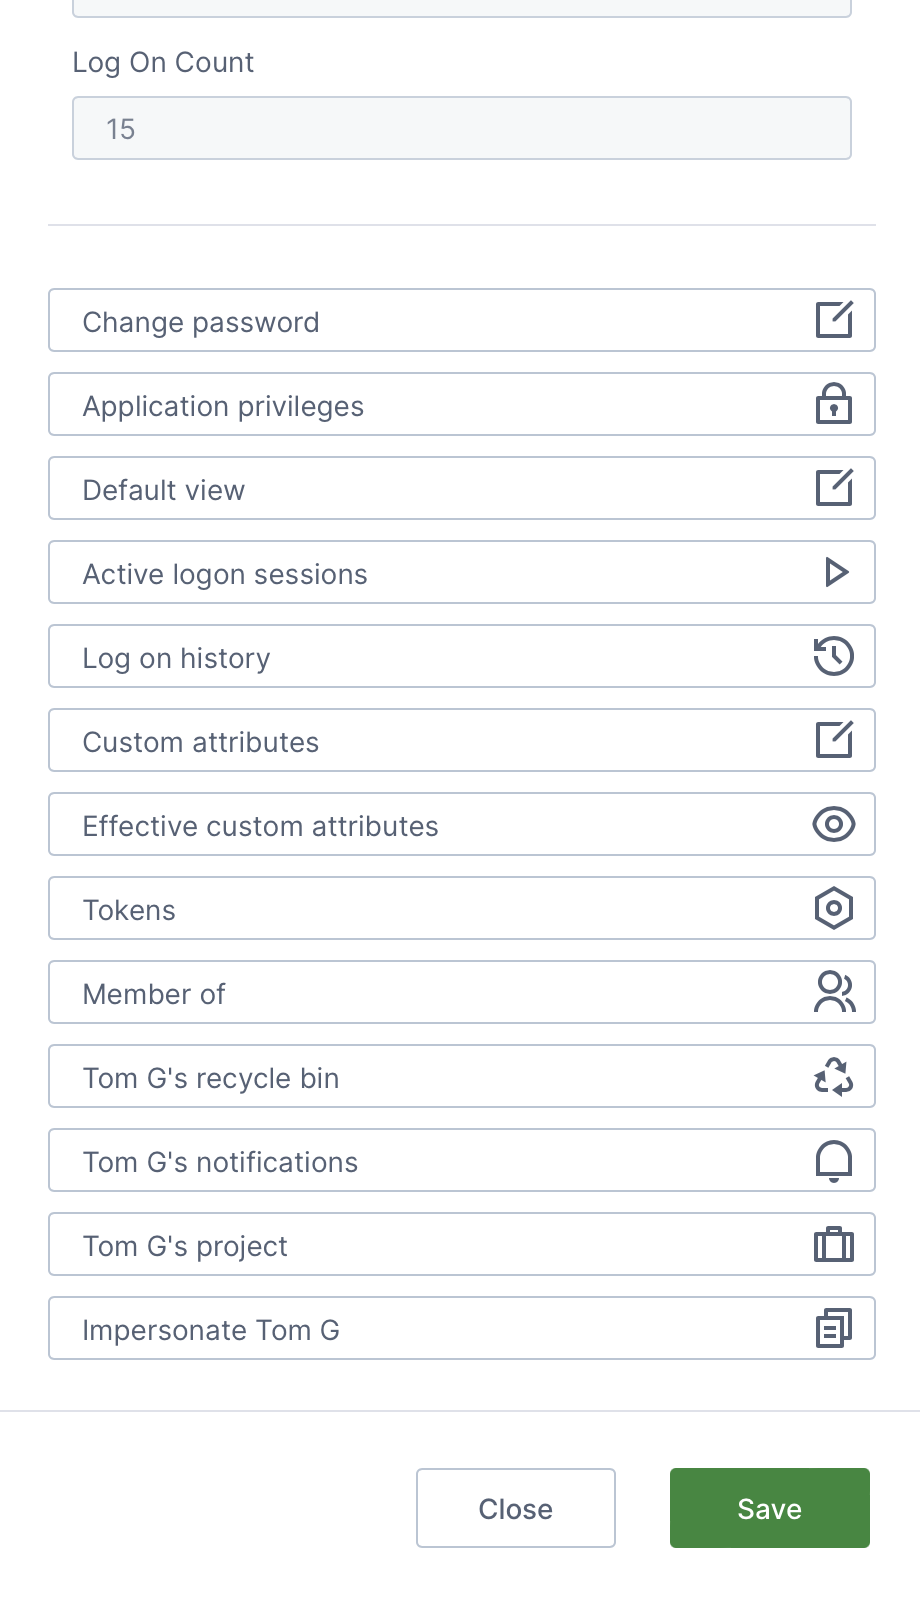
Click to select an account from the list and click Edit in the toolbar to open the Account Details dialog, which allows you to view or modify details for that account. Read-only information includes:
- Account ID
- Account Type
- Created Time
- Last Log On Time
- Last Log On IP Address
- Log On Count
You will also be able to:
- Set the account's default view (the home screen or a dashboard that appears when the user logs on).
- View and manage the account's active logon sessions and logon history.
- Set the account's custom attributes.
- View the effective custom attributes, those inherited by the account.
- Add the account as a member of an existing user group.
- Access the account's recycle bin and restore files.
- Manage the notifications created by the user.
- Manage the files and folders in the user's personal project (i.e., My Project).
- Promote a virtual user account to a regular user account.
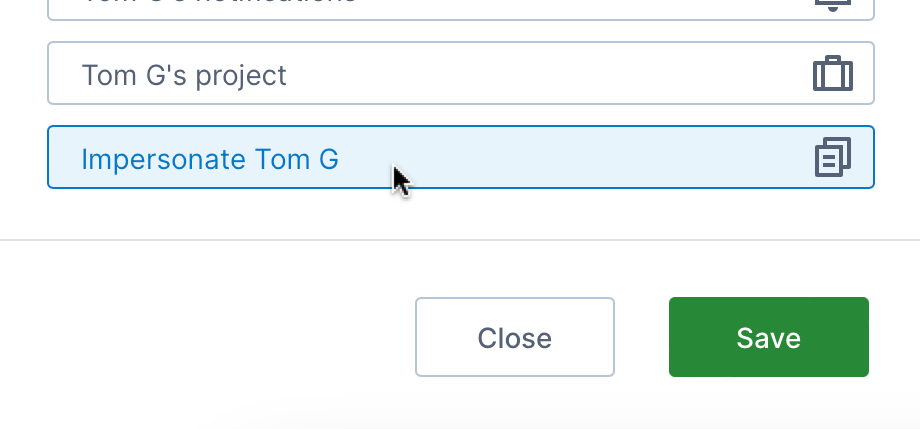
4.2. Impersonate an account
When editing an account as described above, scroll to the bottom of the Account Details dialog to click to Impersonate the user. This allows you to confirm the access and experience set up for that user.
Take note of the warning that appears, including that changes you make as the other user will persist, and click to continue. Your current session will be suspended, and you will be brought to the home screen as the other user.
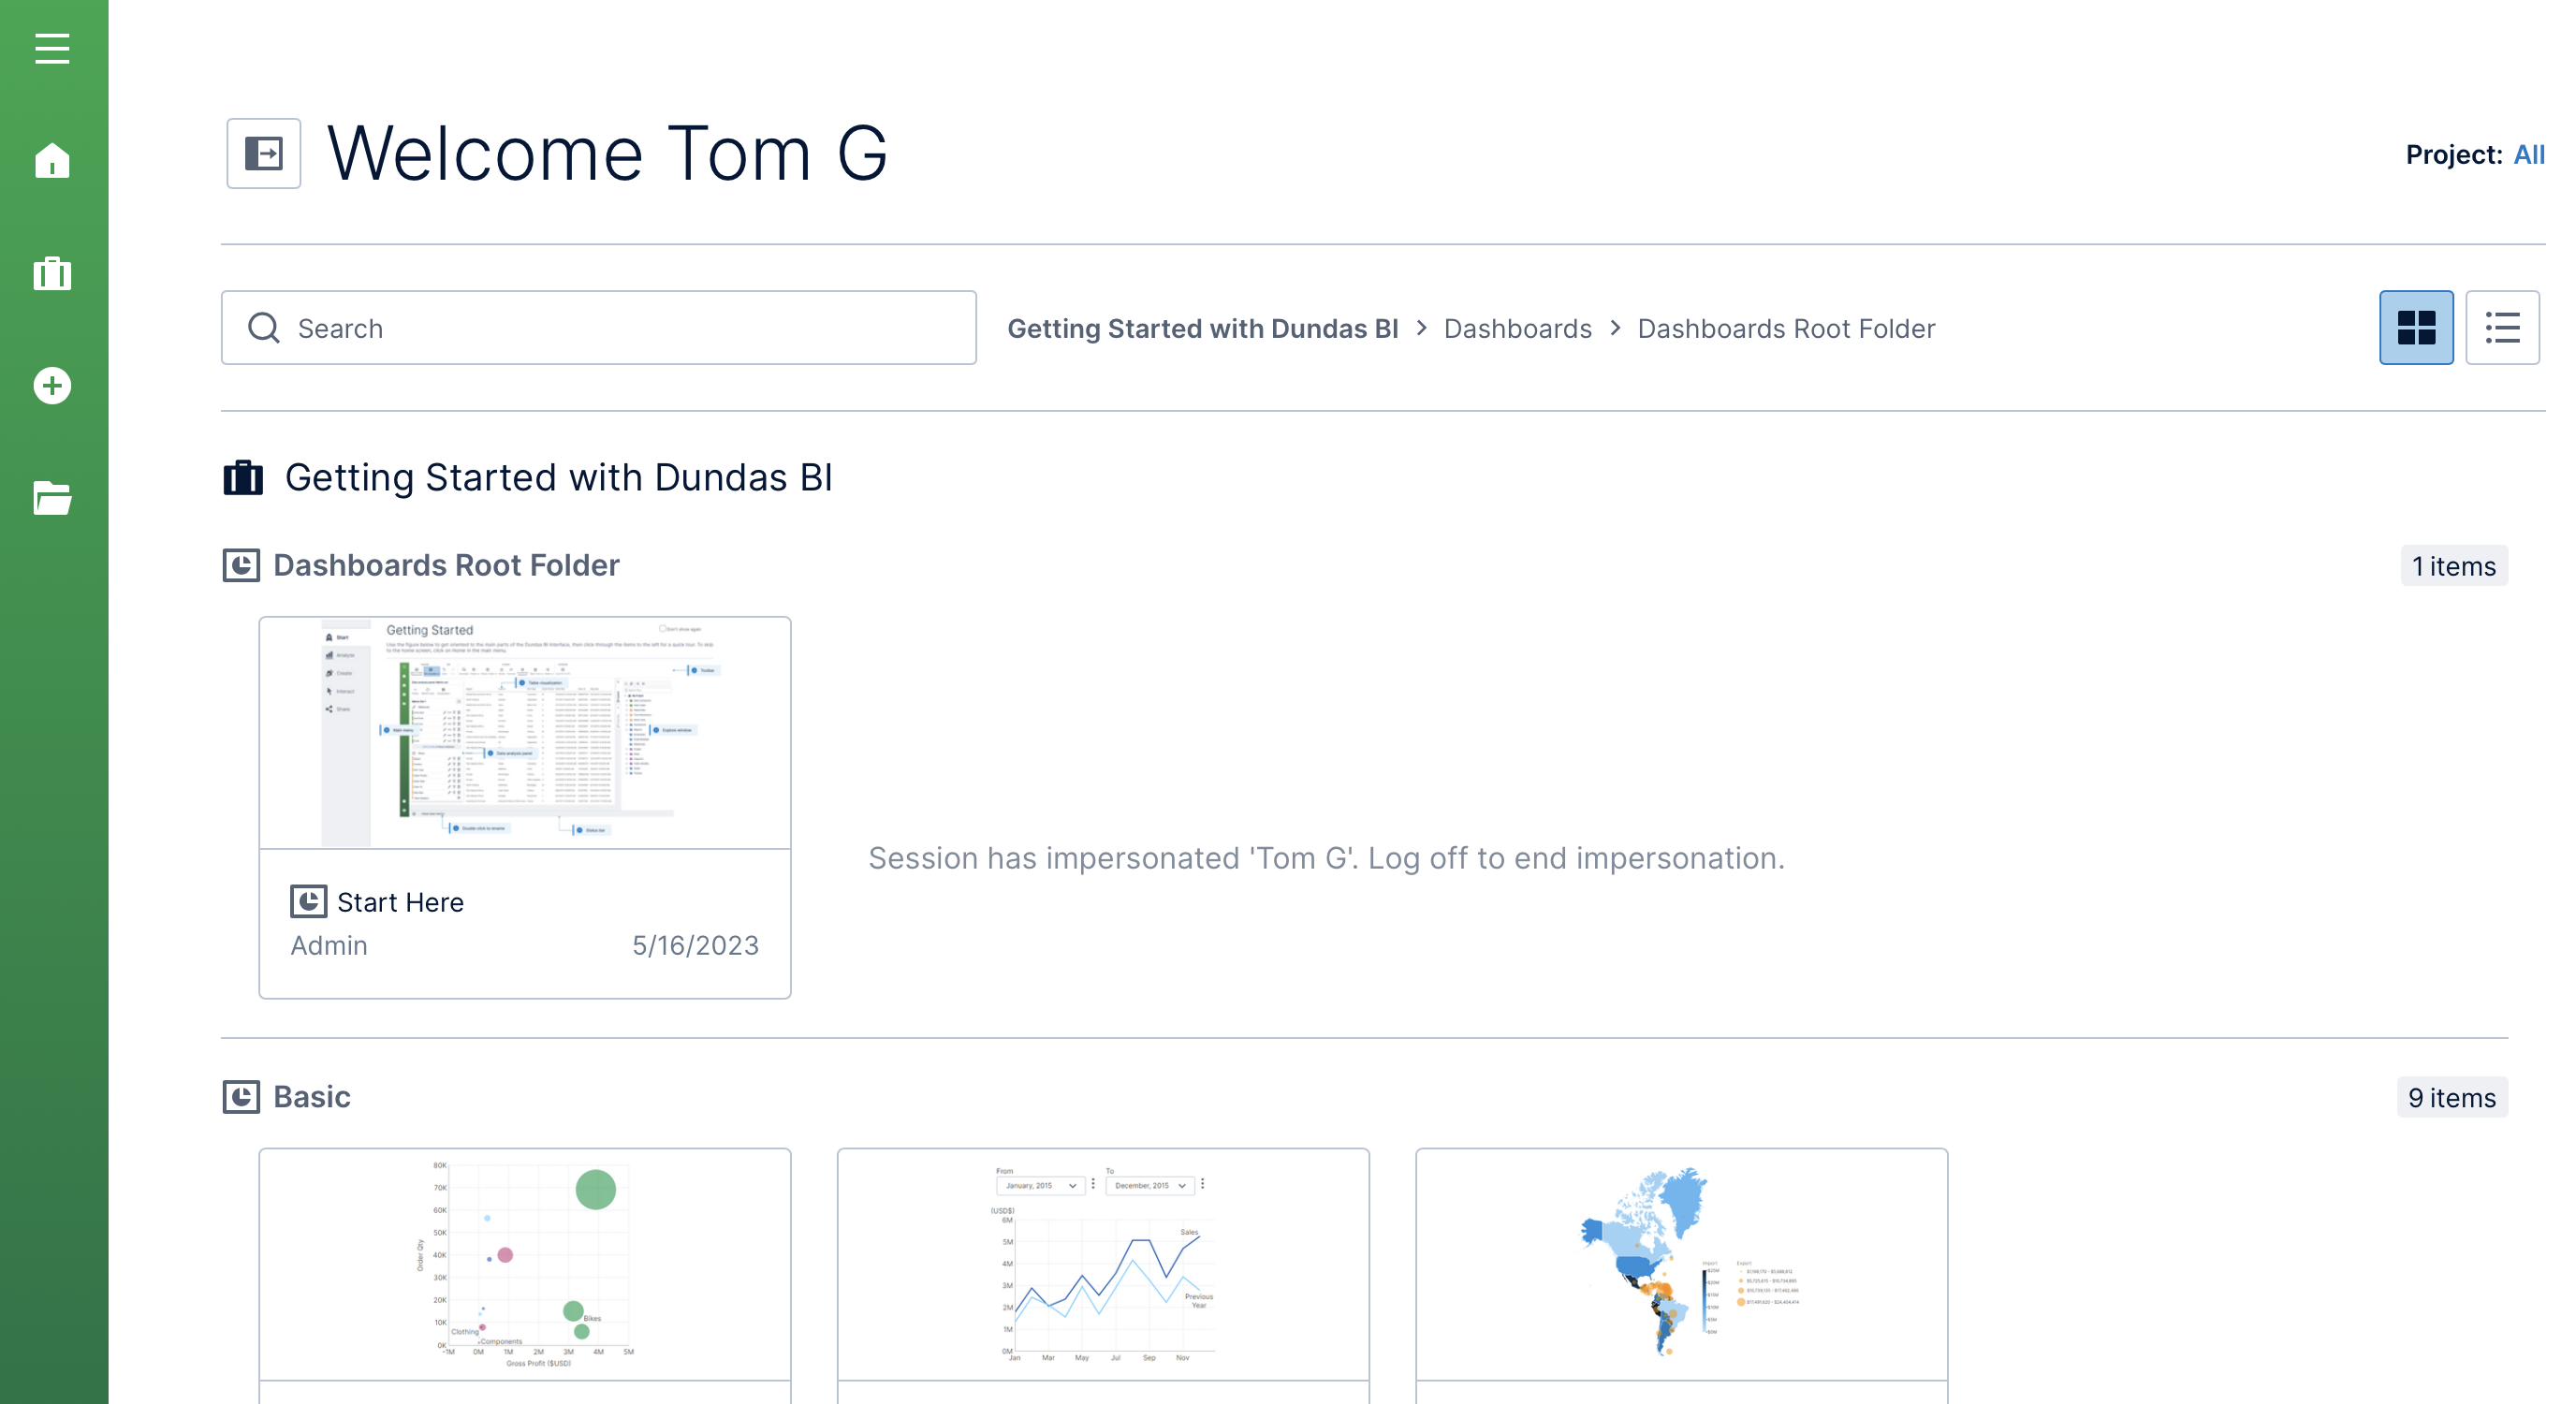
A message will now appear as a watermark at all times to remind you that you are impersonating another user. Once finished performing actions as the other user, log out from the main menu on the left to return to your original session as an administrator.
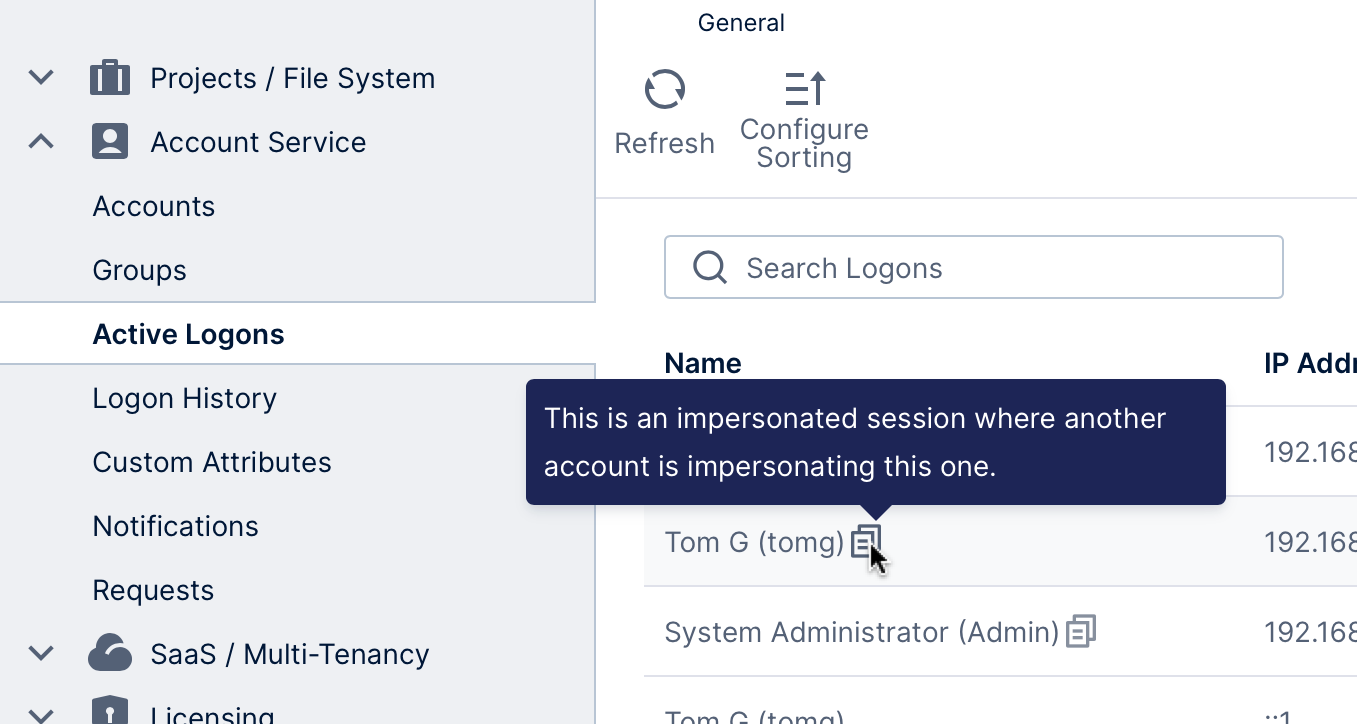
Impersonating sessions will appear with a distinct icon on the Active Logons and Logon History pages. Hover over the icon to see additional details.
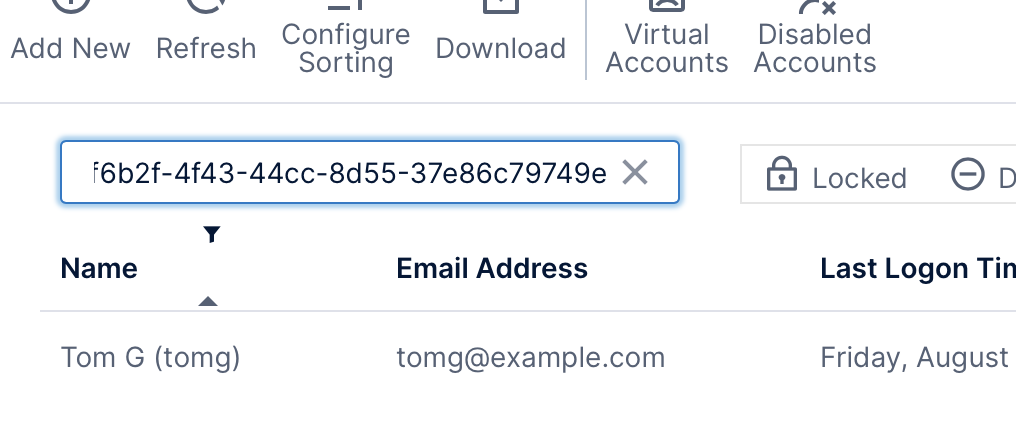
4.3. Search for an account by ID
Every account has an ID (a GUID value) associated with it. If you only know the ID of a specific account, you can quickly search for the corresponding account in the Accounts screen by pasting the ID in the Search box.
5. Add another administrator
It is recommended to add each user that needs administrative privileges to the System Administrators group rather than sharing the credentials of a single account between multiple people. Any user can be made an administrator regardless of their seat type.
To add another administrator, first create the user account if not already added. Next, edit the account and click Member of to add it as a member of System Administrators. You can also edit the System Administrators group instead and click Members to add the account.
6. Upload accounts to add in bulk
To add multiple accounts at once, you can upload a CSV file containing account information in a compatible format.
When viewing the the Accounts page in Administration, drag the file from your desktop or another app onto the page. The columns that will be imported correspond to the ones included when you click Download to obtain existing account information as a CSV file, plus an optional Password column. All columns are optional except Account Name, as indicated in this list of typical columns:
- Account Name – (Required) The name entered when the user logs in, or referring to a Windows or external account name. If an account with this name already exists, it will not be imported and a warning will be displayed.
- Account Type – One of the values of the AccountType enumeration corresponding to a type that can be created through the UI (e.g., LocalUser).
- Display Name – The name displayed for a user to other users.
- Password – The password for a user to enter to log in. If not specified for a user, a password will be auto-generated and the user will need to reset their password to log in.
- Email – An email address to associate with a user.
- Seat Type – One of the values of the LicenseSeatKind enumeration. The default value is StandardUser.
- Is Seat Reserved – Corresponds to the Seat Mode setting for a user: TRUE if the seat is reserved, or FALSE for a floating seat. The default value is FALSE.
- Tenant ID – Omit when not using multi-tenancy, to add accounts outside of any tenant, or (if you are a tenant administrator) to add accounts to your own tenant.
- Culture – If provided, use the same format as the Culture setting when adding an account in the UI.
- Direct Group IDs – If provided, the account will be added to each of the specified user-created or tenant administrator groups. If you are a tenant administrator, this applies only to groups within your own tenant.
If successful, the list of accounts will update to include the new accounts.
A dialog will appear if there are any warnings or errors. To view the full details about any warnings or errors, see the application logs.