1. Overview
This article shows how to display the top/bottom 'N' records and the sum of the remaining records using data cube transforms.
2. Set up the data cube
This example uses the Adventure Works database to display the top 4 Product IDs by LineTotal price, and the sum of the rest of the LineTotal values.
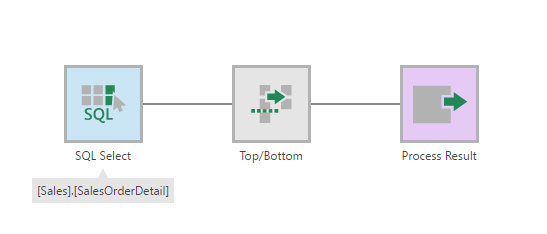
Under the data connector, find the [Sales].[SalesOrderDetail] table, and drag it onto the data cube canvas.
An automatic ETL process consisting of SQL Select transform and the Process Result is created.
2.1. Top/Bottom transform
Select the connection link and insert a Top/Bottom transform from the toolbar.
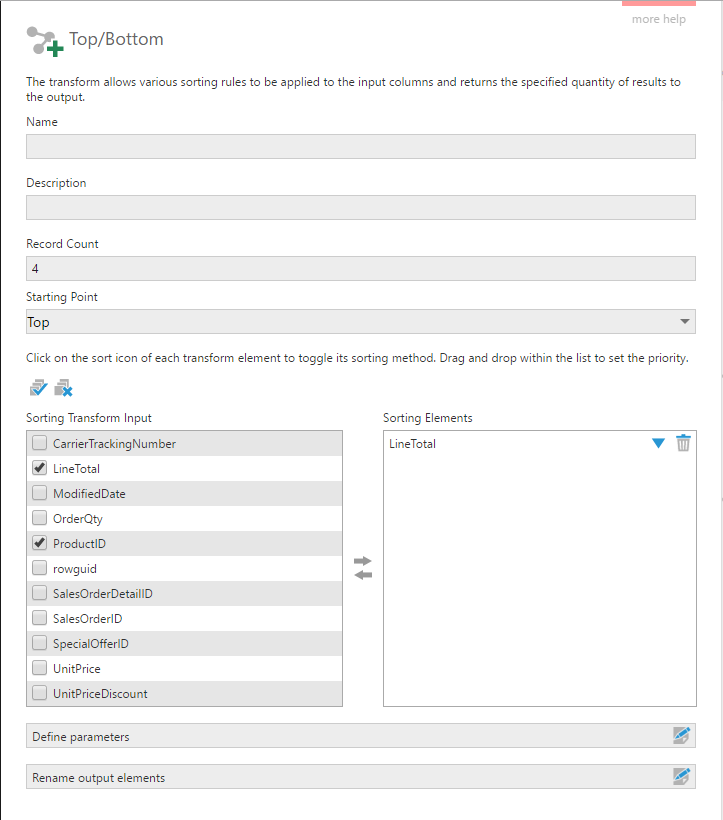
Right-click on the Top/Bottom Transform and select Configure.
In the configuration dialog, insert the number of records you want to see in the Record Count. From the Sorting Transform Input, drag the measure being sorted for the Top/bottom records (LineTotal).
2.2. Union transform
Drag and drop the [Sales].[SalesOrderDetail] table again onto the canvas to create another SQL Select transform.
Combine the outputs of the Top/Bottom transform and the new SQL Select using a Union transform.

2.3. Sort transform
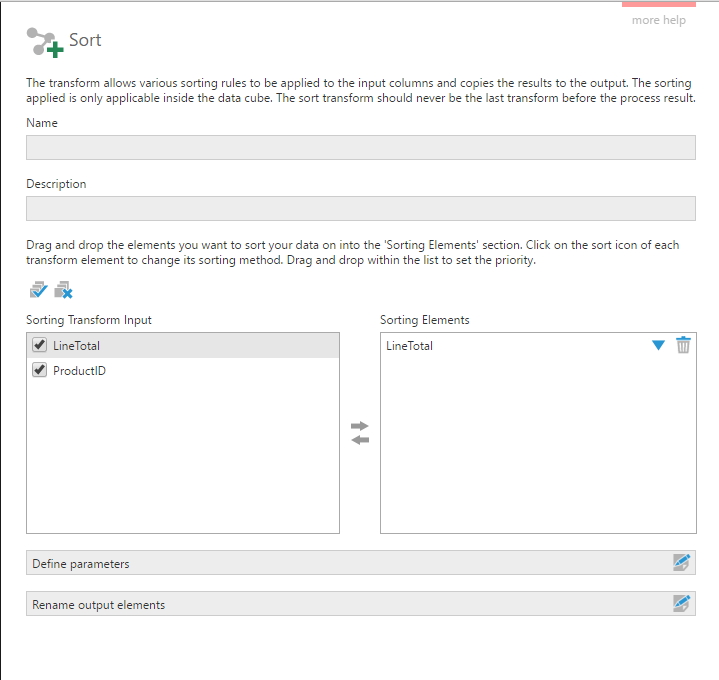
Select the connection link between the second SQL Select and the Union transform, and insert a Sort transform.
Right-click the transform and configure it. In the configuration dialog, drag LineTotal from the Sorting Transform Input to the Sorting Elements and click its arrow button to sort it in Descending order.
2.4. Rank transform
Select the connection link between the Sort transform and the Union transform, and insert a Rank transform.
Right-click on the transform and configure it. In the configuration dialog, Linetotal from Rank Transform Input to Ranking Elements.
2.5. Filter transform
Select the connection link between Rank transform and the Union transform and insert a Filter transform.
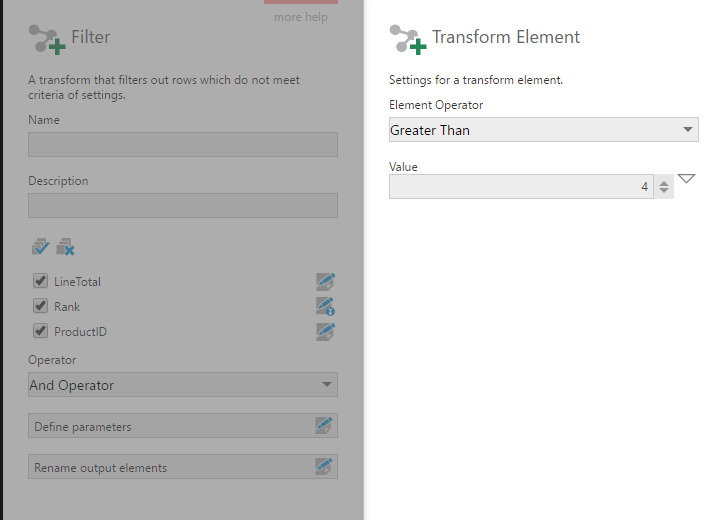
Right-click on the transform and configure it. In the configuration dialog, click the Edit icon beside the Rank element. Choose Greater Than from the Element Operator dropdown and set the value as 4. This will give us all the records that have a rank greater than 4 (i.e., all but the top 4 records).
2.6. Aggregate transform
Next, click on the connection link between the Filter transform and the Union transform and insert the Aggregate transform.
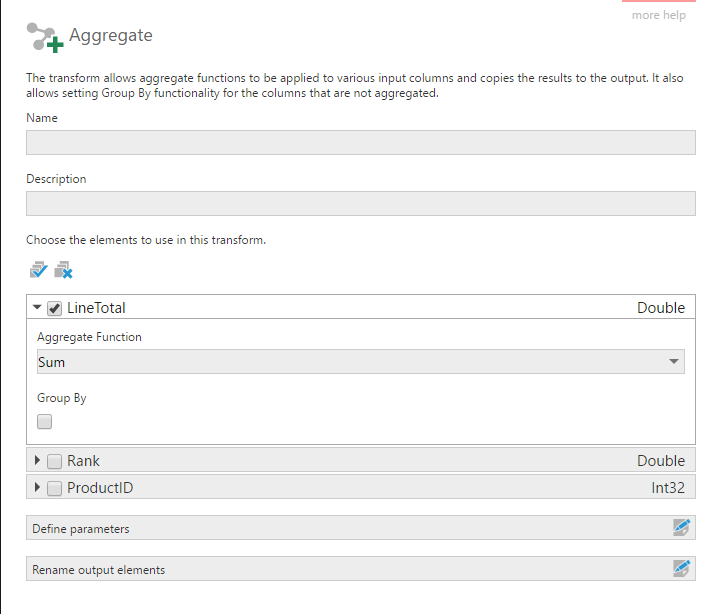
In its configuration dialog, uncheck all the measures or dimensions that are not needed. Set the Aggregate function for LineTotal as Sum and uncheck the ProductID.
3. Preview the data
Select the Union transform and open the Data Preview window.
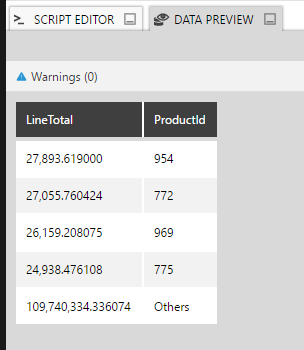
You can see the ProductIDs with the top 4 LineTotal values and an additional row with the sum of the rest of the LineTotal values.
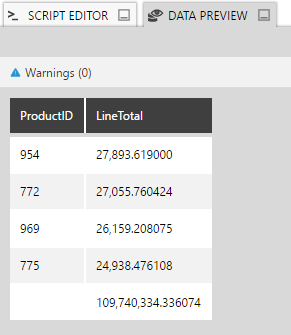
Notice that the sum of the rest of the LineTotals has an empty string for the ProductID.
3.1. Replace the empty string
Click on the connection link between Union transform and the Process Result node.
3.1.1. Data Conversion transform
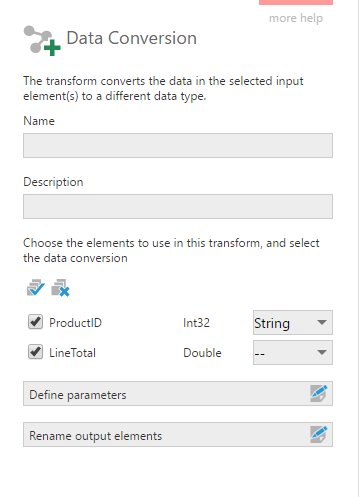
In our case, ProductID contains numbers and not yet strings (text), so we will insert a Data Conversion transform and configure it.
Change the type for ProductID from Int32 to String.
3.1.2. Calculated Element transform
Click on the connection link between the Data Conversion transform and the Process Result node, and insert a Calculated Element transform.
In its configuration dialog, uncheck ProductID and add a new calculated element.
Name this calculated element as ProductID. Change the Data Type to String and add the following code in the expression editor:
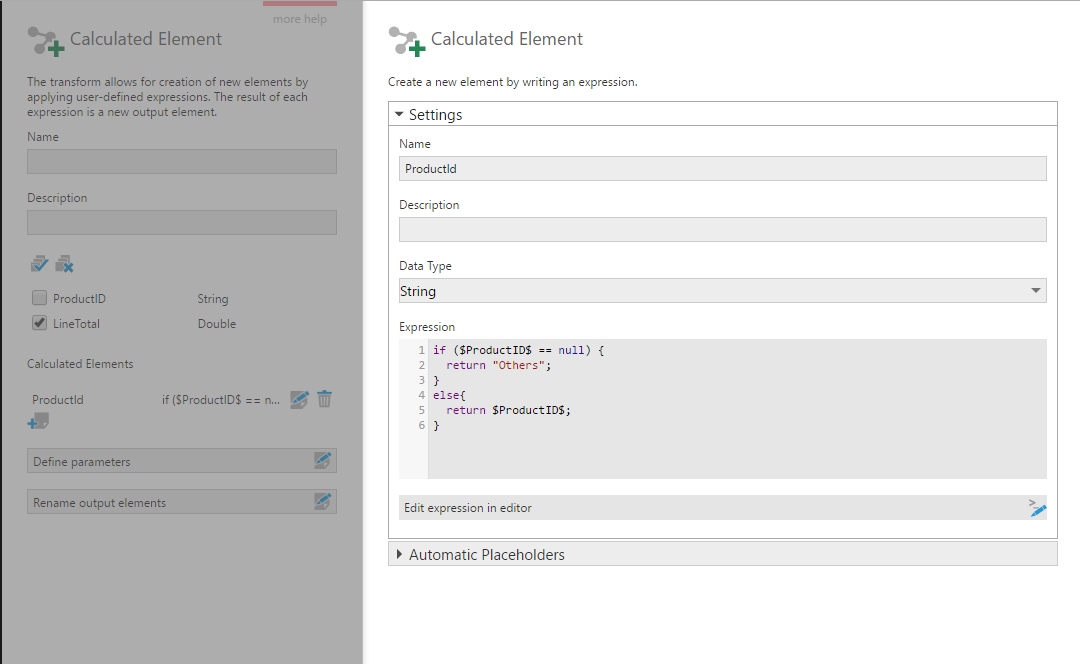
Submit the changes.
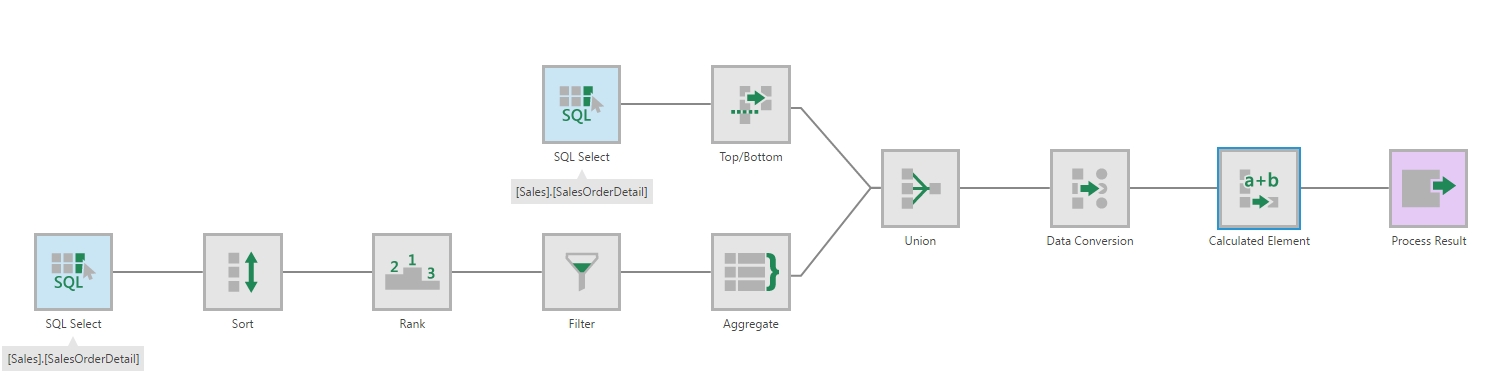
The final data cube looks like this:
Click on Process Result and preview the data in the Data Preview window.