
1. Overview
A data image is an image visualization based on your data, which you can add to your dashboard, report, scorecard, or small multiple. Use it to show a different image depending on data values.
2. Add a data image to a dashboard
This example shows you how to add a data image visualization to your dashboard.
First, find or create a data connector with data containing addresses to an image, or parts of an address, like in the following SQL Server database table.
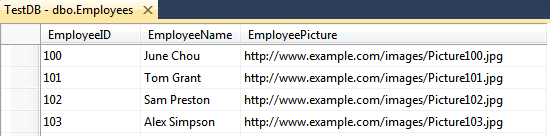
This example includes the full URL of a picture to go with each employee.
Next, create a new dashboard using the blank template.
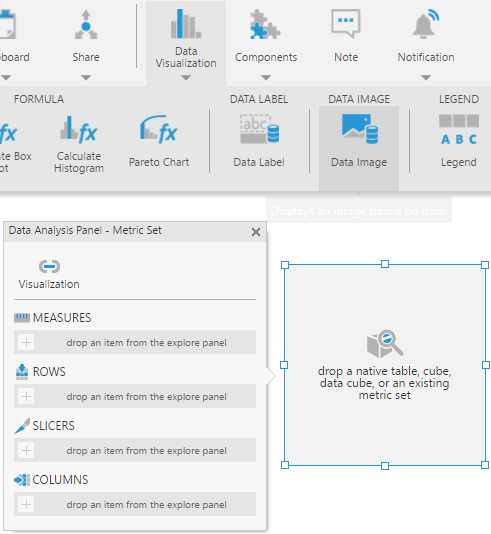
Go to the toolbar, click Data Visualization, and then select Data Image. An empty data image visualization appears on the canvas with its Data Analysis Panel opened.
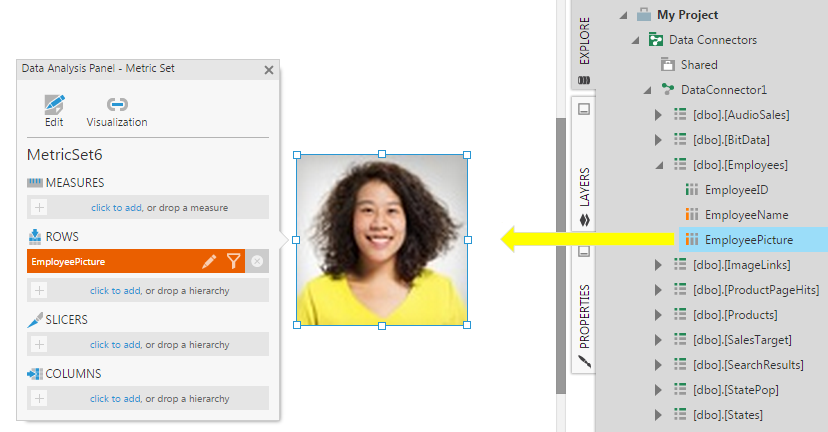
In the Explore window, expand the data connector and drag the column containing the image URLs onto the empty data image visualization (or under Rows in its Data Analysis Panel). The picture corresponding to the first row is displayed by default.
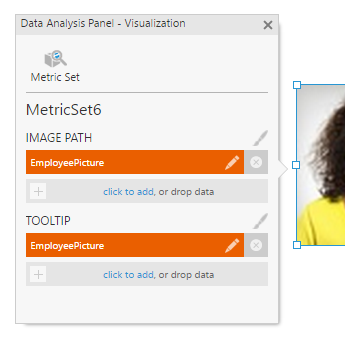
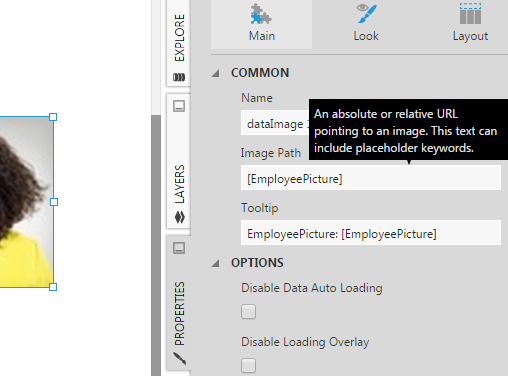
In the Data Analysis Panel, click Visualization. You'll see that your data is assigned under Image Path.
Next, go to the Properties window for the data image, and find the Image Path property, located in the Design tab under Lines & Fills in recent versions. You'll see it has a placeholder keyword corresponding to the hierarchy assigned under Image Path in the Data Analysis Panel.
If you have data that forms only part of the URL to an image, edit this property and use the placeholder keywords to insert whichever parts of the address need to change according to the data. See the image path section below for details.
You can filter your data to change which picture is displayed by the data image.
3. Use a data image in a scorecard
This example shows you how to use a data image visualization in a scorecard to produce a list of images corresponding with data. The same or similar steps also apply to report and small multiple views.
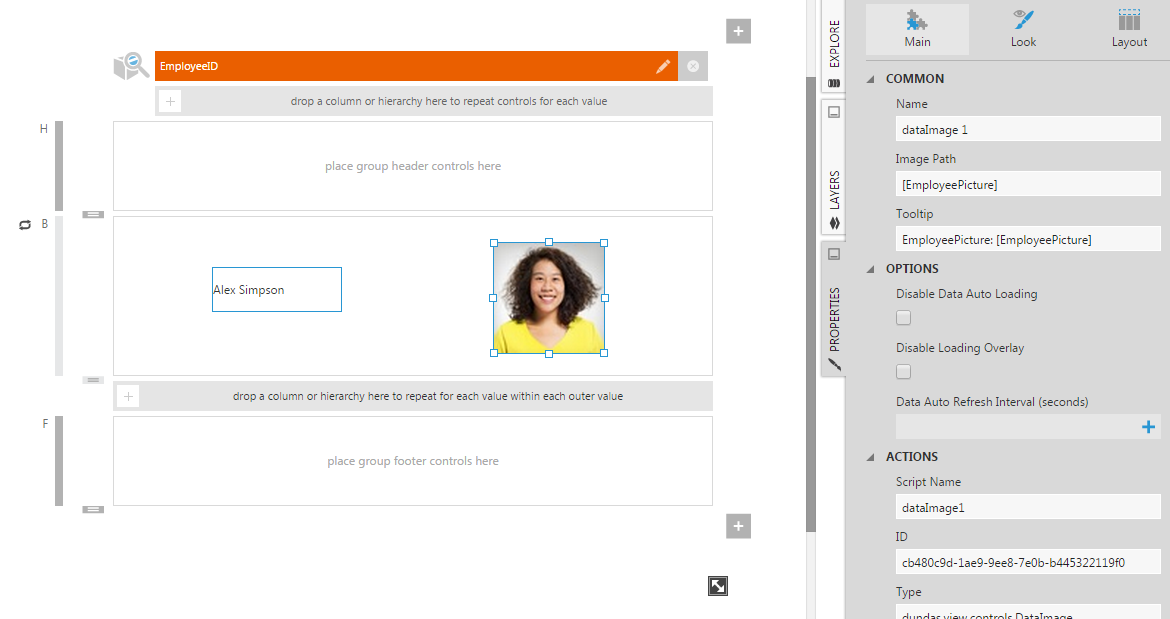
In new scorecard, drag a column identifying each scorecard row to the scorecard's grouping area (labeled drop data here to repeat...).
Add a Data Image from the toolbar and drag it into the body (labeled B along the left) if not there already. Then drag the data identifying each image onto the data image. If your data only forms part of an image URL or address, edit the Image Path property described in the dashboard example above.
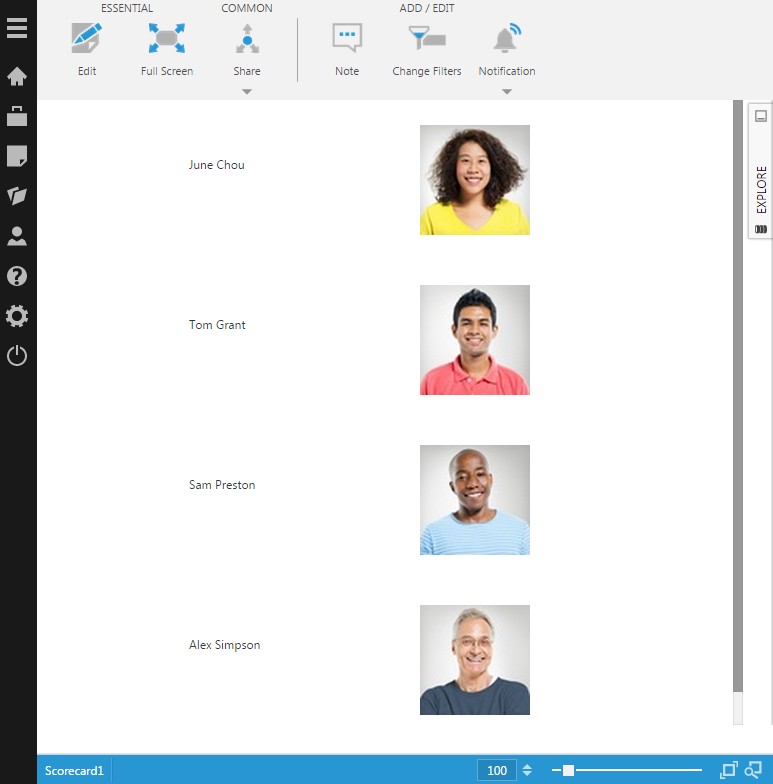
Choose View in the toolbar to see the scorecard showing a list of images.
4. Display Base64 encoded image data
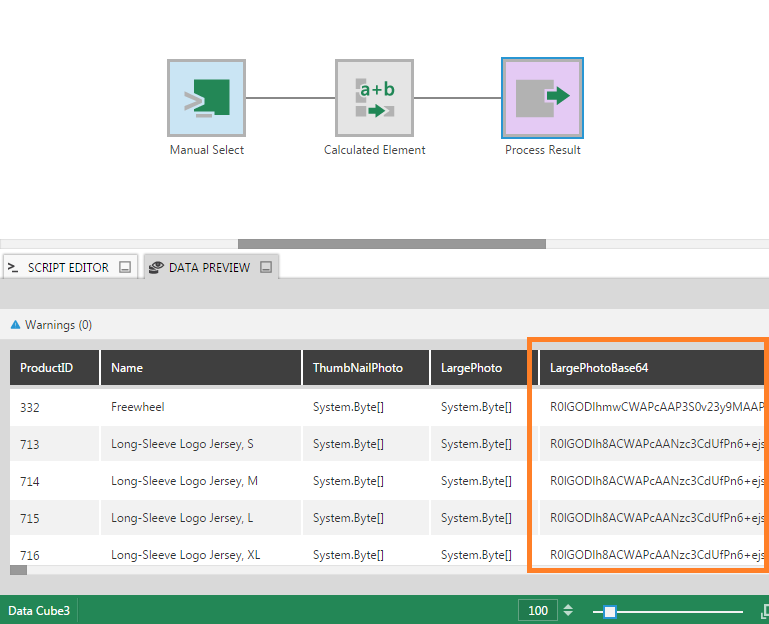
Although metric sets do not directly support the SQL Server image data type, for example, you can use a data cube to convert the binary data to a Base64 string/text encoding that can then be displayed by the data image visualization. The following example shows you how to do this using the AdventureWorks 2012 sample database, which contains image data for various products.
In our example, we have created a data cube using the following manual query against SQL Server's Adventure Works sample database:
select p.ProductID, p.Name, ph.ThumbNailPhoto, ph.LargePhoto
from [Production].[Product] p
inner join [Production].[ProductProductPhoto] ppp
on p.ProductID = ppp.ProductID
inner join [Production].[ProductPhoto] ph
on ph.ProductPhotoID = ppp.ProductPhotoID
where ph.ProductPhotoID <> 1
Regardless of whether you use a manual query, first configure the select transform and ensure the Binary columns containing the image data are checked to include them in the cube's result.
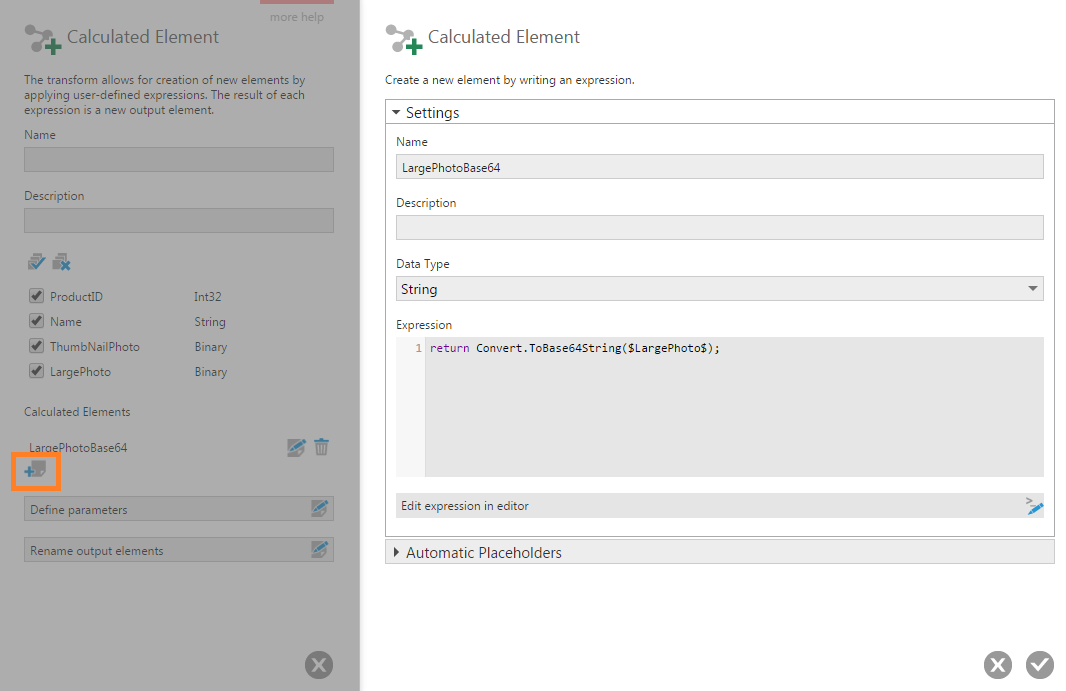
Next, insert a Calculated Element transform that will be used to convert the LargePhoto binary column to a new Base64 encoded string column, using the .NET method Convert.ToBase64String.
Double-click the transform to configure it, then click the button under the Calculated Elements section to add a new element.
Set the Data Type to String, set Maximum Length to 0 (unlimited), and use an expression like the following:
return Convert.ToBase64String($LargePhoto$);
Click the Process Result transform and then open the Data Preview window to see the Base64 encoded data.
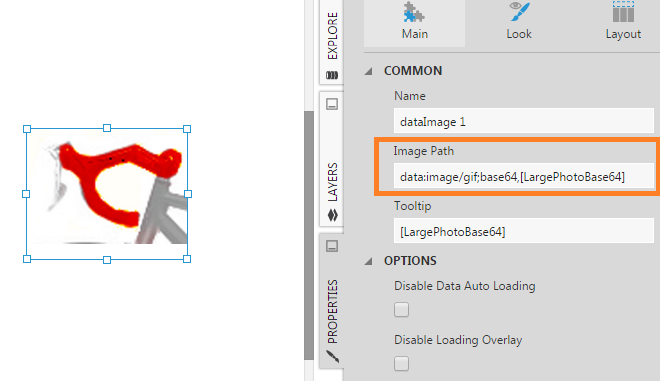
Next, find or add the data image visualization in a dashboard (or other view).
Add the base64-encoded hierarchy from the data cube to the data image or its Data Analysis Panel in order to connect it.
Open Properties for the data image and set the Image Path property to: data:image/gif;base64,[Base64 Hierarchy], where [Base64 Hierarchy] refers to your hierarchy name. If your image data is not in GIF format, the gif portion of the property setting should be changed to the appropriate file extension or media type, e.g., image/jpeg or image/png.
5. Properties
5.1. Image Path
The Image Path property specifies a URL that points to an image. The URL can be an absolute image path (e.g., http://www.example.com/images/image1.png), or a path that is relative to the root of the Dundas or Managed Dashboards & Reports website (e.g., /managed/api/resource/staticresourcefile/image1.png). As shown in examples below, you can also access an image resource you previously uploaded by its file ID, or set other URLs supported by web browsers such as a data URL to display a base64-encoded image.
You can insert one or more keywords to be replaced with values from your data. If your data does not already contain an entire path or address to an image, you can combine keywords with the missing text as shown in examples below.
| Data values | Image Path property | Resolved URL |
|---|---|---|
| ProductPicture = http://www.example.com/products/Picture200.jpg | [ProductPicture] | http://www.example.com/products/Picture200.jpg |
| ProductPicture = Picture201.png | http://www.example.com/products/[ProductPicture] | http://www.example.com/products/Picture201.png |
| ProductPicture = Picture202 | http://www.example.com/products/[ProductPicture].png | http://www.example.com/products/Picture202.png |
| ProductPicture = /Content/Images/Picture203.png | [ProductPicture] | http://dbiserver/Content/Images/Picture203.png |
| ProductPicture = Picture204.jpg | /Content/Images/[ProductPicture] | http://dbiserver/Content/Images/Picture204.jpg |
| State = Maine, City = Portland | /Content/Images/Photo_[State]_[City].jpg | http://dbiserver/Content/Images/Photo_Maine_Portland.jpg |
| CompanyLogo = 0f079222-a7ca-4a15-8e7c-b21c96ab4cbb | dundasImageResource:[CompanyLogo] | Displays the uploaded image resource with the specified file ID |
| ImageDataBase64 = RIOGODlmhw... | data:image/gif;base64,[ImageDataBase64] | Displays the base64-encoded image |