File and folder properties
1. Overview
Each item you create is treated as a file, including data connectors, metric sets, and dashboards, and these are organized into folders and projects.
The Properties dialog lets you view and edit the properties associated with a selected file, folder, or project. You can view the references to and from a file, modify security settings, and roll back to a previous version in the revision history.
2. Launching the Properties dialog
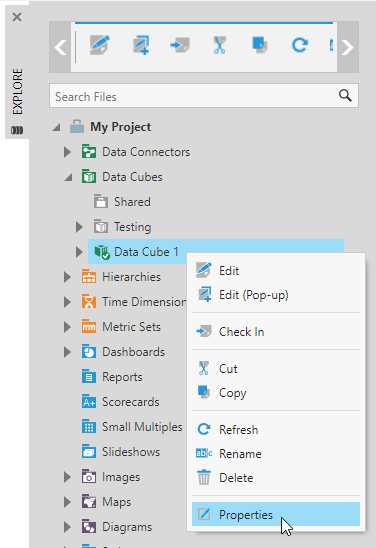
To launch the Properties dialog, select a file, folder, or project when opening a file from the main menu, from the Explore window, or another file explorer. Right-click (or long-tap) and select Properties from the context menu that appears.
3. Properties you can view and edit
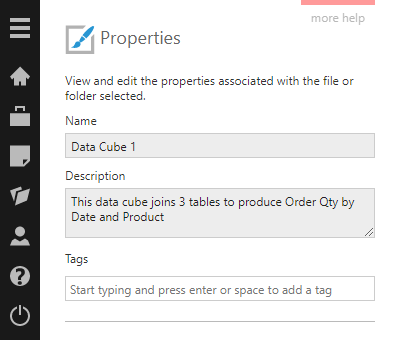
The Properties dialog lets you view and edit the following properties:
- Name - Rename the item.
- Description - Add your own descriptive text, displayed in the item's tooltip.
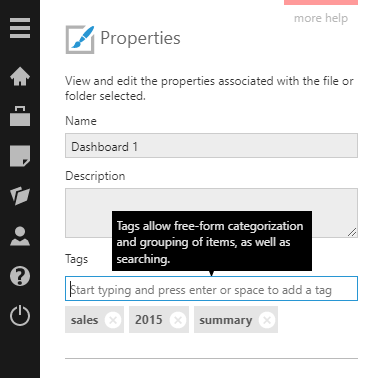
- Tags - Add tag words to help categorize your files and find them when searching.
3.1. Using tags
To add a tag to the file or folder, just type a word in the Tags box and press the Enter or Space key. You can also use the auto-complete menu that appears as you type to select an existing tag in the system.
You can remove a tag by clicking the x button beside the tag (unless the tag is inherited for a file from one of its containing folders).
Once you've added tags, you can search by them in the Explore window on many screens or in other file explorers such as in Open dialogs.
Files can be found by the tags set either on the file, or one of its containing folders.
4. Read-only properties
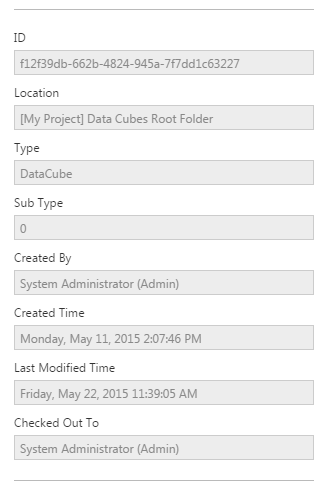
Further down are various read-only properties:
- ID
- Location
- Type
- Subtype
- Created By
- Created Time
- Last Modified Time
- Checked Out To - (if applicable)
The ID property is needed when writing scripts that reference items such as a metric set or dashboard.
5. Revision history
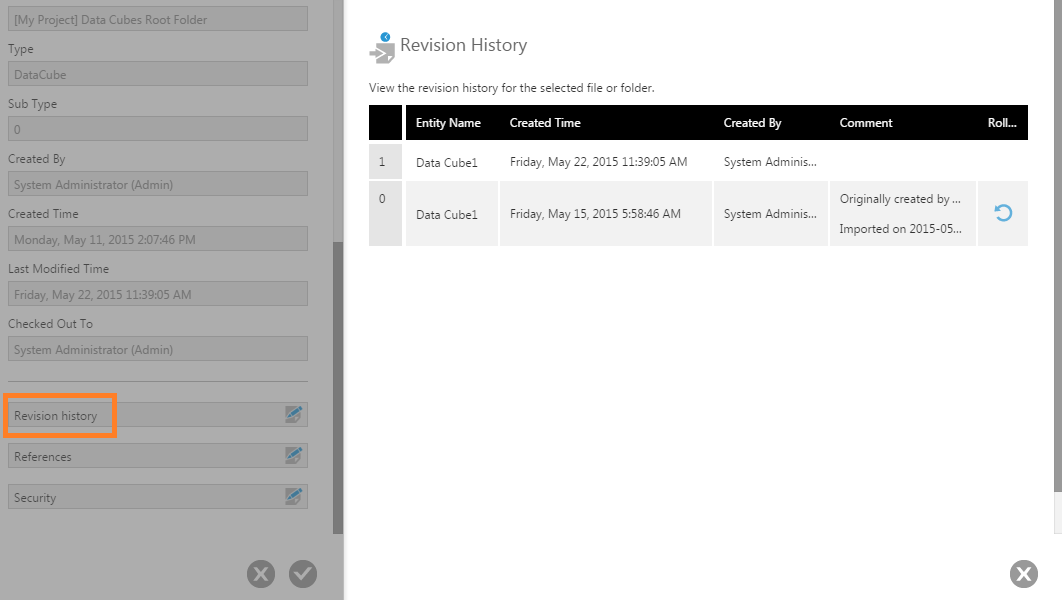
Revision history is the built-in version control mechanism. Scroll all the way down in the Properties dialog, and then click Revision history.
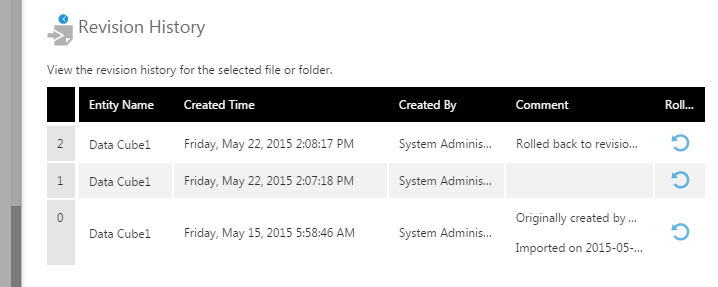
The Revision History dialog lists all of the revisions or changes that happened to this item. Each revision corresponds to a check in by a specific account, or an event such as the initial file creation. For more information about checking in items, see the Check in, check out and auto saving article.
5.1. Roll back to a previous revision
From the Revision History dialog, you can roll back the file to a previous revision by clicking the corresponding button in the Roll Back column. This is useful if, for example, you are not happy with recent changes made to a dashboard and you want to revert it to an earlier state.
In the revision history, click the Roll Back button corresponding to the revision you want to go back to.
The current file will be checked out if necessary, updated with the contents of the chosen revision, and then checked in automatically. This will create a new revision for the file.
6. References to and from the file
Scroll all the way down in the Properties dialog, and then click References to see a list of other items that reference (i.e., have a dependency on) the current file, and items that the current file itself references (i.e., references by this file).
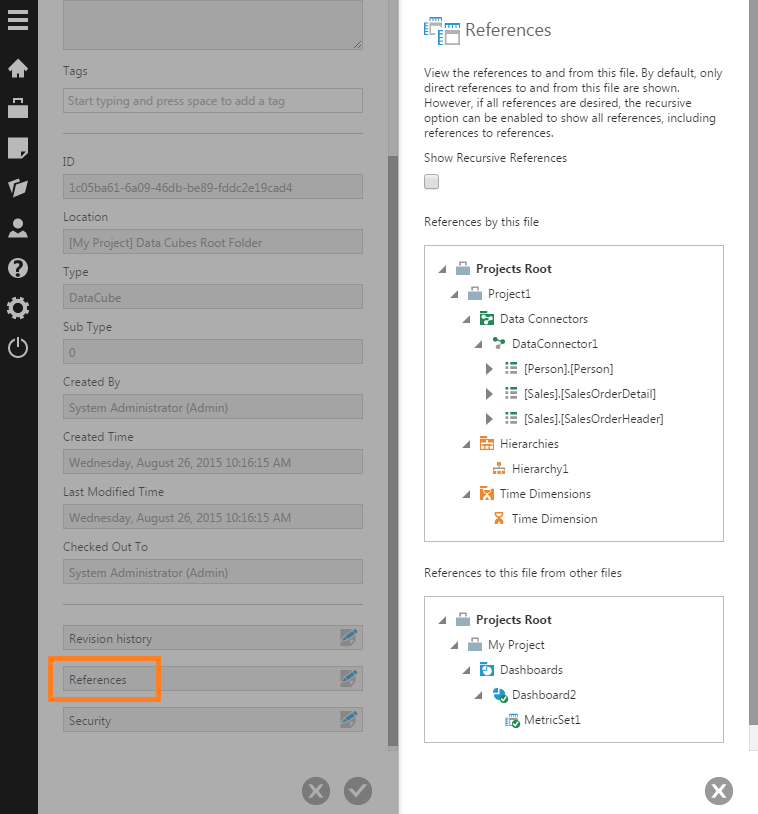
This can show the 'data lineage', tracing the data displayed in a dashboard back through each item to its source, or vice versa.
6.1. Show recursive references
By default, only direct references to and from the current file (e.g., data cube) are shown. If you want to see all references (including references to references), select the Show Recursive References option. For example, use this option to find out what data connectors are ultimately being used by a dashboard where a data cube and metric set are also used.
7. Security privileges
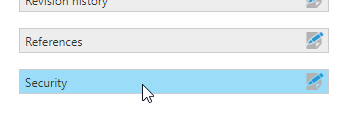
To set security privileges on the file, folder, or project, click Security at the bottom of the Properties dialog.
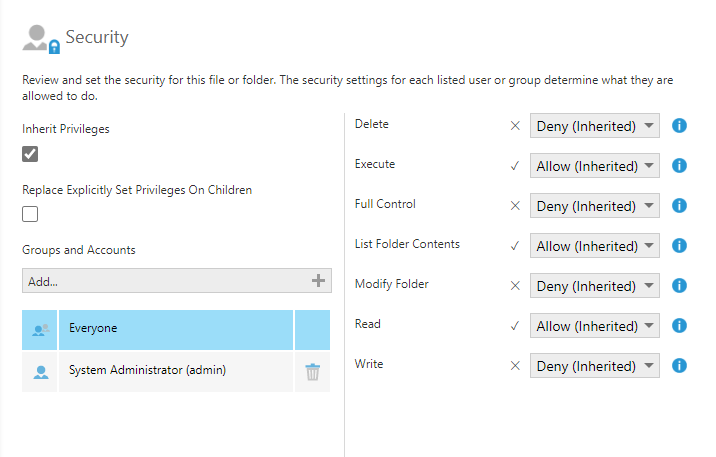
The Security dialog presents a list of accounts and groups. For each account or group, you can allow or deny various privileges (e.g., Read, Write, Delete).
7.1. Inheritance
Security privileges set on a folder or project are inherited by default by the files contained within it, allowing you to configure security for all of its contained files at once. To create new subfolders, right-click a folder and choose New Folder, then right-click files to Cut and right-click a folder to Paste, or drag files while holding the Shift key on the keyboard.
The checkboxes in the Security dialog determine whether files inherit privileges from their parent or not:
- The Inherit Privileges checkbox determines whether this file or folder inherits privileges from the file or folder containing it. When a privilege is inherited, a blue information icon appears that you can click to find out where it was set.
- Select Replace Explicitly Set Privileges On Children to make all files and folders contained within this one inherit the privileges you are setting. This checkbox takes effect when the dialog is submitted and will not remain checked if you return later, instead it clears any explicitly set privileges on contained files or folders so that they inherit from their parent.
7.2. List of security privileges
| Privilege | Description | Remarks |
|---|---|---|
| Delete | The privilege to delete a file. | |
| Execute | The privilege to execute a file. |
This privilege has to be granted on anything that acts as a data source:
For example: to use a metric set, the underlying data cube, data connector, and tables must have at least an Execute privilege. Note A manual select ignores the privileges on the native structure of a data connector (tables, views, etc.). |
| Full Control | The privilege to fully control a file, folder, or project. |
Full Control implies everything, including changing security privileges – meaning when this privilege is inherited from the containing folder or project, it implies that Full Control is granted regardless of other settings. For example, granting this privilege on a project automatically implies that the assignee of the privilege is a "project administrator" who implicitly has the Full Control privilege granted on anything contained in it. |
| List Folder Contents | The privilege to list all items in a folder. | Read is implied by List Folder Contents. |
| Modify Folder | The privilege to modify a folder's properties and create child items. | Read is implied by Modify Folder. |
| Read | The privilege to see a file and its contents. | Execute is implied by Read. |
| Write | The privilege to update the contents of a file. | Read is implied by Write. |
7.3. Add an account or group to the list
In order to give privileges to an account or group, it first needs to be listed under Groups and Accounts.
Click Add if needed, select one or more accounts or groups in the dialog that appears, and then click its Save button at the bottom to return to the list.
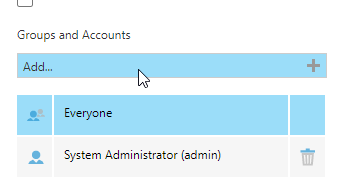
Click the delete icon to the right of an account or group in the list if you want to stop setting privileges for it directly on this file or folder.
7.4. Give file privileges to an account or group
Select an account or group under Groups and Accounts on the left, and then set Allow or Deny for their privileges listed on the right.
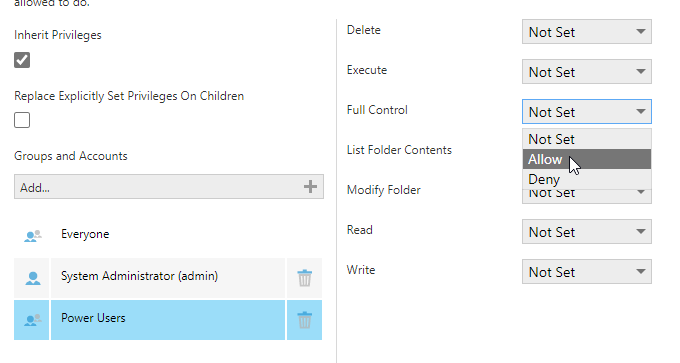
A deny assignment set for an account or one of its groups always takes precedence and cannot be overridden by assigning allow without removing the deny assignment. The account or one of its groups must also have allow assigned for a privilege for it to be granted. Note that administrators including system administrators and users with full control of the containing project or folder have all privileges and are not effectively denied any privilege.

