
Localization and multi-language support
1. Overview
Multiple languages are supported through the use of XML localization (translation) files on the server that determine all user interface text, and through culture-sensitive formatting of numbers and dates.
Text that appears in the various user interface screens, dialogs, and toolbars can be customized by editing the localization XML files and replacing whatever text you require, or by using overrides, which can help with application branding. Currently, the software does not ship with alternative language translations, but this could be added in a future release, or it can be accomplished by third parties or your own organization.
For information about localizing most types of tokens see Managing tokens. Text displayed within dashboards and other views can be localized in version 23.2 and above using code libraries.
2. Right-to-left support
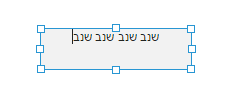
You can use right-to-left languages such as Arabic and Hebrew when entering text for display purposes in the dashboard designer.
As an example, create a new dashboard and add a Label component to the canvas.
Go to your Windows Language bar and change the input langauge to one that flows right-to-left (e.g., Hebrew).
Select the label component and click Edit Label Text from the toolbar (or the right-click menu).
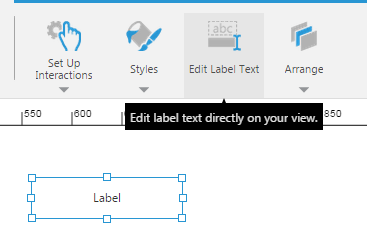
Press CTRL+SHIFT on the right side of your keyboard. This will ensure the cursor position is correct for right-to-left text entry. You can now begin typing the label text in a right-to-left manner.
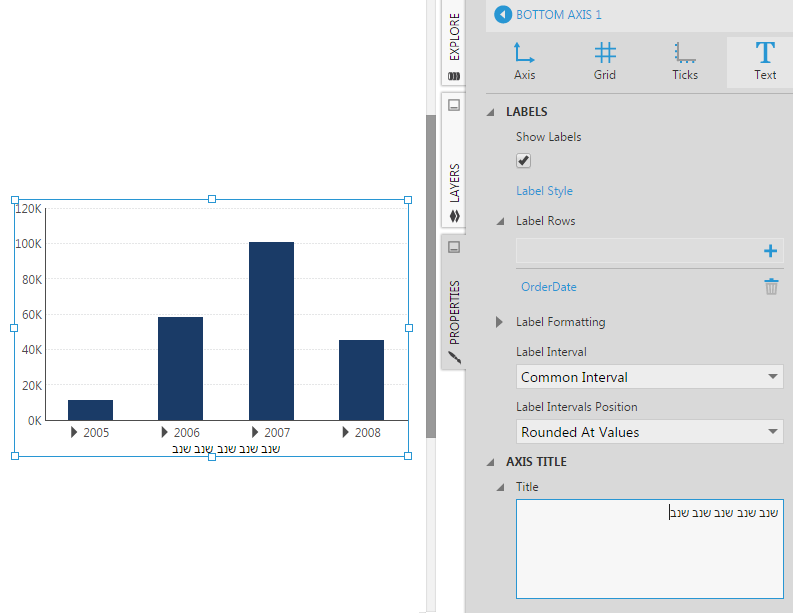
Similarly, when entering text in the Properties window for a data visualization control (e.g., Title property for a chart axis), press CTRL+SHIFT and then begin typing right-to-left text.
3. Culture settings
A locale or culture is a collection of settings that defines a user's language, country and preferences for viewing specific kinds of information in a user interface, such as numbers, dates, times, and currency. Numbers and dates will automatically display according to each user's current culture without any other configuration, with some aspects customizable through format settings.
A culture is represented as a culture name, typically consisting of two parts:
- A lowercase culture code associated with a language.
- An uppercase subculture code associated with a country or region.
Below are some examples of culture names:
| Culture Name | Language (Country/Region) |
|---|---|
| en-US | English (United States) |
| en-CA | English (Canada) |
| fr-FR | French (France) |
| fr-CA | French (Canada) |
| de-DE | German (Germany) |
An extensive list of culture names (or 'language tags') is available here and can apply whether the application is running on Windows or Linux.
3.1. Default culture
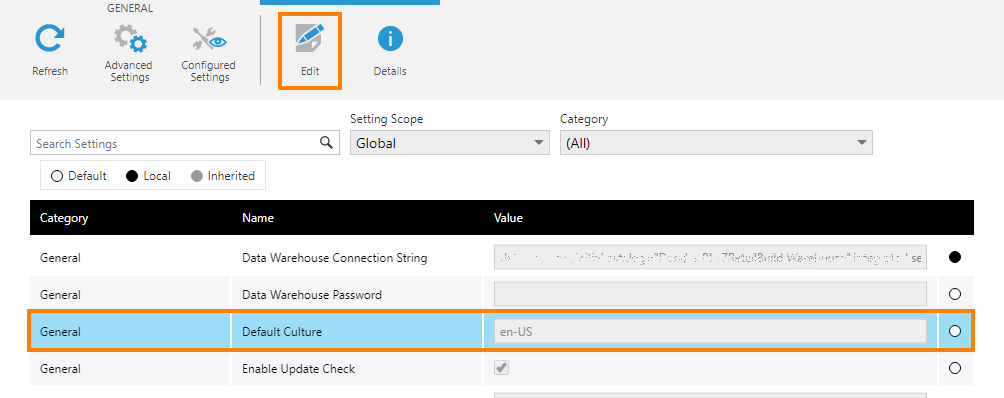
The application is installed with a default culture using the culture settings of the server, but this can be changed by an administrator via a configuration setting.
To change the default culture, click Admin from the main menu, expand Setup, and then click Config. In the Configuration settings, select the Default Culture setting and click Edit in the toolbar.
3.2. User account and group culture
A culture setting can also be applied directly to a user account or group by an administrator to assign them different cultures. This setting takes precedence over the application's default culture for each user.

3.3. Session culture
The culture can also be set for a user just for their current logon session. This culture takes precedence over their account and server culture settings described above.
The session's culture can be automatically determined by the language settings from the user's browser if the Enable Accept-Language Header Culture application configuration setting is enabled.
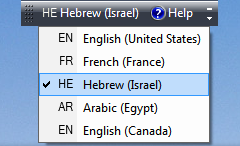
It is also possible to specify directly the culture you want to use for your logon session by navigating to the login screen with the cultureName query string parameter.
Here is an example URL for specifying a French (France) culture:
http://myserver:8000/LogOn?cultureName=fr-FR
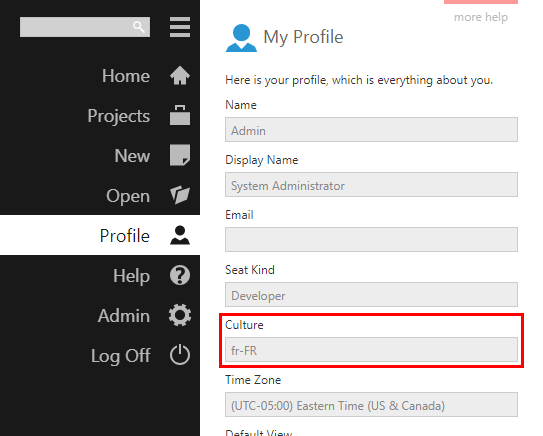
After logging on, you can confirm the culture associated with your logon session by clicking on Profile in the left menu, and finding the Culture field.
Various places in the application will display numbers and dates formatted accordingly as well.
The culture for a user's logon session is determined from these settings (in order from highest to lowest priority):
- The culture as specified via the cultureName query string parameter.
- The culture specified in the browser's language settings (Accept-Language header) if enabled in the config settings.
- The culture assigned to the user's account.
- The culture assigned to a group that contains the user.
- The default culture as specified in the application configuration.
4. Localizing for a specific culture
Most displayed text (other than numbers, dates, and data from data sources) comes from localizations. To change this text for different cultures and languages, additional localizations are needed providing the translated text for each required language and/or country.
Localization files are stored in the application and managed through the administration interface from the Localization page, found by expanding the Setup category.
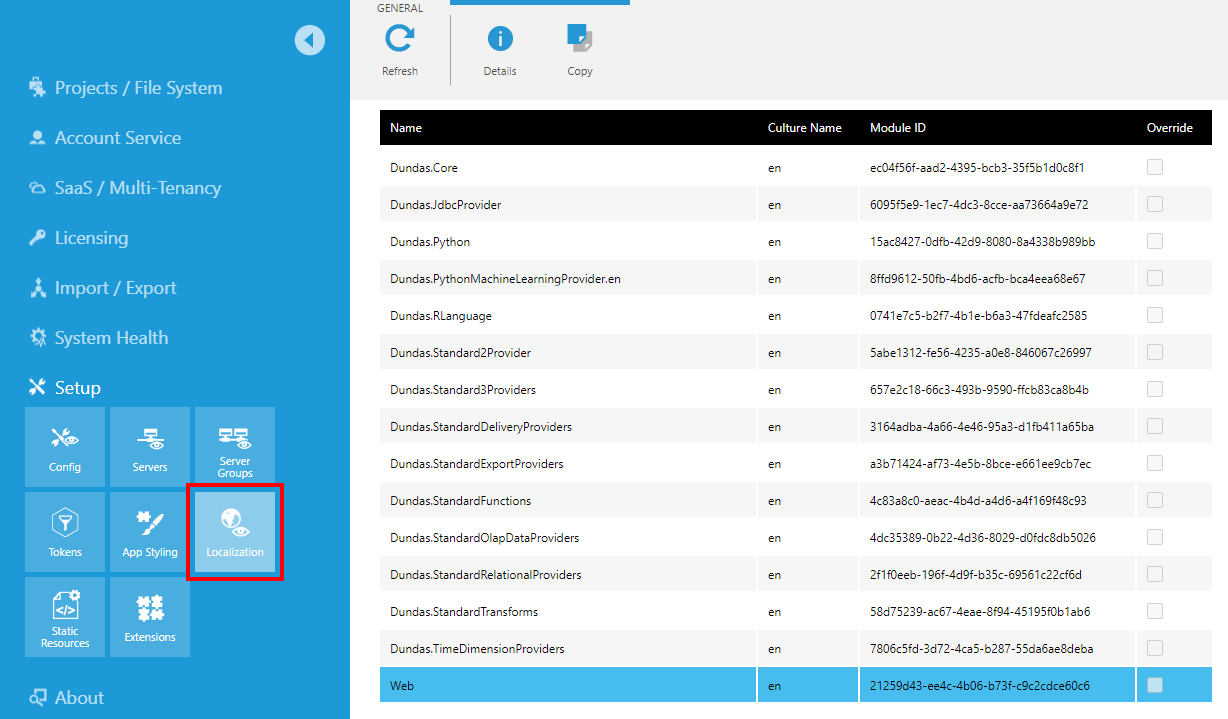
The Web.xml file, for example, contains most of the localization strings pertaining directly to the user interface (for a specific language). You can download a copy of one of the built-in localizations by double-clicking it or by selecting it and clicking Details in the toolbar, then clicking Download localization.
4.1. XML file format
A language localization file is an XML document with the following basic structure:
<?xml version="1.0" encoding="utf-8"?>
<localization>
  <group>
    <string></string>
    ... more strings ...
    ... more groups ...
  </group>
  ... more groups ...
</localization>
4.1.1. Element: localization
The localization element specifies the culture of the localization file. Only one localization element is permitted per localization file.
Example:
<localization xmlns="http://dundas.com/schemas/BI/localization.xsd"
              culture="en"
              moduleId="EC04F56F-AAD2-4395-BCB3-35F5B1D0C8F1">
    ... one or more groups ...
</localization>
4.1.2. Element: group
The group element is used to group related translation strings. Groups can be nested within another group.
Example:
<group name="LogOnView">
    ... one or more strings ...
    <group name="PasswordReset" tags="client">
    ...
    </group>
</group>
4.1.3. Element: string
The string element is used to specify the translated text for a string that appears in the application's user interface. The key attribute uniquely identifies the string and must not be changed. The actual translated text appears between the start and end tags of the string element.
Example:
<string key="GS_LogOn_Title">Log on to Dundas BI</string>
4.2. Example: Localizing for French
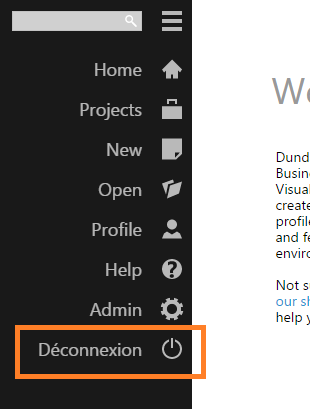
This example shows how to add support for the French (France) culture, localizing the text of the Log Off button in the main menu as an example.
- From the main menu, click Admin, expand Setup and then click Localization.
- Select the Web override file from the list of files and then click Details on the toolbar.
- Click Download localization to save the localization file as an XML file.
- In the localization file, change the values of the string elements to your target language. As an example, change the string with key GS_MainMenu_LogOff from Log Off to Déconnexion. (To complete the localization for another language, any remaining strings should also be localized, or they can be removed.)
- Select the localization Web in the list and then click Copy on the toolbar.
- Set the Target Culture to fr-FR and click Submit.
- From the list of localizations, select the fr-FR culture version of the Web localization and then click Details on the toolbar.
- Click Choose File and select the localization file saved and edited earlier, or you can paste the contents, then submit the dialog.
- In some cases you may need to clear your browser cache and/or recycle the application pool or the website for the changes to take effect.
- Navigate to <application website>/LogOn?cultureName=fr-FR and log on.
- Expand the main menu to see the localized text for the Log Off button.
5. Override mechanism
For the purposes of branding or white labeling, you typically want to modify a few localization strings (e.g., related to product name) instead of adding support for a whole new language. In this case, you can use the override mechanism to replace a subset of localization strings for an existing culture.
See White labeling the application for an example of customizing text using overrides.
