
1. Overview
This article shows you how to set up Custom Analytics for anonymous logon to facilitate implementation of a public dashboard/reporting site or kiosk.
2. Create an anonymous user
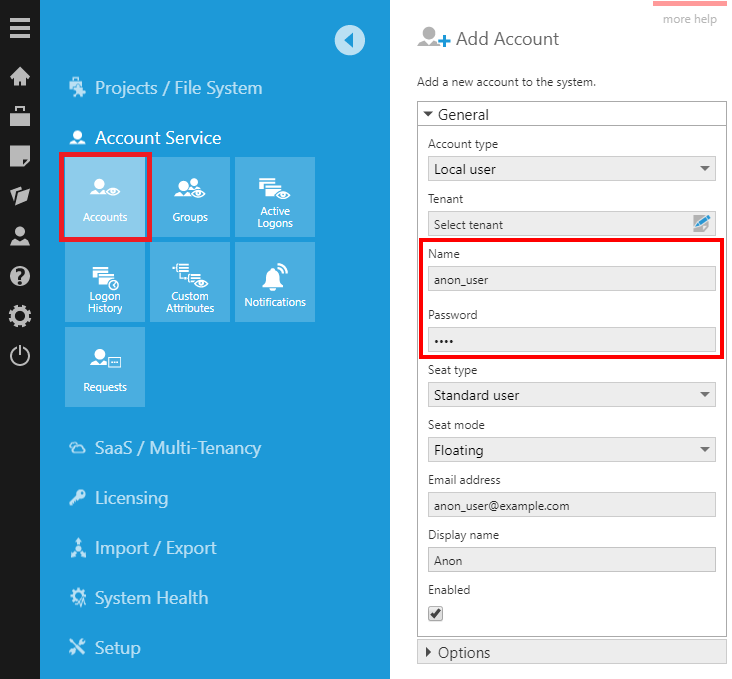
Log on to Custom Analytics as an administrator, then create a new user account to be used specifically for anonymous logon. Take note of the account name and password.
3. Modify configuration settings
In the Administration area, expand the Setup section and click Config.
In the configuration settings that are listed, set the Category to Web Application.
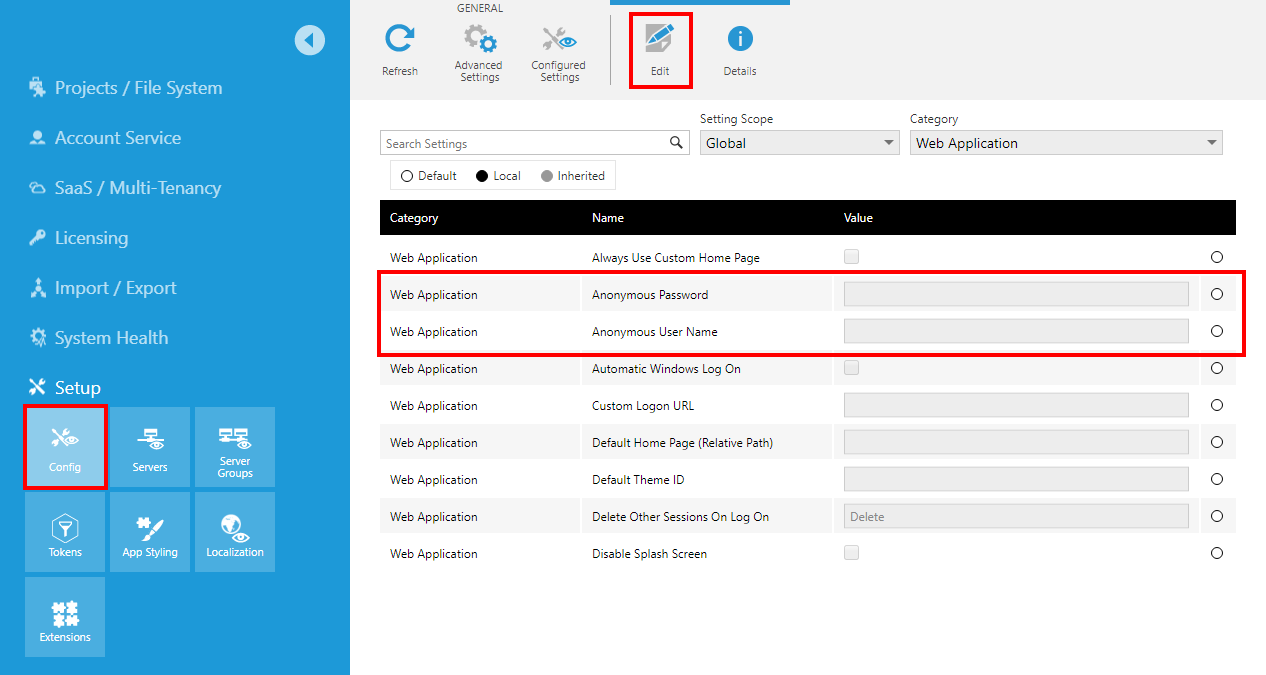
Edit the following configuration settings:
- Anonymous User Name - Set this to the account name that you created in the previous step
- Anonymous Password - Set this to the password of the anonymous user account
Anonymous logon will be enabled automatically once both settings are configured.
4. Test anonymous logon
When anonymous logon is enabled, a user navigating to your Custom Analytics website (e.g., http://customanalytics.example.com:8000/) will be automatically logged on. They will see the home screen, for example, instead of seeing the Log On screen.
An administrator may still need to log on to Custom Analytics for admin purposes. In this case, simply navigate to the LogOn page directly to see the normal Log On screen. For example, navigate to http://customanalytics.example.com:8000/LogOn/ and log on as usual.
When a user is logged on anonymously and the session expires, the page will be reloaded and they will be logged back on automatically.
When a non-anonymous user is logged on and the session expires, the user will be returned to the Log On screen and a Session has expired message will be shown.