
1. Overview
Built-in dedicated multi-tenancy support is available, allowing administrators to easily create and manage tenants (clients), with each tenant providing its own complete set of administrators, users, and groups. Tenants are specially designed to be completely isolated from other tenants in a single application instance where each tenant can have its own content, content can be shared with all tenants with optional data security based on who is logged on, or a combination of these.
Multi-tenancy is most commonly used by a SaaS solution provider who wants to enhance their software BI and analytics capabilities by integrating Logi Symphony into it (hosted OEM/ISV scenario). Other cases where a multi-tenant instance may be beneficial are deployment of a client-facing portal, or a large internal deployment that requires complete isolation between different departments/lines of business.
2. Multi-tenant instances
2.1. Access security and isolation
Access and user security is fully designed to incorporate isolation of tenants, allowing tenant users to see only the appropriate files, including dashboards & reports, data connectors or cubes, and notes. New files created by a tenant user will not be visible to users that belong to other tenants, and a tenant's users are never made aware of other tenants or users belonging to other tenants. For example, lists of users provided when sharing a link or setting up notifications are restricted to the current tenant.
2.2. Commercial alignment and licensing control
Specific allocation of licenses per tenant allows multi-tenant solution providers to match their different tenants' licensing needs. This is important in cases where the tenant buys licenses for their own users. This can allow a SaaS provider to monetize their analytics solution by selling specific licenses (e.g., Power User licenses) to their tenants.
2.3. Data security when sharing content
In a multi-tenant instance, you have the option of sharing or reusing content between tenants such as dashboards & reports, or other project files like metric sets and data cubes. For these files, you can still ensure that different data is loaded depending on the tenant of the user who is logged in.
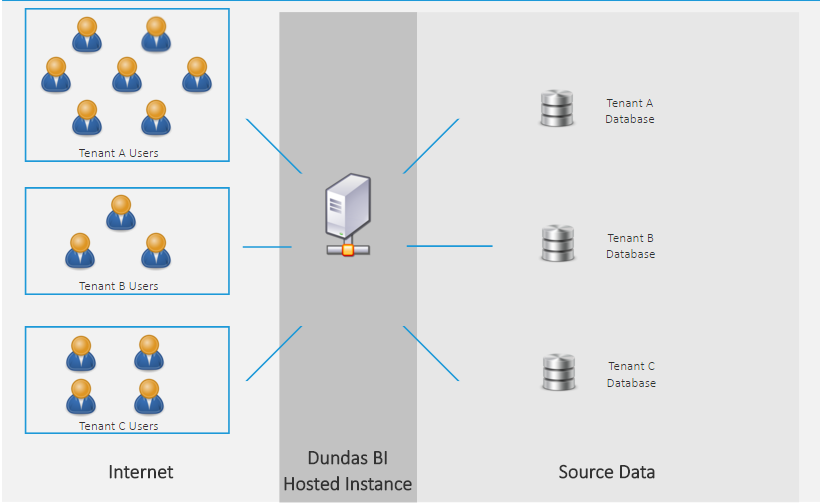
One example of this is where each tenant has their own database, but the solution provider hosts only one instance of the application. Assuming the database structure is the same across all tenants, you can display each tenant's data using a single set of dashboards and reports, for example, and reuse it across all the tenants rather than maintain a separate copy for each, by using data connector overrides.
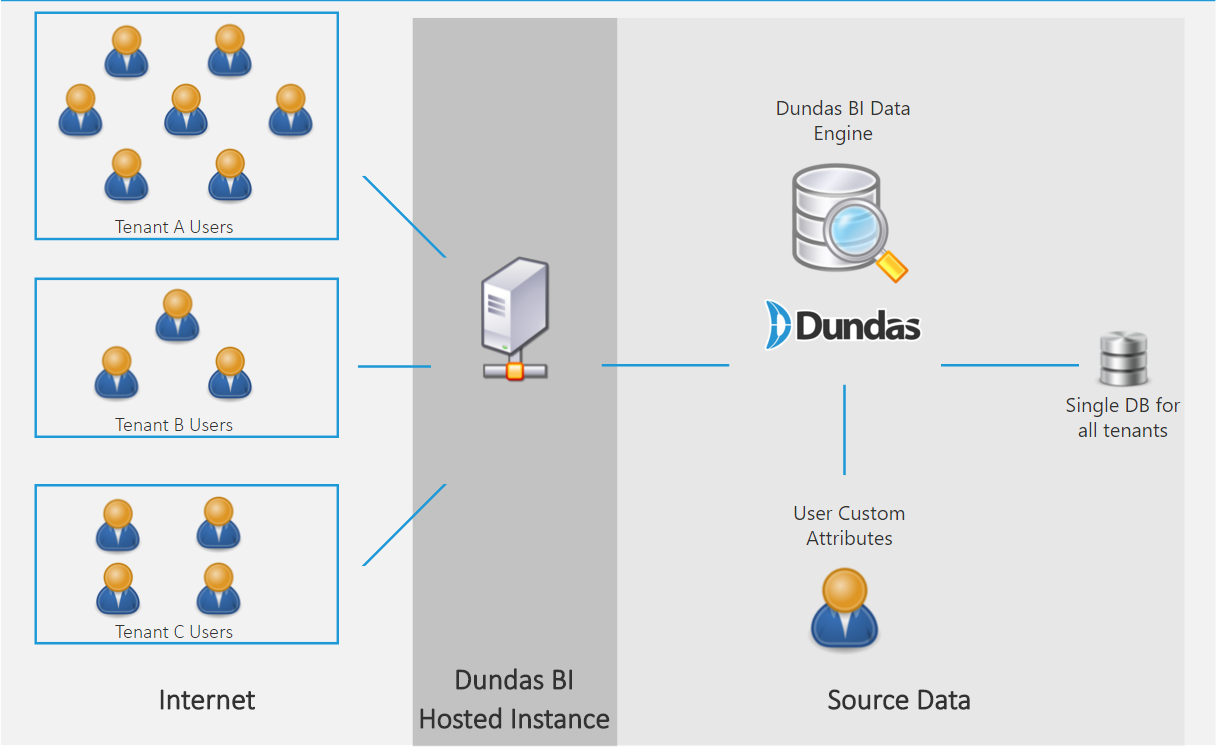
The same scenario of reusing dashboards and reports is possible using row-level security if the data for all the tenants is stored in a single database. In this case, the data of each tenant will be identified by a tenant ID or a similar field, and can be secured using custom attributes or security hierarchies, or provider security options like using SSAS roles impersonation if the data source is an OLAP cube.
3. Administering tenants
When multi-tenancy is enabled in the license, System Administrators can create and manage tenants, their user accounts, and content. Each tenant can also be assigned Tenant Administrators with the ability to manage their own users and content.
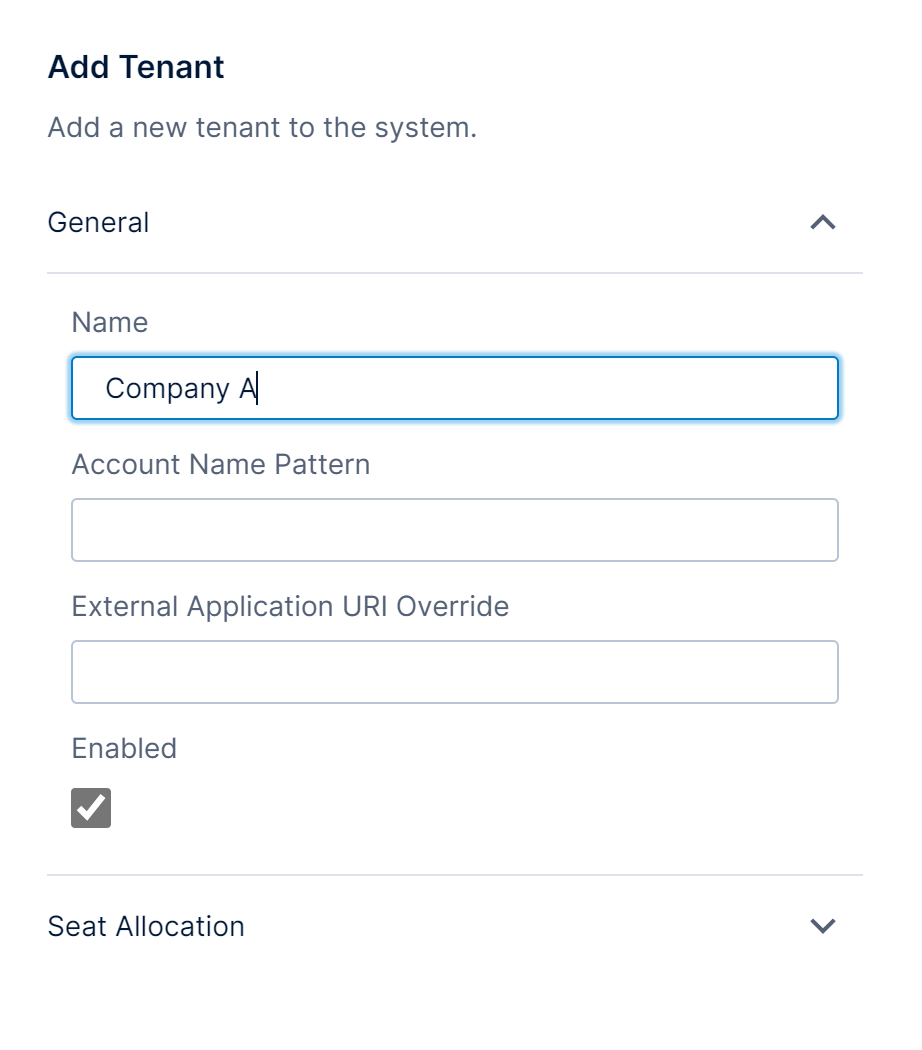
System administrators can create and edit tenants from the Tenants page in the administration area.
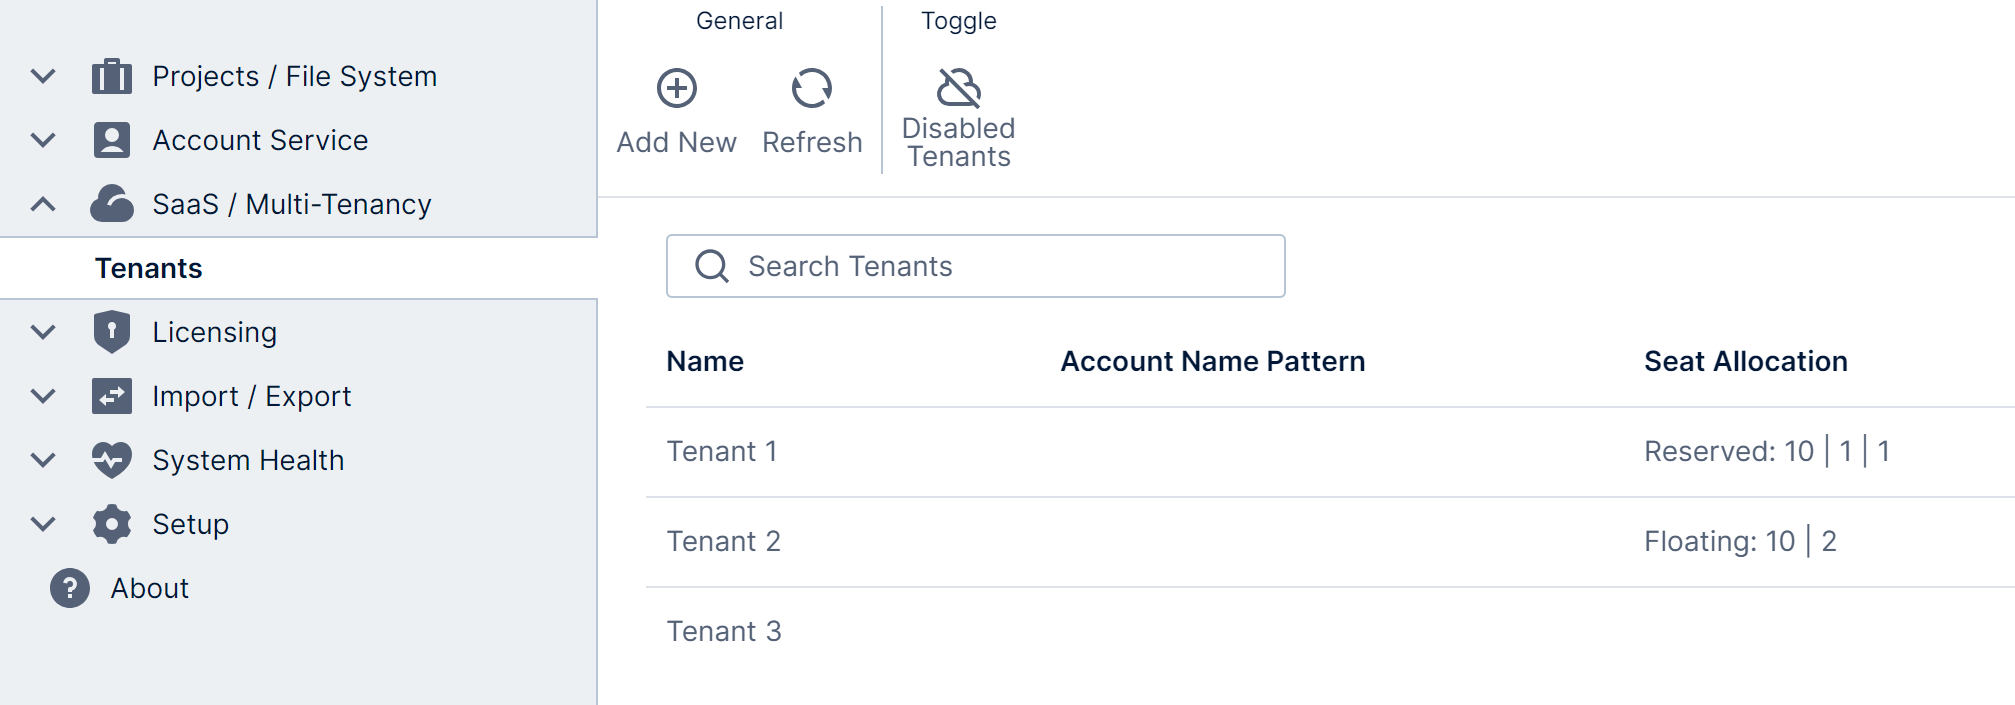
For each tenant, you have the option of assigning seats and elastic hours included in your license on a per-tenant basis by clicking to expand the Seat Allocation section.
A walkthrough is included in the tenant overrides example setup.
3.1. Adding a new user account to a tenant
Once the tenant is created, you can add accounts to it by editing the tenant and clicking Accounts, or by expanding Account Service in administration and clicking to go to the Accounts page.
To add an account to a tenant, ensure Global is unchecked, then assign Tenants.
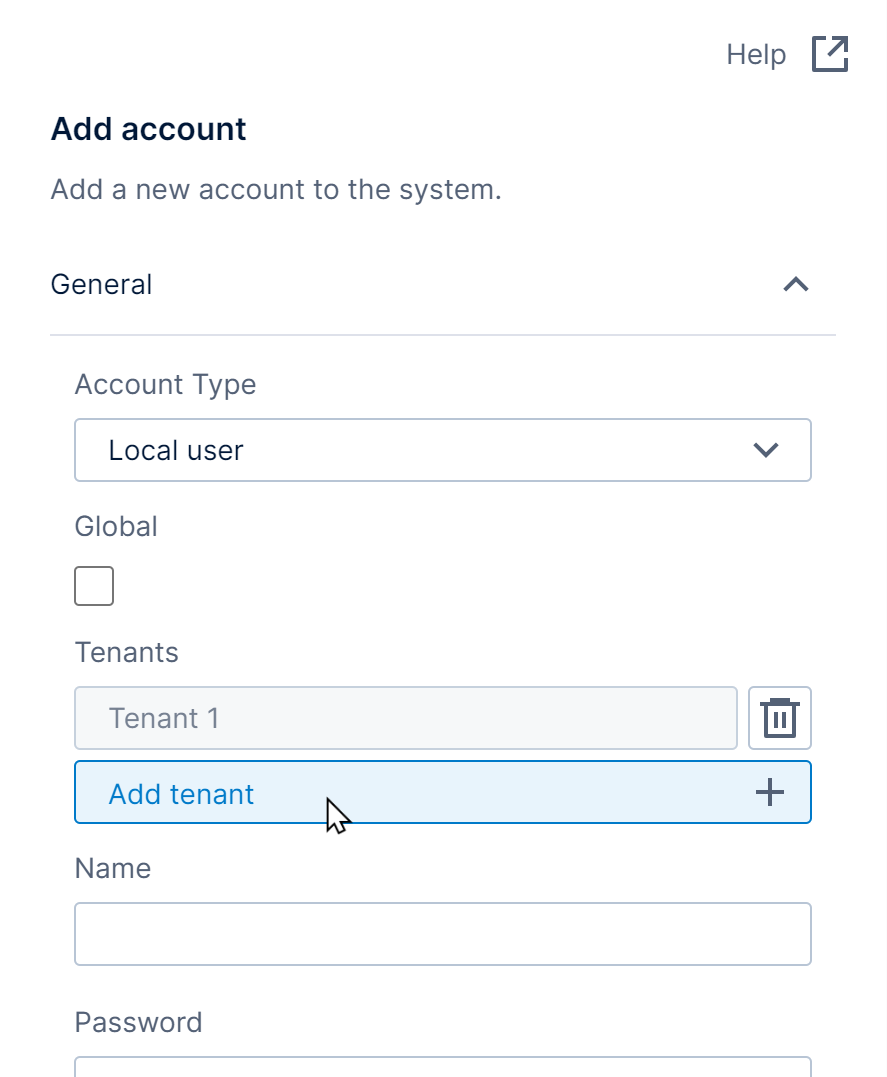
An account can be assigned to multiple tenants, and you can edit the account to change those assignments after the account is created. Users who belong to multiple tenants can switch between them from the Profile menu accessed from the main menu on the left.
3.2. Adding tenant administrators
Tenant administrators have the ability to add new accounts to the tenant, set up their custom attributes, assign available license seats to those accounts, and other tasks within the tenant.
The membership of each Tenant Administrators group can be edited from the Groups page in administration found under Account Service, or you can edit a tenant from the Tenants page and click to edit its Groups from its dialog.
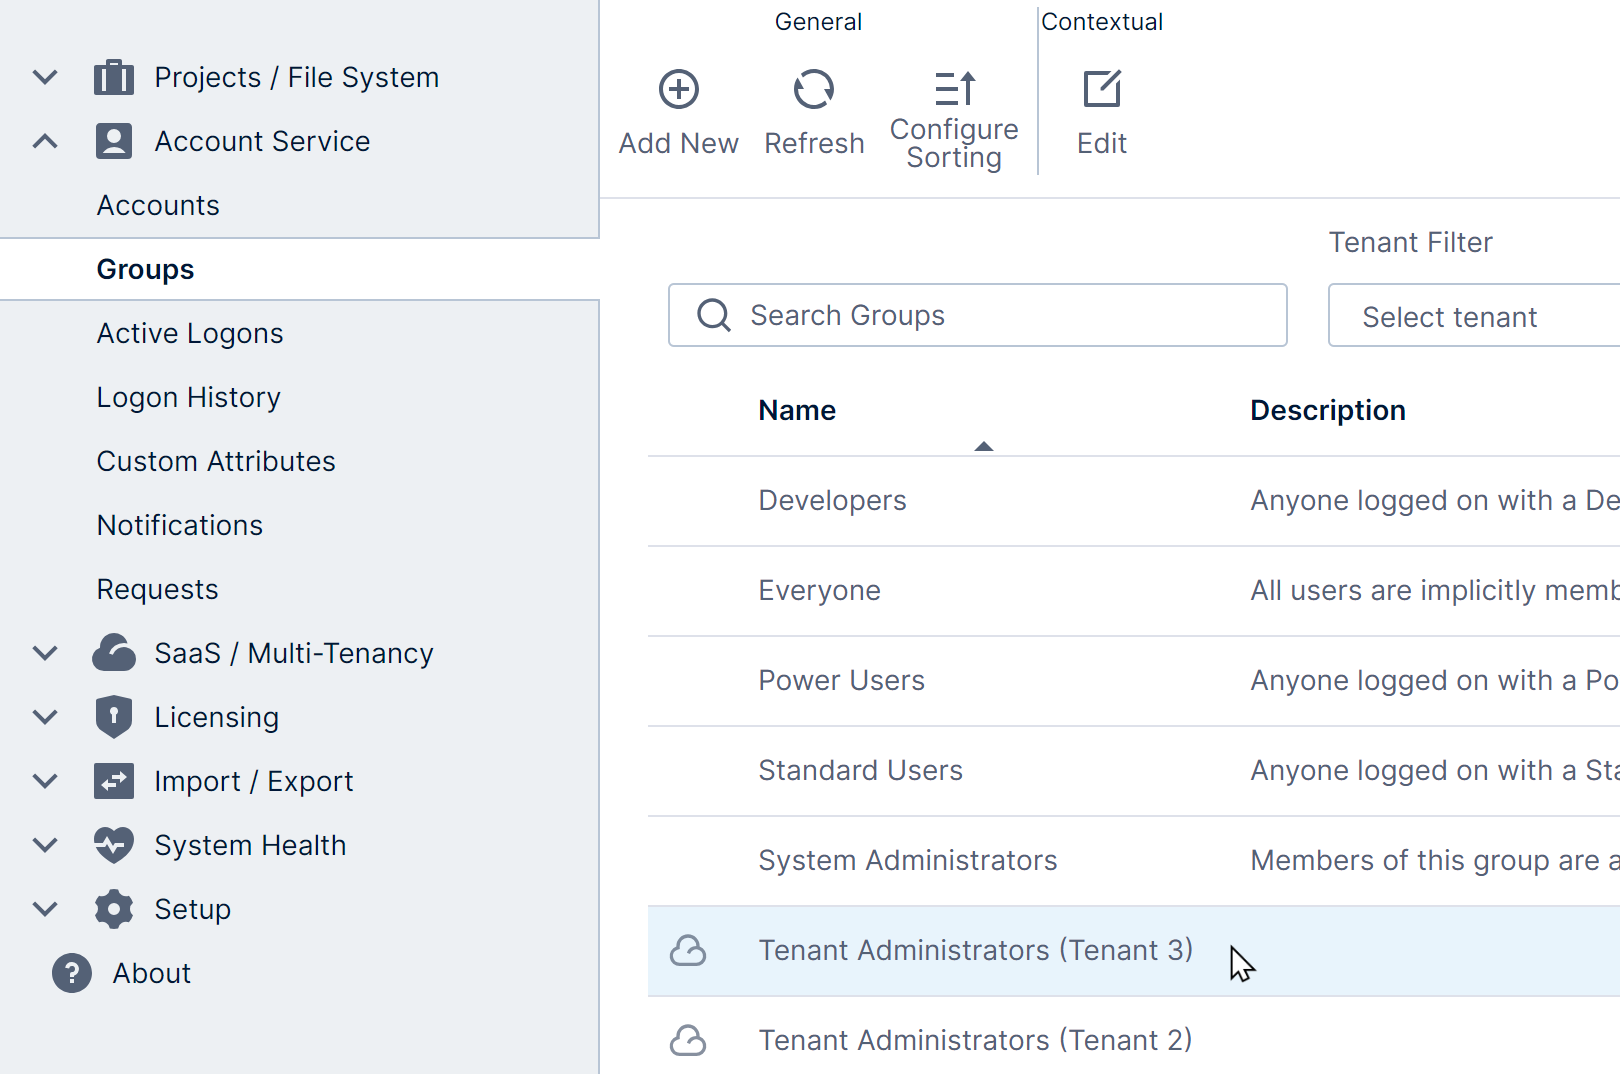
Edit the Tenant Administrators group for a particular tenant, then click Members to edit its membership as shown in the article on groups. You can also assign this group membership when editing an individual user account that belongs to the tenant.
Tenant users added as a tenant administrator only have access to create and edit their own tenant's accounts, projects, custom attributes, and other items. They cannot see or access other tenants and will see a different administration homepage than system administrators.
3.3. Managing files & content
When creating projects as a system administrator, you can click to select a tenant to associate it with, or leave this field blank.
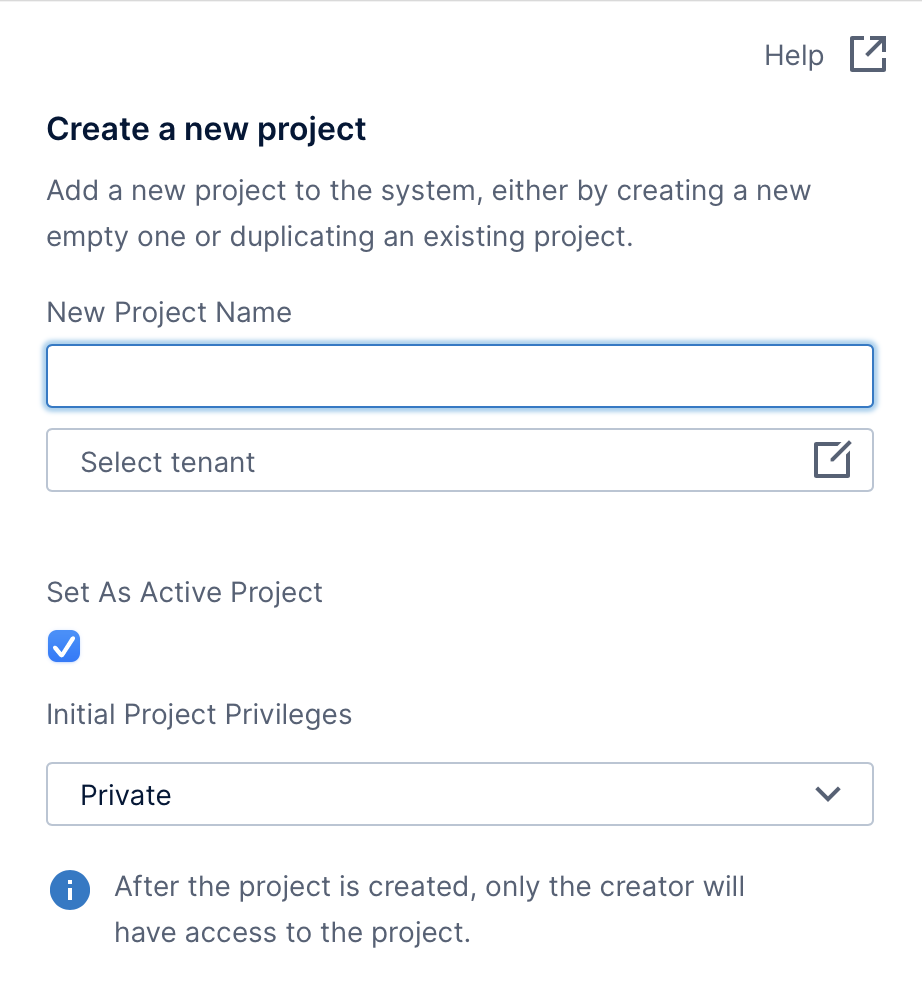
When a project is associated with a tenant, it cannot be accessed by members of any other tenant, and can be found in the main menu only for that tenant's users. Tenant users can also create their own content in these projects if they have sufficient privileges, and tenant administrators can create projects within their own tenant. (System administrators can manage all content from Administration, and links may be shared with other users not associated with any tenant if required.)
Content in projects that are not associated with a tenant can be accessed by all tenants as long as the tenant members have Read access to it in its security privileges. You can also choose to add or place content in the Global project so that it appears under the Shared folders listed within every other project. A project shared between tenants can be beneficial when reusing content such as dashboards with the same data, or the same data structure but using data security, so that the solution provider does not have to replicate their efforts across all tenants.
4. See also
- Licensing
- Customize branding for each tenant
- Tenant overrides
- Dedicated warehouse databases for tenants
- Security overview
- Using custom attributes to filter data by user
- Using a security hierarchy to filter data by user
- Using a security hierarchy to filter SSAS data by user
- Using SSAS roles impersonation
- Enabling federated authentication