Import and export a project
1. Overview
This article shows you how to use the export and import options available to administrators for projects, their files such as data cubes and dashboards, and other files and objects.
Various items can all be exported from the application and stored in an export file (or DBIE file). This export file can then be imported back into the same or another application instance.
For example, you can use this functionality to migrate a project from a development or staging instance of the application to a separate production instance. Importing content that already exists overwrites it with the version contained in the export file.
2. Export or import
In the administration area, expand Import / Export along the left, and then click either Export or Import.
If you are importing an existing DBIE file, click Choose File to browse to it, or you can drag and drop the file.
Next, step through each type of item:
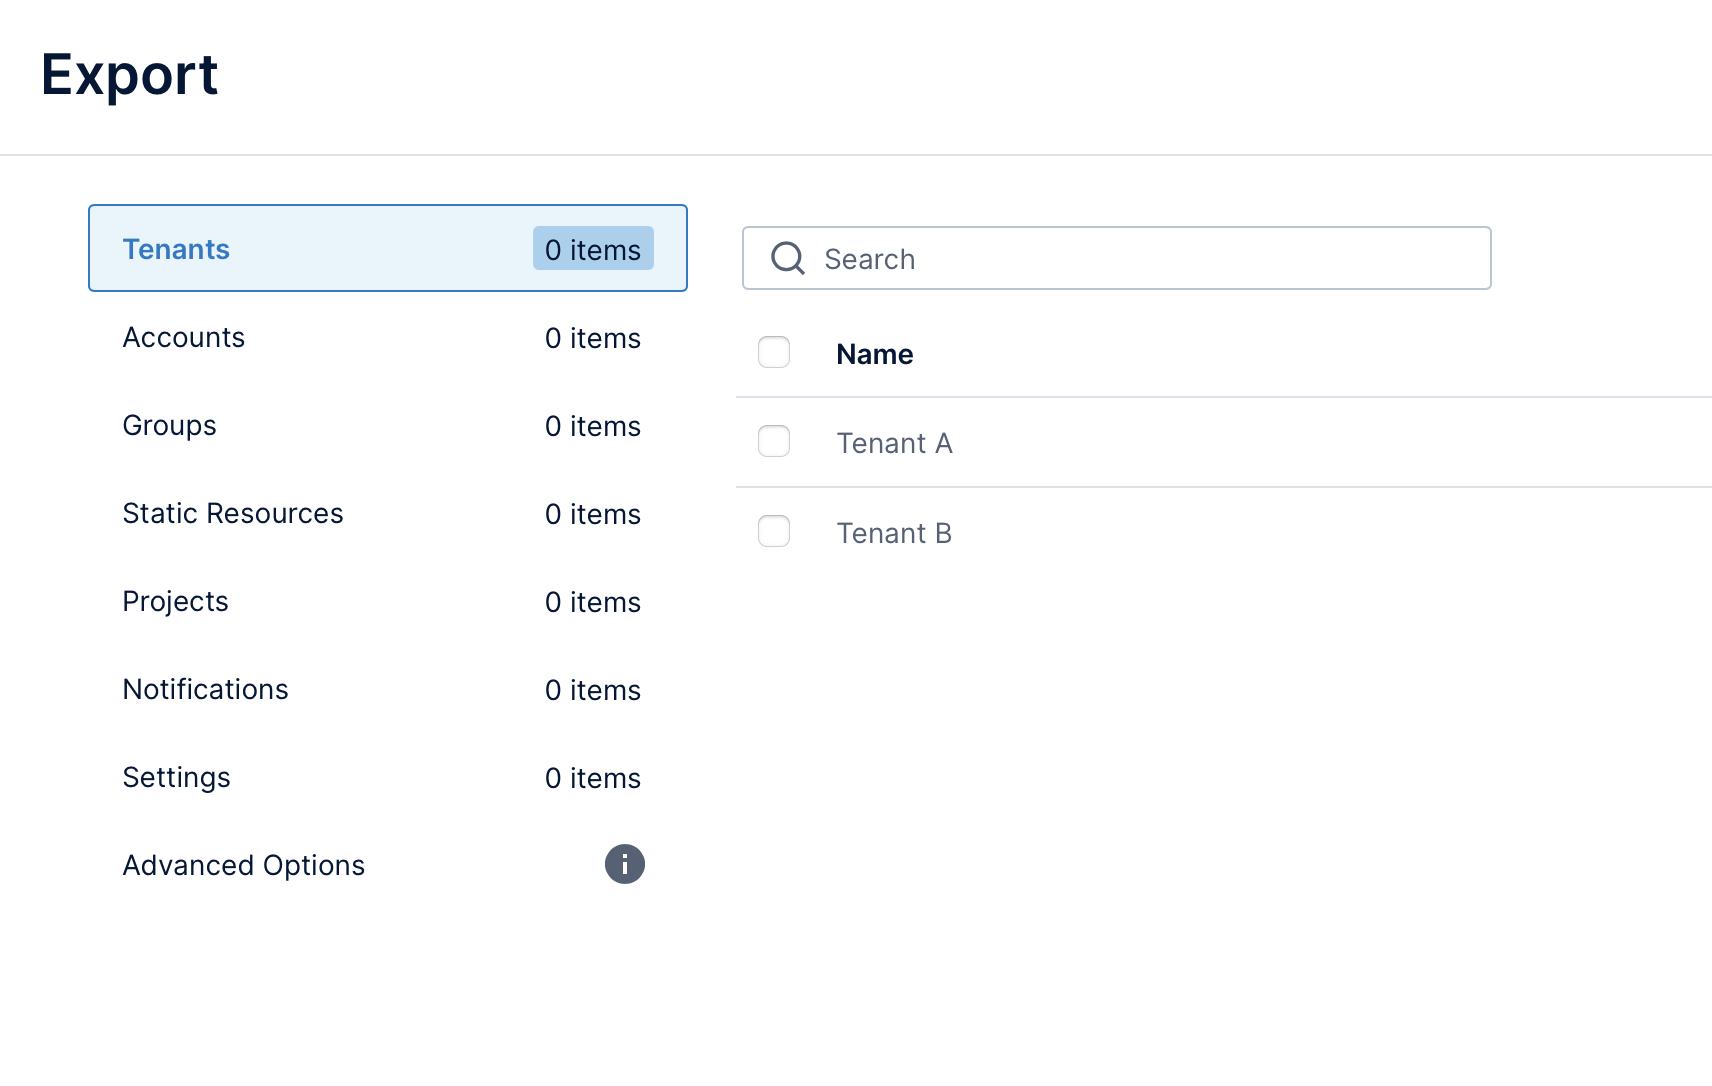
- Tenants – Available only on multi-tenant instances.
- Accounts – User & group accounts.
- Groups – Groups of accounts that have been set up.
- Static Resources – Custom files used when white labeling or customizing the application.
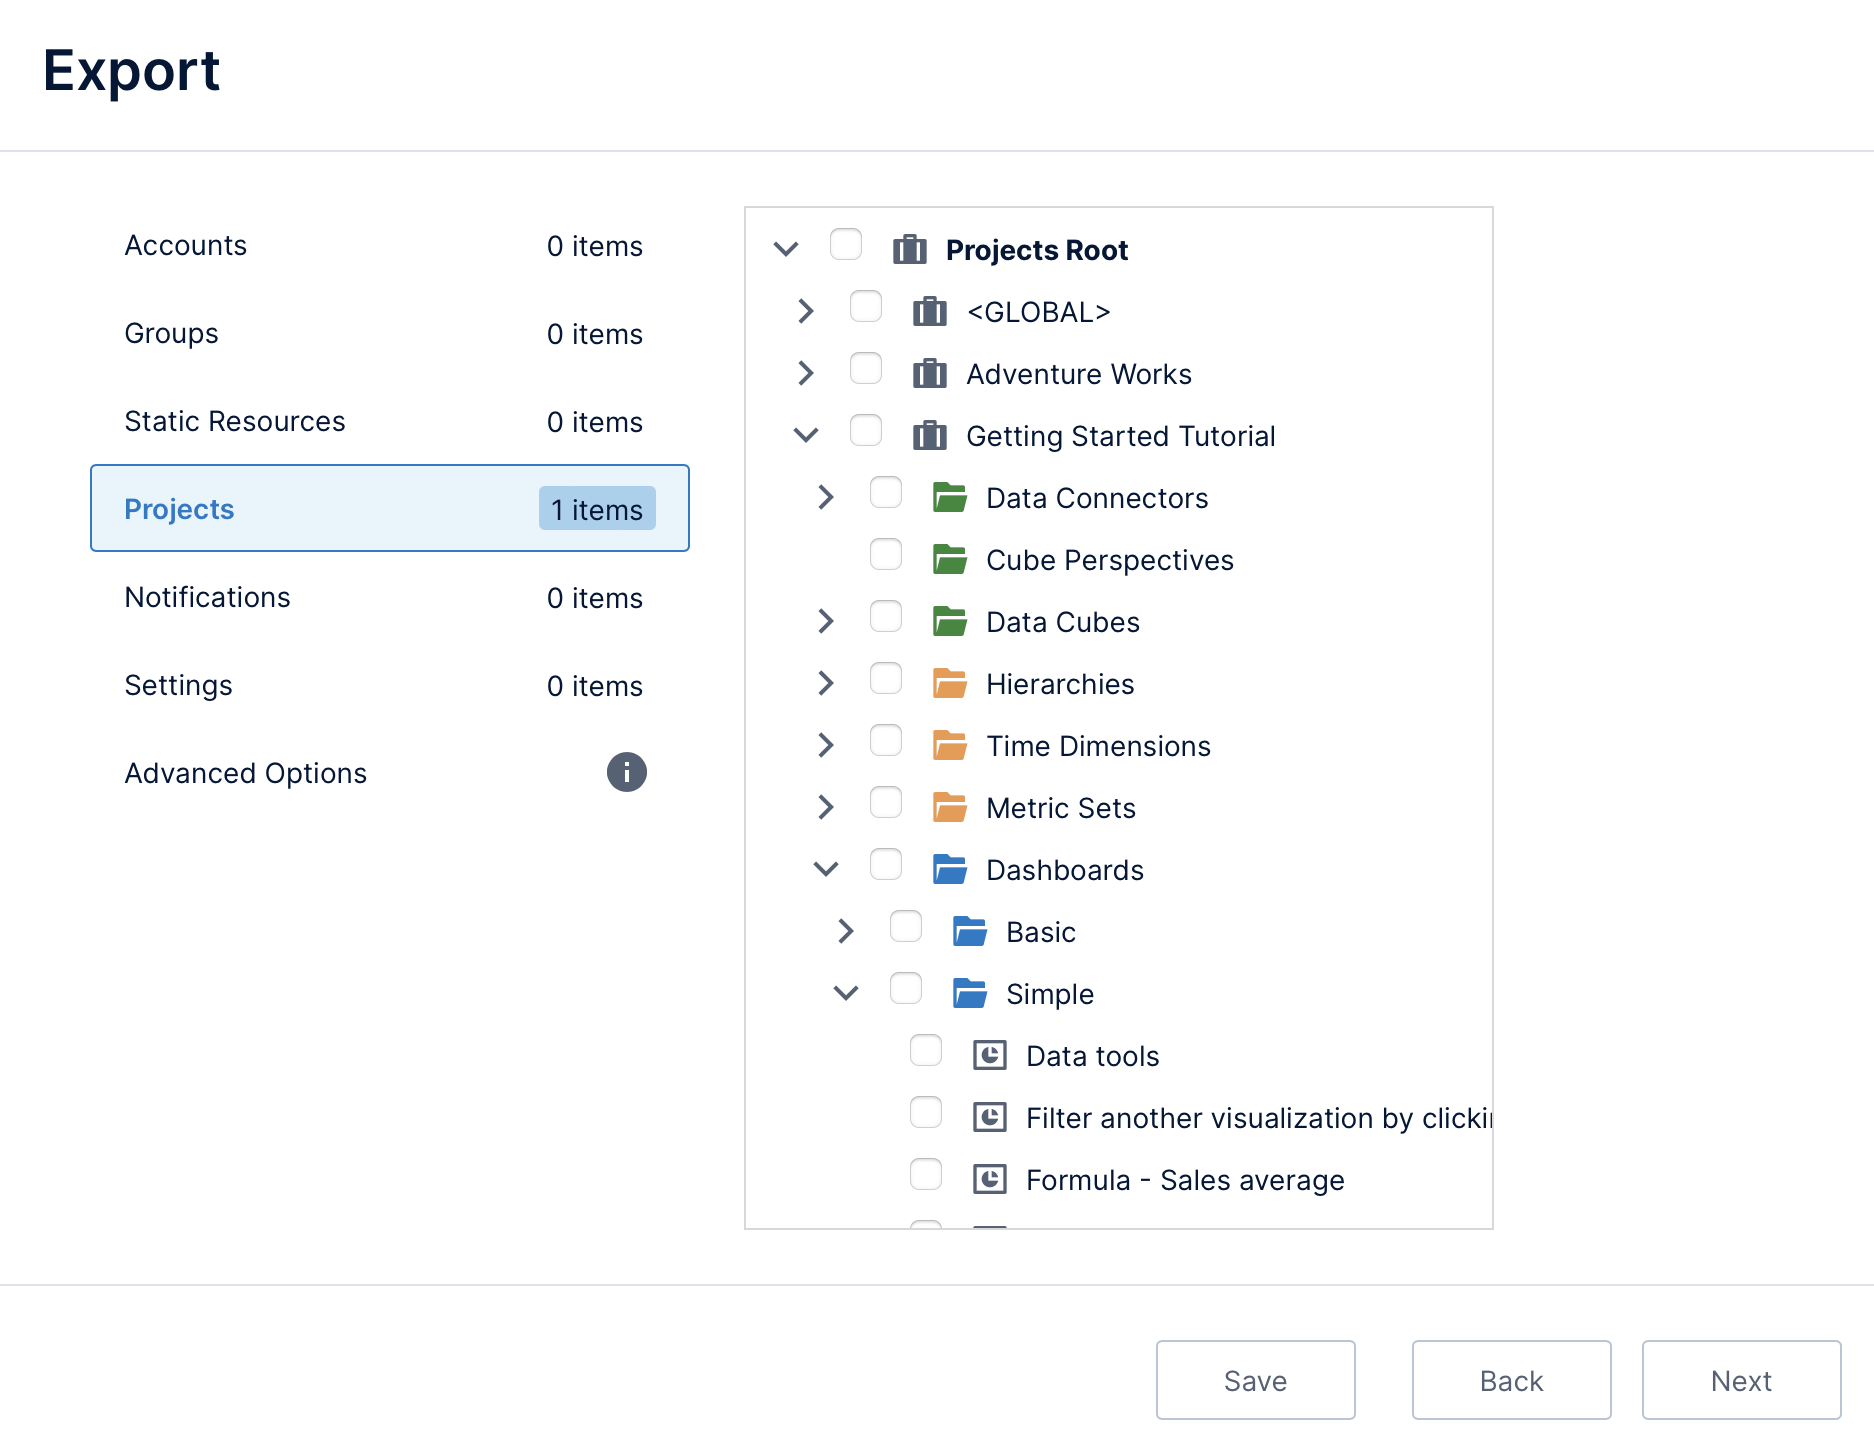
- Projects – Projects and the files contained in its folders, including data connectors, dashboards, styles & themes, etc.
- Notifications – Notifications created by a user for a view (this account and view must exist when importing).
- Settings – Application configuration settings that you want to save, load, or migrate.
- Advanced Options – Export or import additional kinds of items, or access important options related to the items you selected.
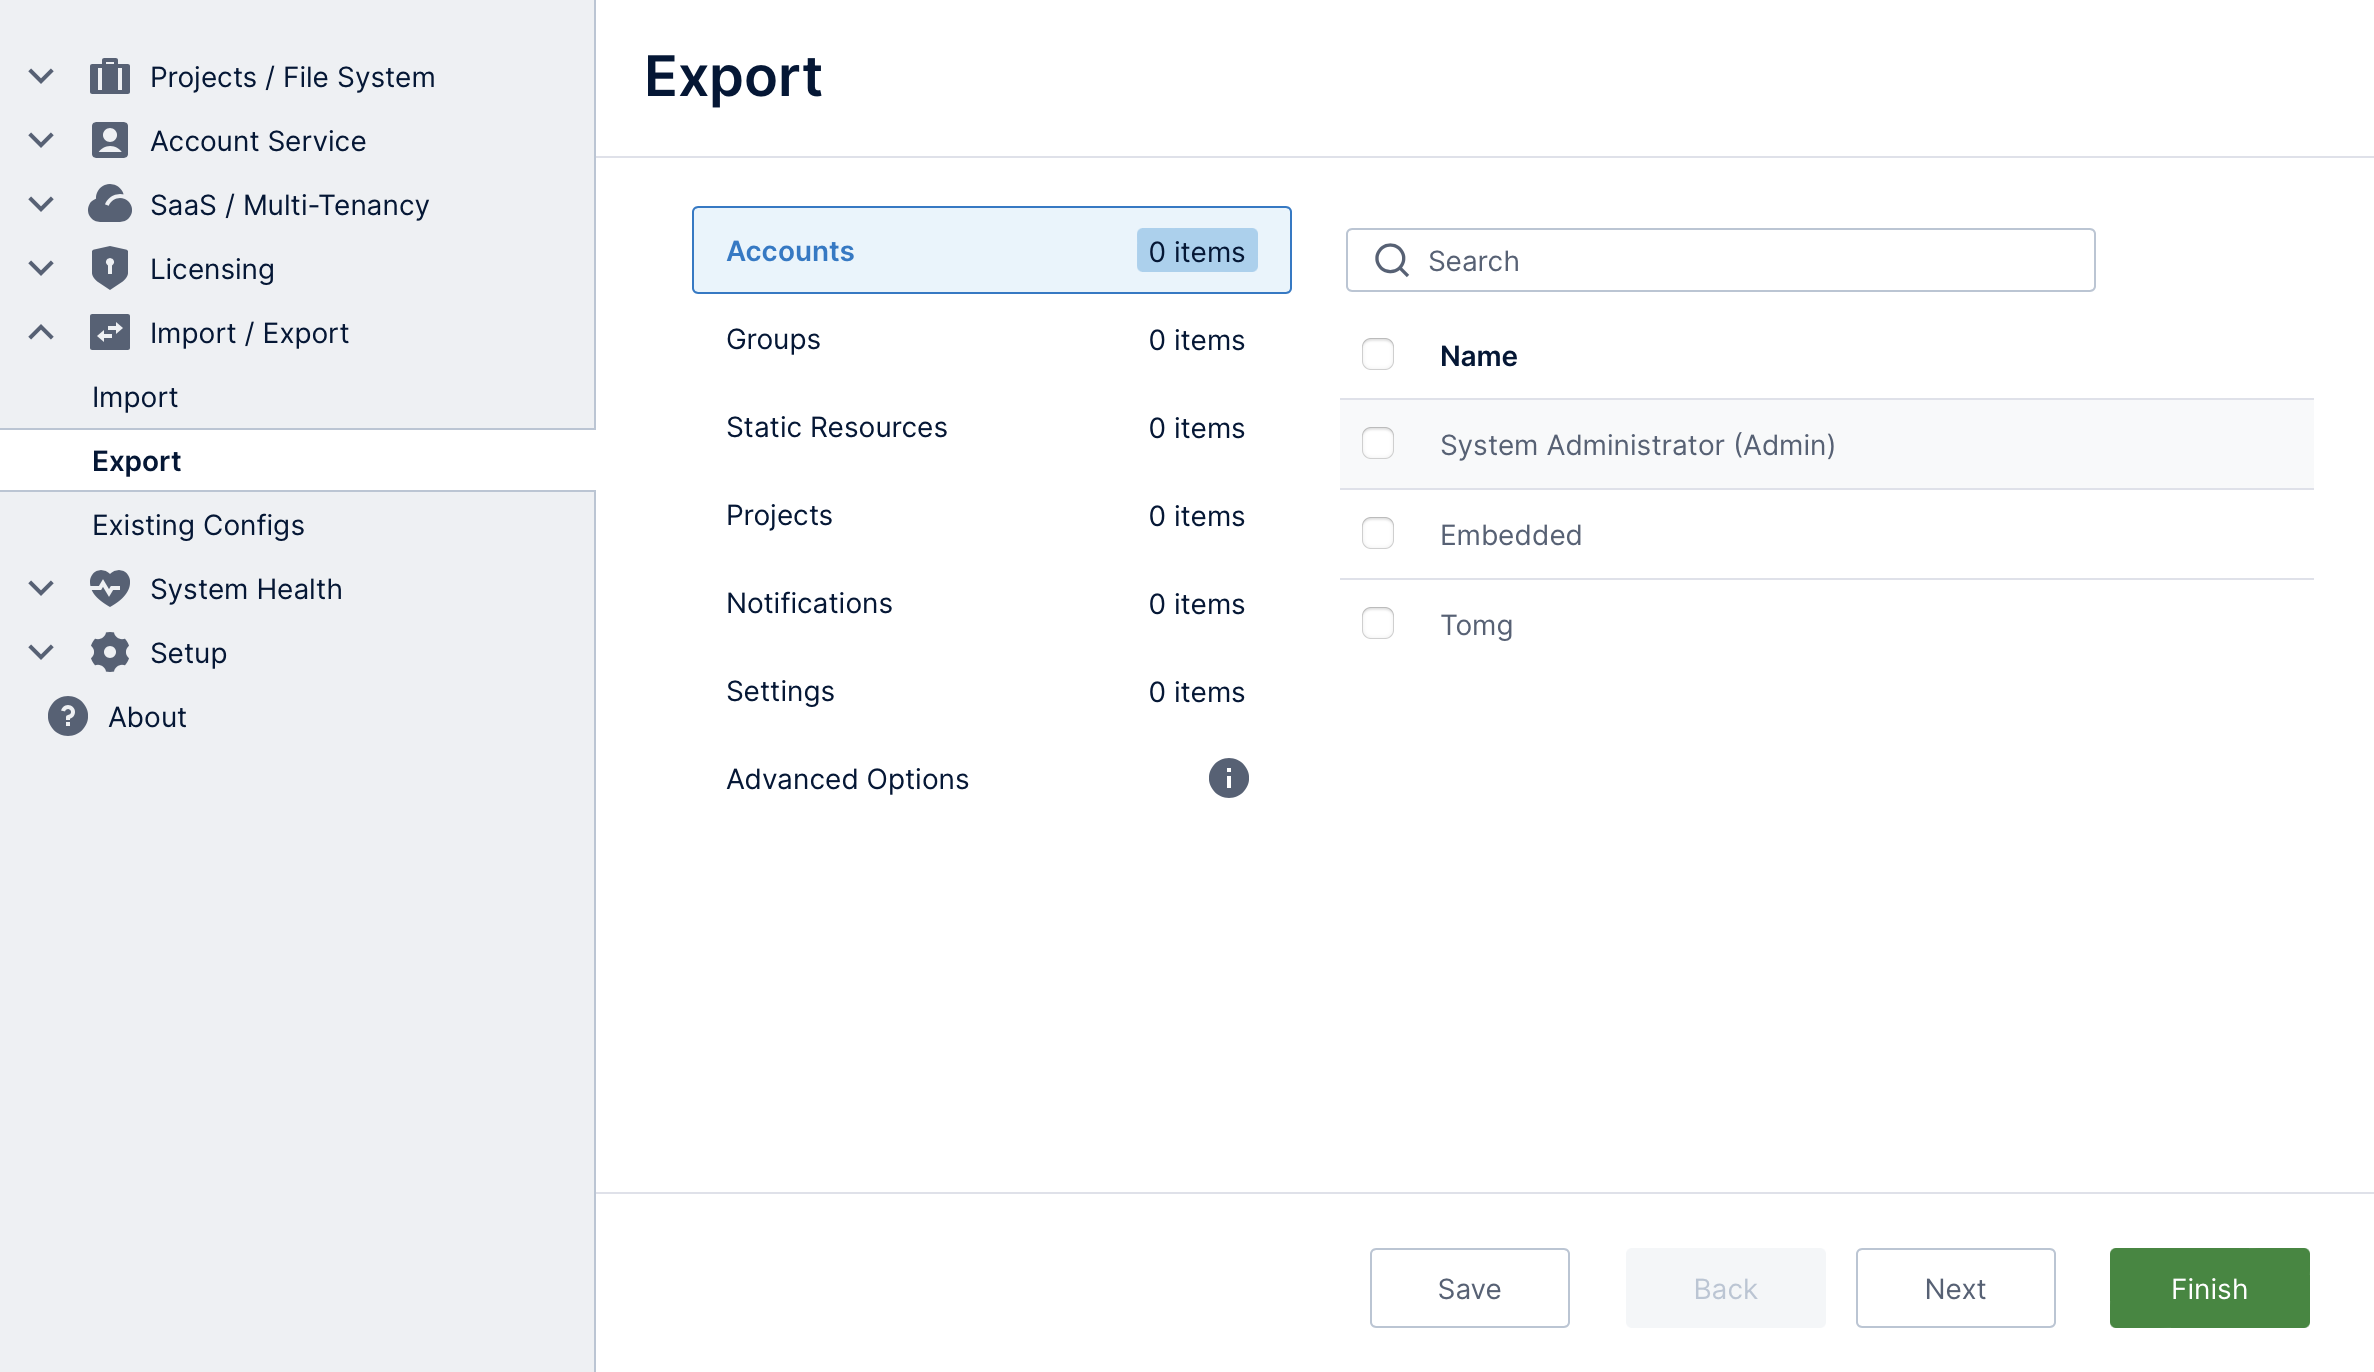
Some steps are detailed further in the following sections.
Each step is optional and you can click Next without selecting items if you aren't interested in them. When importing, some options will not be available if they weren't included when exporting.
3. Selecting tenant items
The Tenants step is only available on instances containing tenants, or if the export file contains tenants when importing.
Select tenants in this step to export or import the tenants themselves, or to be able to include accounts, groups, projects, files, and other items that belong to these tenants in later steps.
In the steps that follow, tenant items may be identified separately, or you may need to select the tenant from a dropdown before being able to select its items.
You can also use the advanced option All Tenants when exporting to be able to use other options such as All Accounts for items like tenant accounts.
4. Selecting projects and files
Exporting and importing is often used to save or transfer projects or some of their files.
In the Projects step, you can click to expand each item and use the checkboxes to select entire projects, or only specific folders or files within them, such as specific data connectors, dashboards and reports, etc.
When selecting specific items, any other items they rely on will automatically be included by default, such as metric sets, data cubes, and data connectors, according to the advanced option to include Referenced Items that is enabled. When importing, these referenced files must be included in the export file or already exist to be able to import the files that depend on them.
Personal projects (named 'My Project') belonging to users are not listed in this step. To export these projects, select their Accounts instead, and ensure the advanced option is enabled to Include User Projects.
When importing, your application instance may already contain some of the same content as the DBIE file if it was exported from there originally or imported earlier. In these cases, items will be replaced by the version in the DBIE file. (Different content that was created with the same name and location is not replaced because it will have a different ID. The imported content may instead be renamed to avoid confusion.)
5. Set advanced options
In this last step before exporting or importing begins, there are several advanced options that can be toggled on or off. It is possible to click Finish before you get to this step if you know you want to use the existing selections.
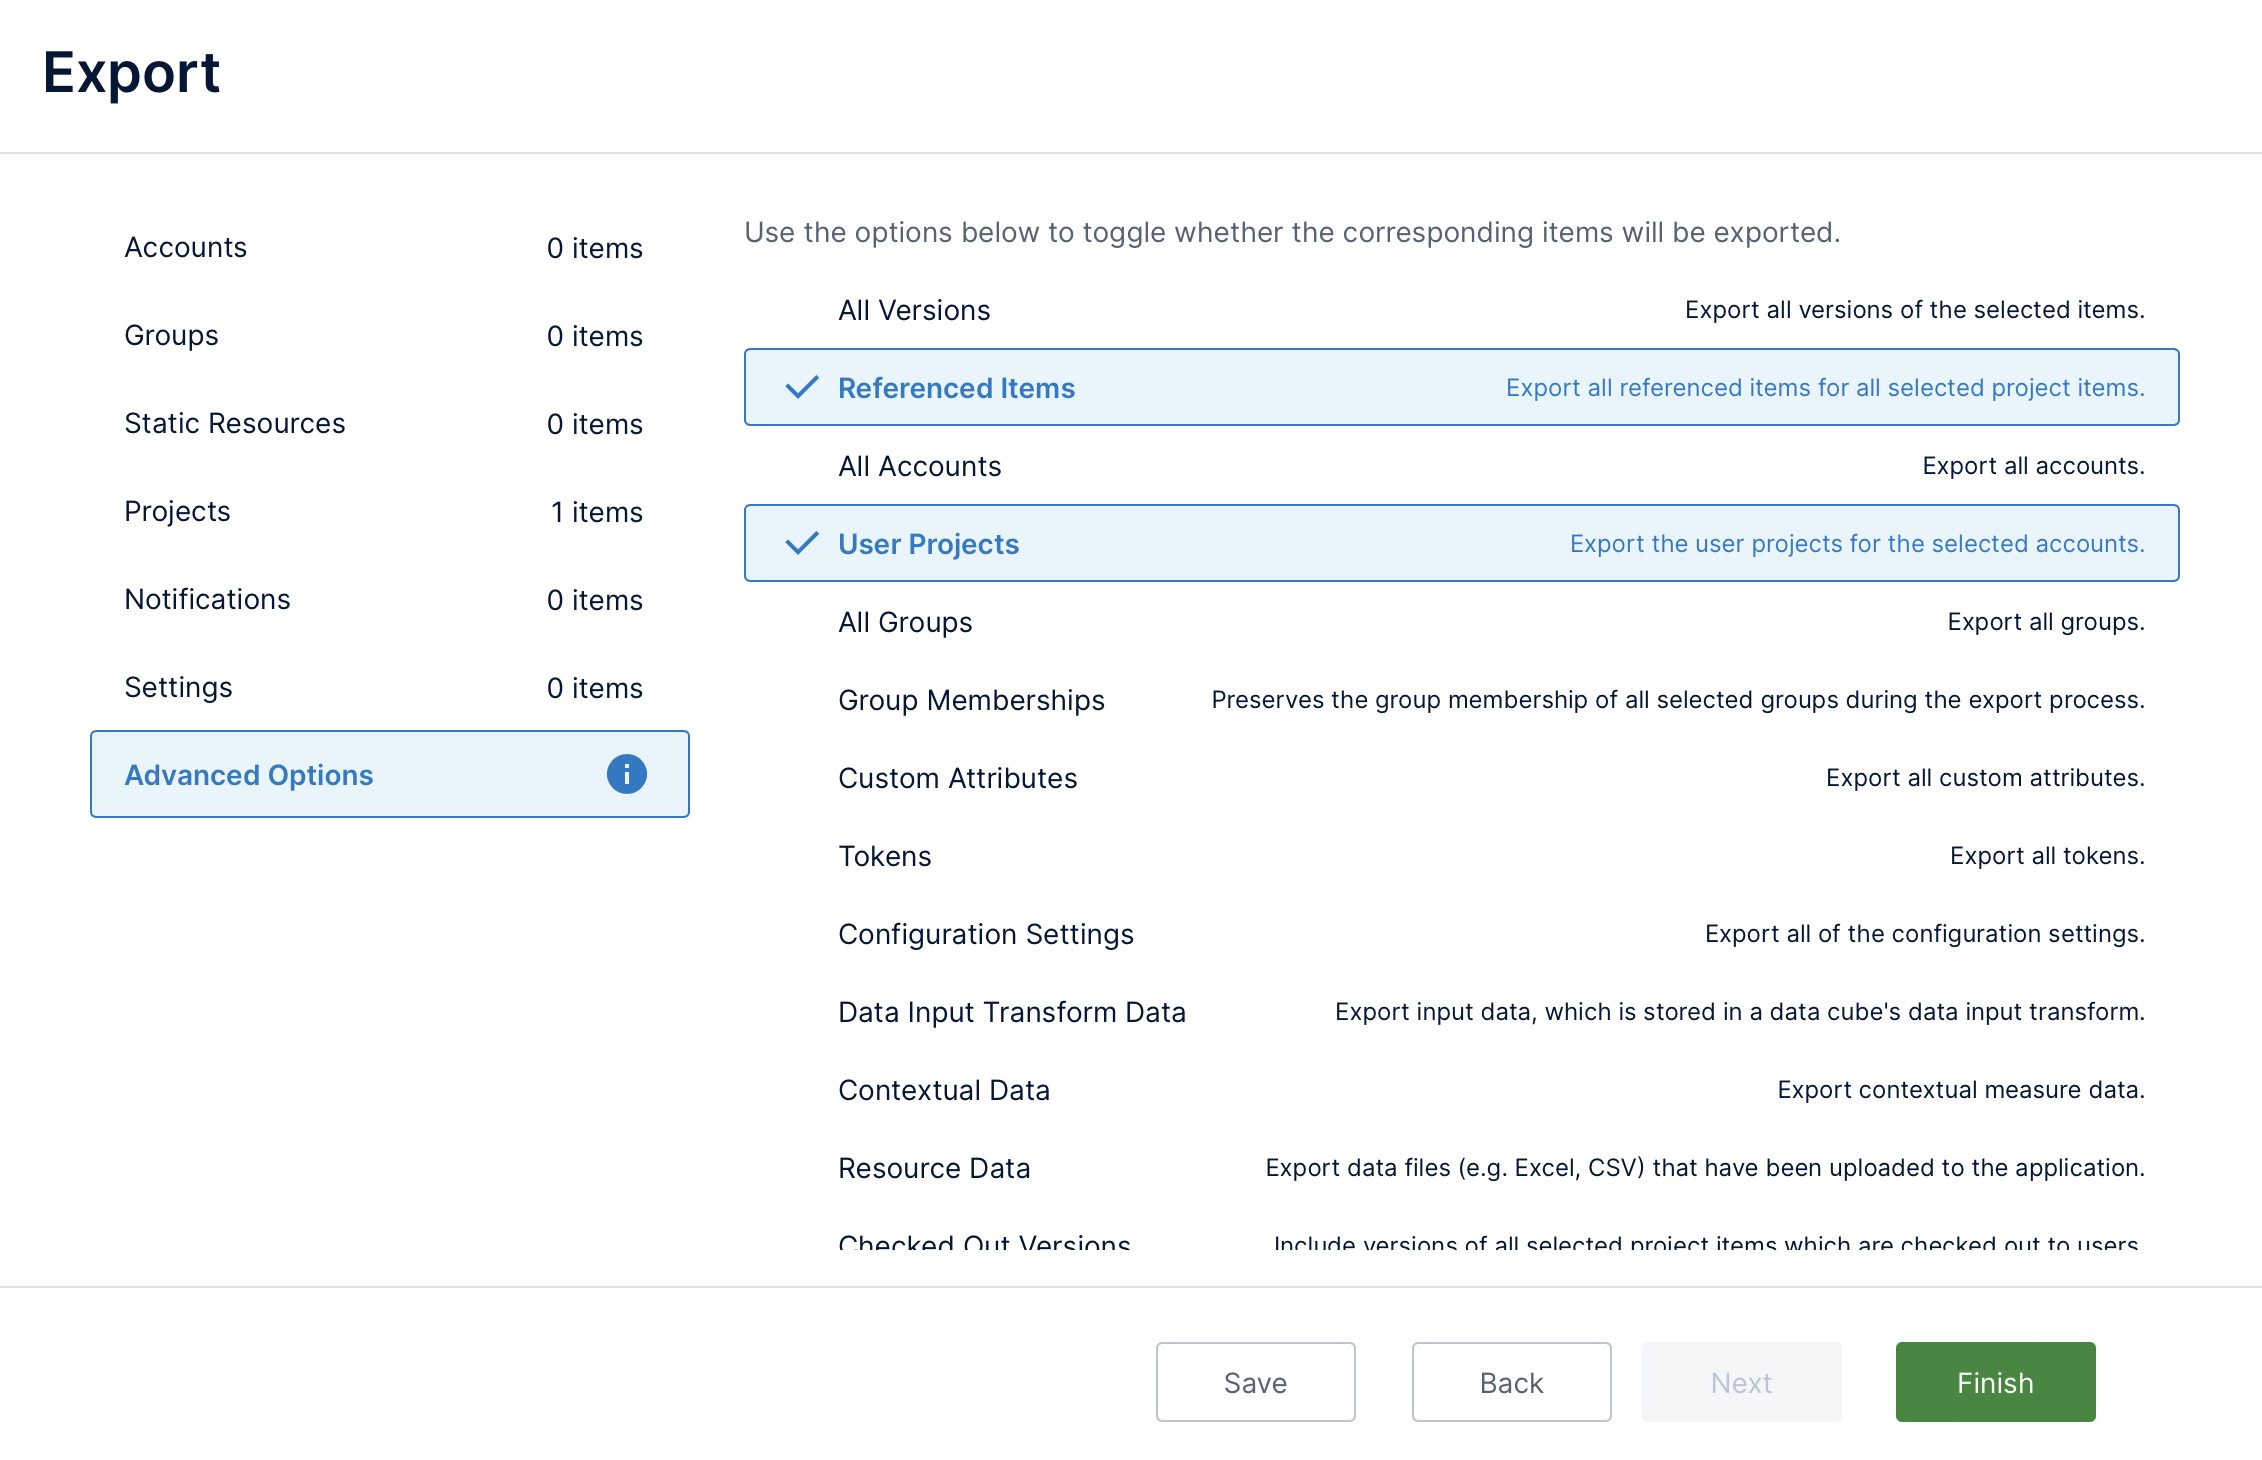
Some important advanced options are described below.
5.1. All versions
Select All Versions if you want to include the entire revision history of each file, including the ability to rollback to previous revisions, otherwise only the latest checked-in revision will be included.
5.2. Referenced items
Leave the Referenced Items option enabled to automatically include all referenced items that the files you selected from projects depend on. This includes items such as custom attributes and tokens that are referenced by selected data cubes or metric sets, even when not explicitly selecting to include any other items. Referenced items do not include input data or data resources such as uploaded Excel files, as described in the next section.
5.3. Data, corrections, and notes
The following advanced options involve data and user input that may be considered sensitive or to be handled with caution, and are not included by default when exporting or importing:
- Data Connector Settings – (Import only) Connection settings in data connectors. The All Versions option will have the same effect. For tenant overrides, deselect this option to prevent overwriting existing overrides.
- Data Input Transform Data – Data stored in a data cube's Data Input transform, whether entered directly into the transform or as a data source for a metric set, or input through data input interactions on a dashboard or other view.
- Contextual Data – Data entered into a contextual measure in a metric set.
- Resource Data – Uploaded Excel, CSV, or other data files used for a data connector.
- User Input Entries – Notes added to data from selected or existing data cubes, and measure corrections (data annotations) for selected or existing metric sets.
It can be important to include this data when exporting, however you should use caution when importing as existing data will be overwritten for associated files that already existed in that application instance.
5.4. Publish histories
If you use the Publish feature for publishing files from one project to another in a single application instance, a relationship is created between the corresponding files to help when re-publishing the same content again later.
You can select to include the Publish Histories of selected project items to maintain these relationships when publishing again in the future.
6. Save configuration
When exporting, you can click Save at the bottom if you want to reuse your selections again later to perform the exact same export. For example, you might export the same items on a regular basis from here or using the dt command line tool.
To see and use your saved export configurations, click Existing Configs under the Import / Export category.
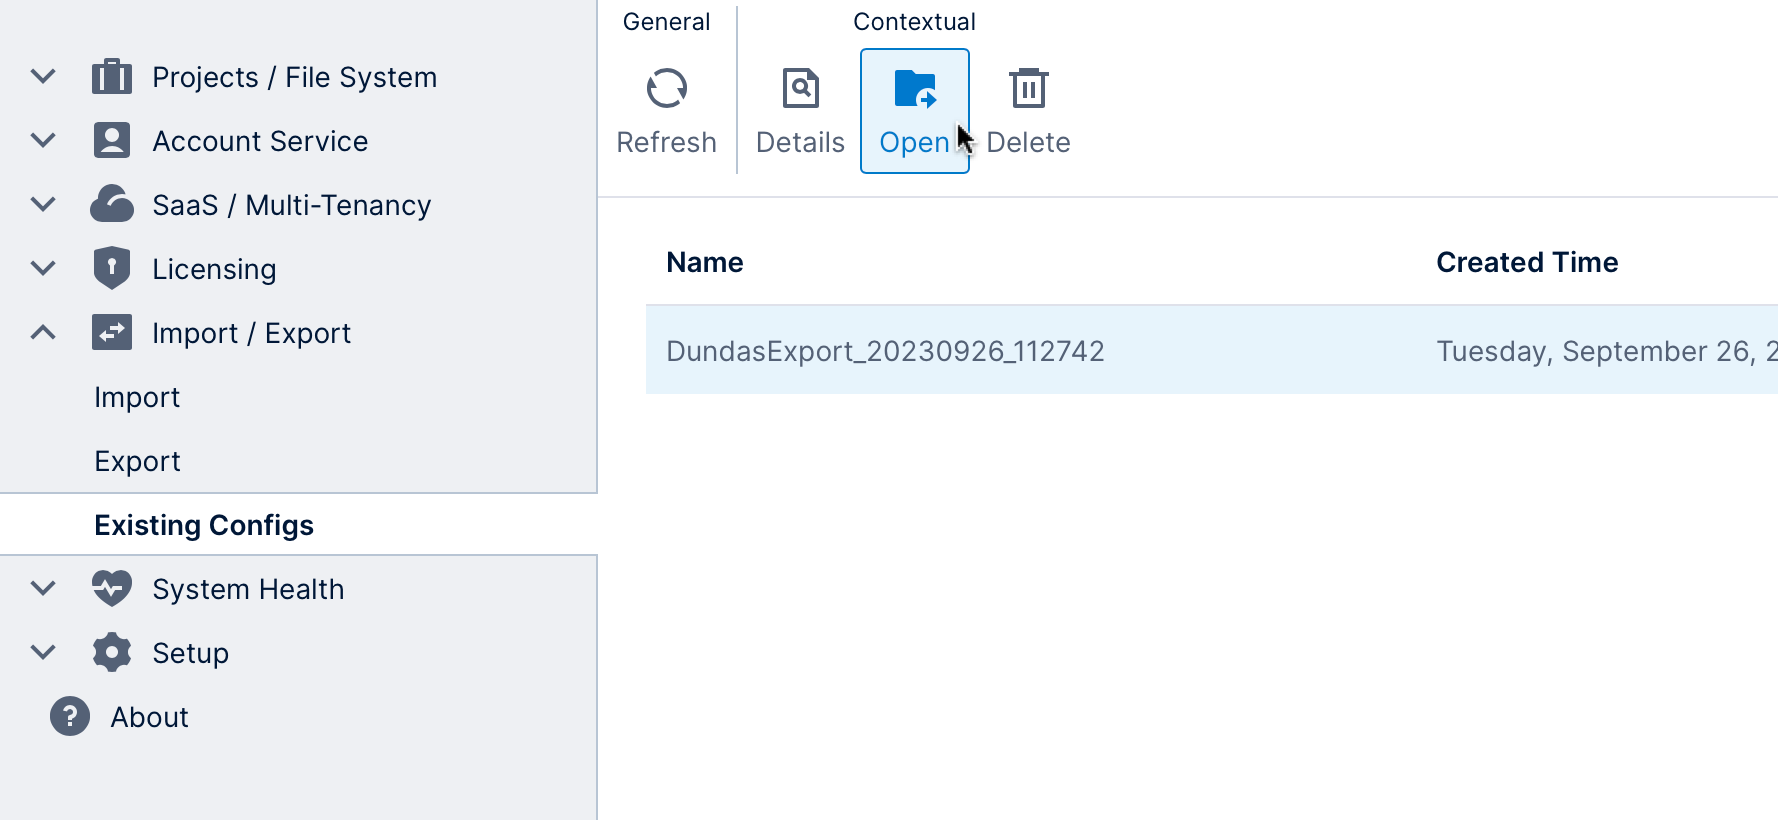
To use an export configuration, select it and click Open in the toolbar.
7. Finish
Begin the export or import procedure by clicking Finish after reviewing all of the options, or at any point if you know all desired options are selected.
A report is displayed when the procedure completes.

The report details all of the items that were exported or imported along with any errors or warnings that you should review.
Click to navigate through each section on the left to list its items in the table to the right. You can click on a row in the table to see more details in a dialog.
7.1. Download the export file
When you are exporting and the process was successful, the export file will normally be downloaded automatically, otherwise you can click the Download button. The file will be named DundasExport_<Date>_<Time>.dbie to include the date and time of the export.

